This project is one of my favorites but I actually did it a LONG time ago when I was decorating my oldest son’s nursery.
I’m thinking I may do something similar to finish out our new baby’s nursery so I pulled these out and fell in love with them all over again. So if you are looking for an easy DIY you can do for your kid’s room look no further.
*This post may contain affiliate links which may allow us to receive a small commission (at no additional cost to you) for purchases you make after clicking on product links in our posts, to view our full affiliate disclosure click here.
But rest assured we fully believe in every product we endorse.
Materials:
- Wooden Plaques
- Acrylic White Paint
- Assorted Acrylic Paint Colors
- Matte Mod Podge
- Paintbrushes
- Scissors
- An IPad or other tablet device
- Saw Tooth Picture Hangers and Nails
- Hammer
- Aerosol Matte Finish Spray Enamel
- Scrapbook paper
Prime and Paint the Wood Plaque
To start you are going to want to prime the wood plaque with white paint.
I did it both ways and there was a visible difference between when I primed and when I didn’t.
Let that dry then paint the beveled side edges in one color, let dry.
Then paint the flat surface whatever you want your primary color to be.
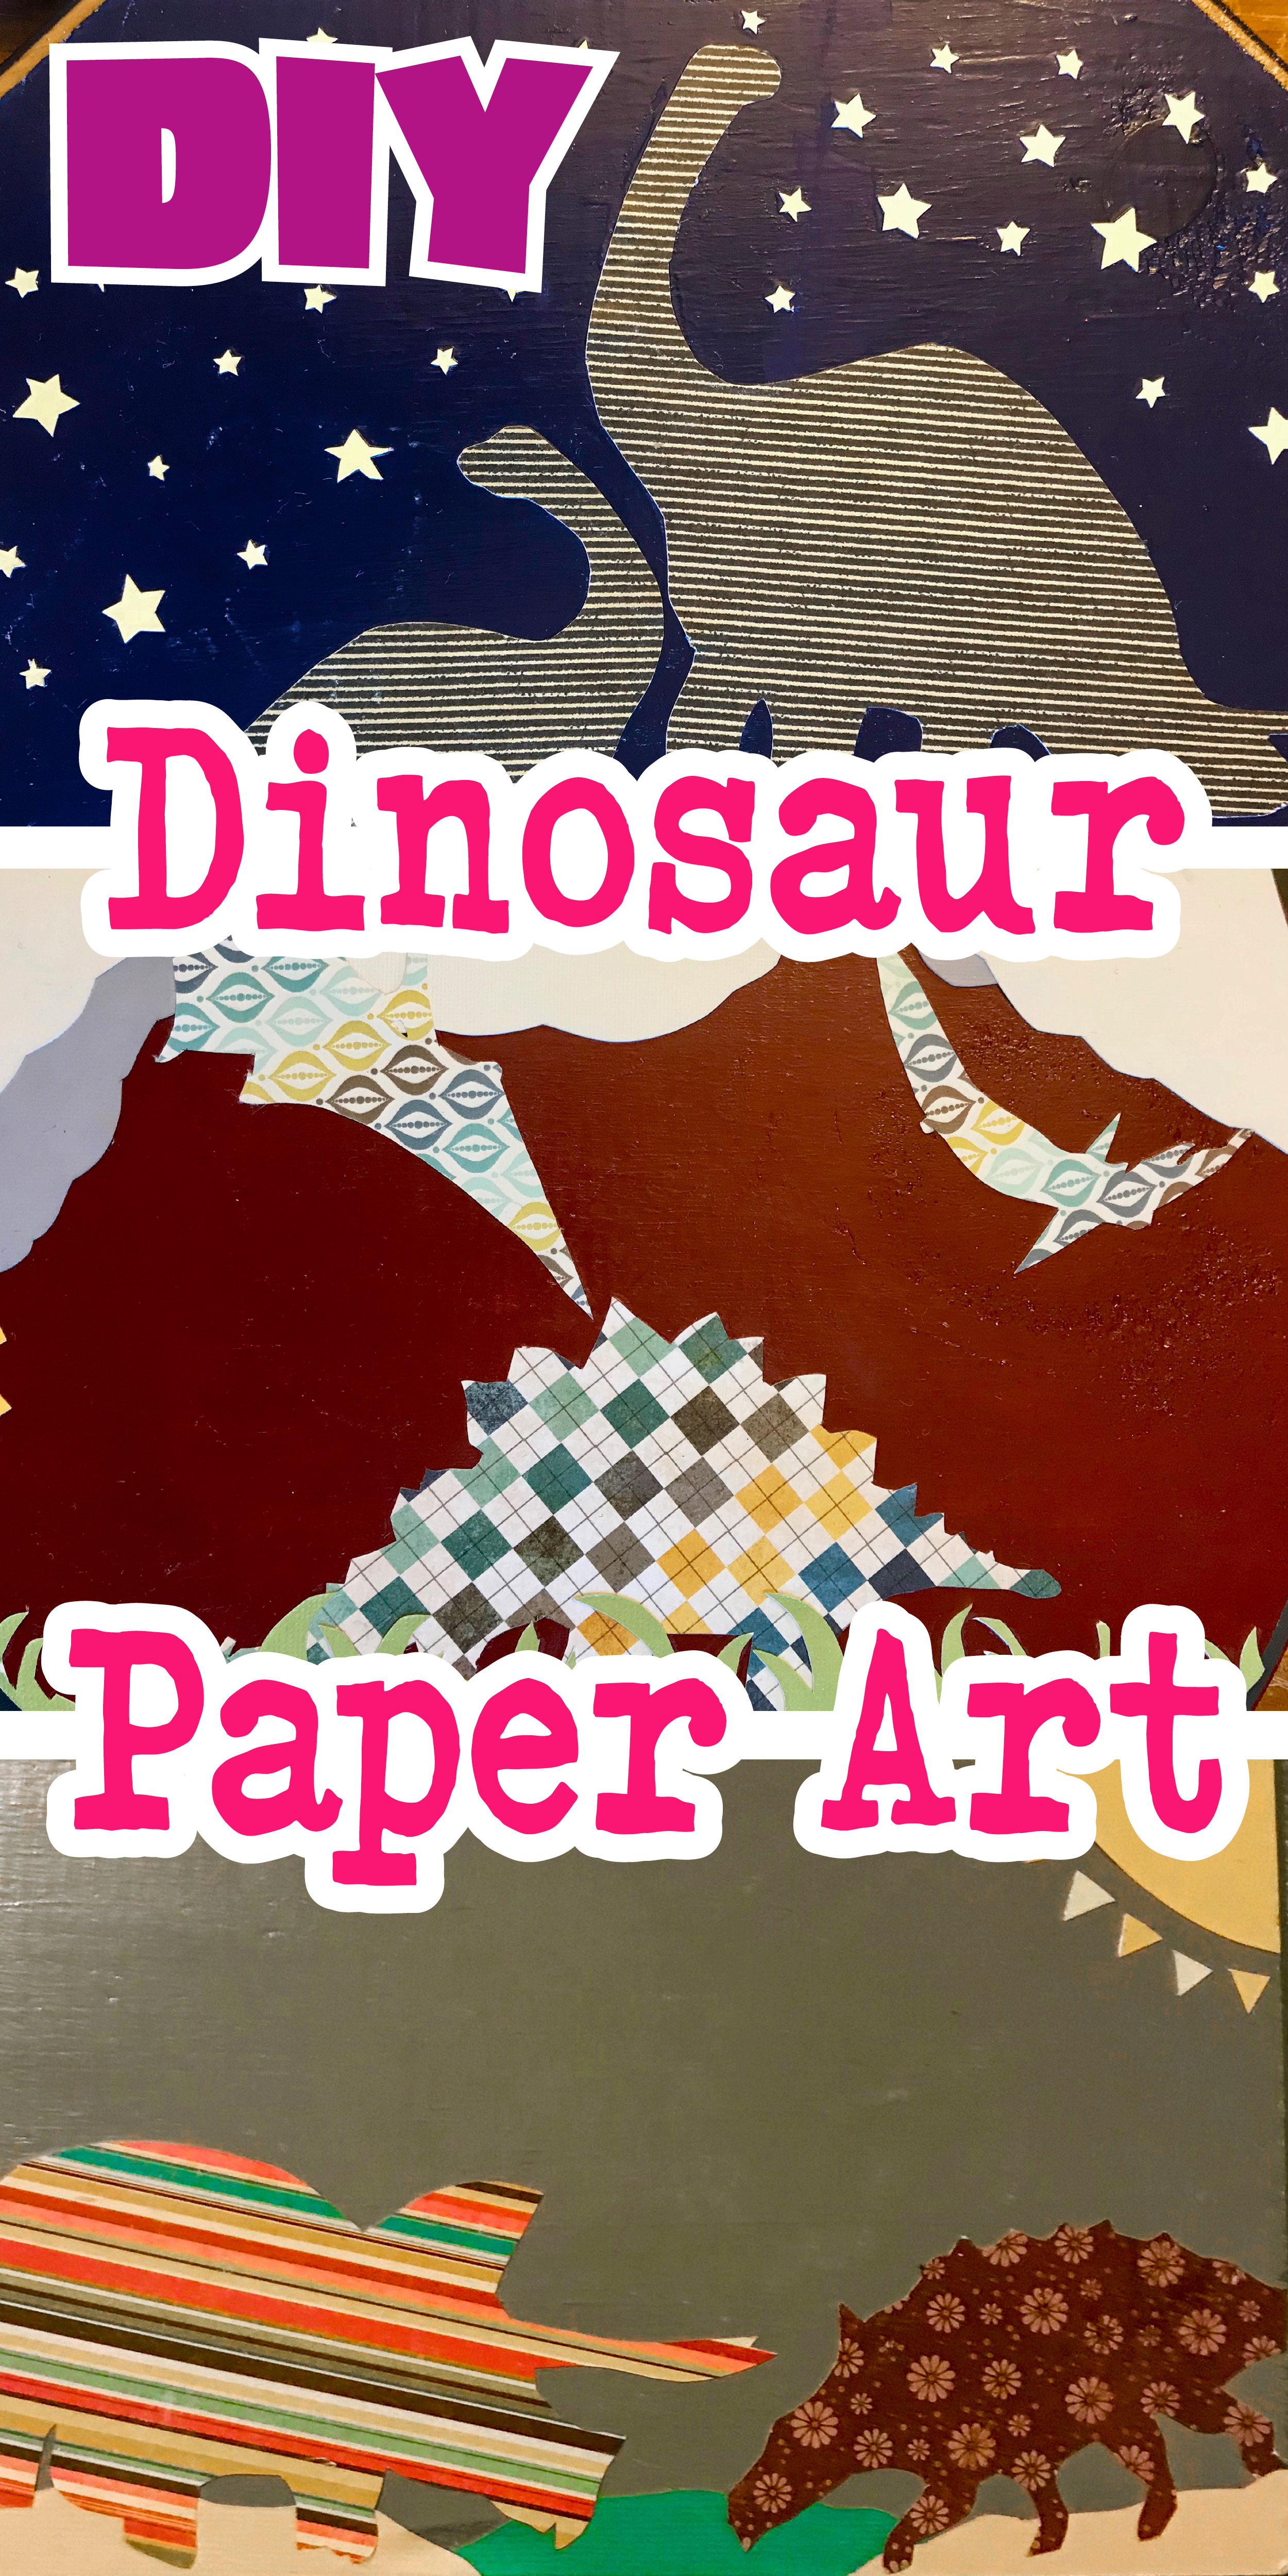
Trace Onto Scrapbook Paper
Here is where it gets fun (or at least to me this is the fun part).
Google images of dinosaurs and to be on the right side of copyright law it’s not a bad idea to limit your search to public domain images.
For those of you who don’t know how to do this it’s pretty simple. You can find my article on how not to violate copyright law here: Are You (Unintentionally) Violating Copyright Laws? This post details how to find public domain images you can use.
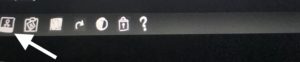
Save the image you want to your iPad. Now download the Lightbox Trace app from your App Store.
Open the app and select your photo by clicking on this icon.
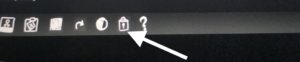
Then lock it in place by selecting the little lock.
Put the scrapbook paper you chose on top of your iPad, then turn down the lights in the room you are working in and you can now see the image clear as day through the paper.
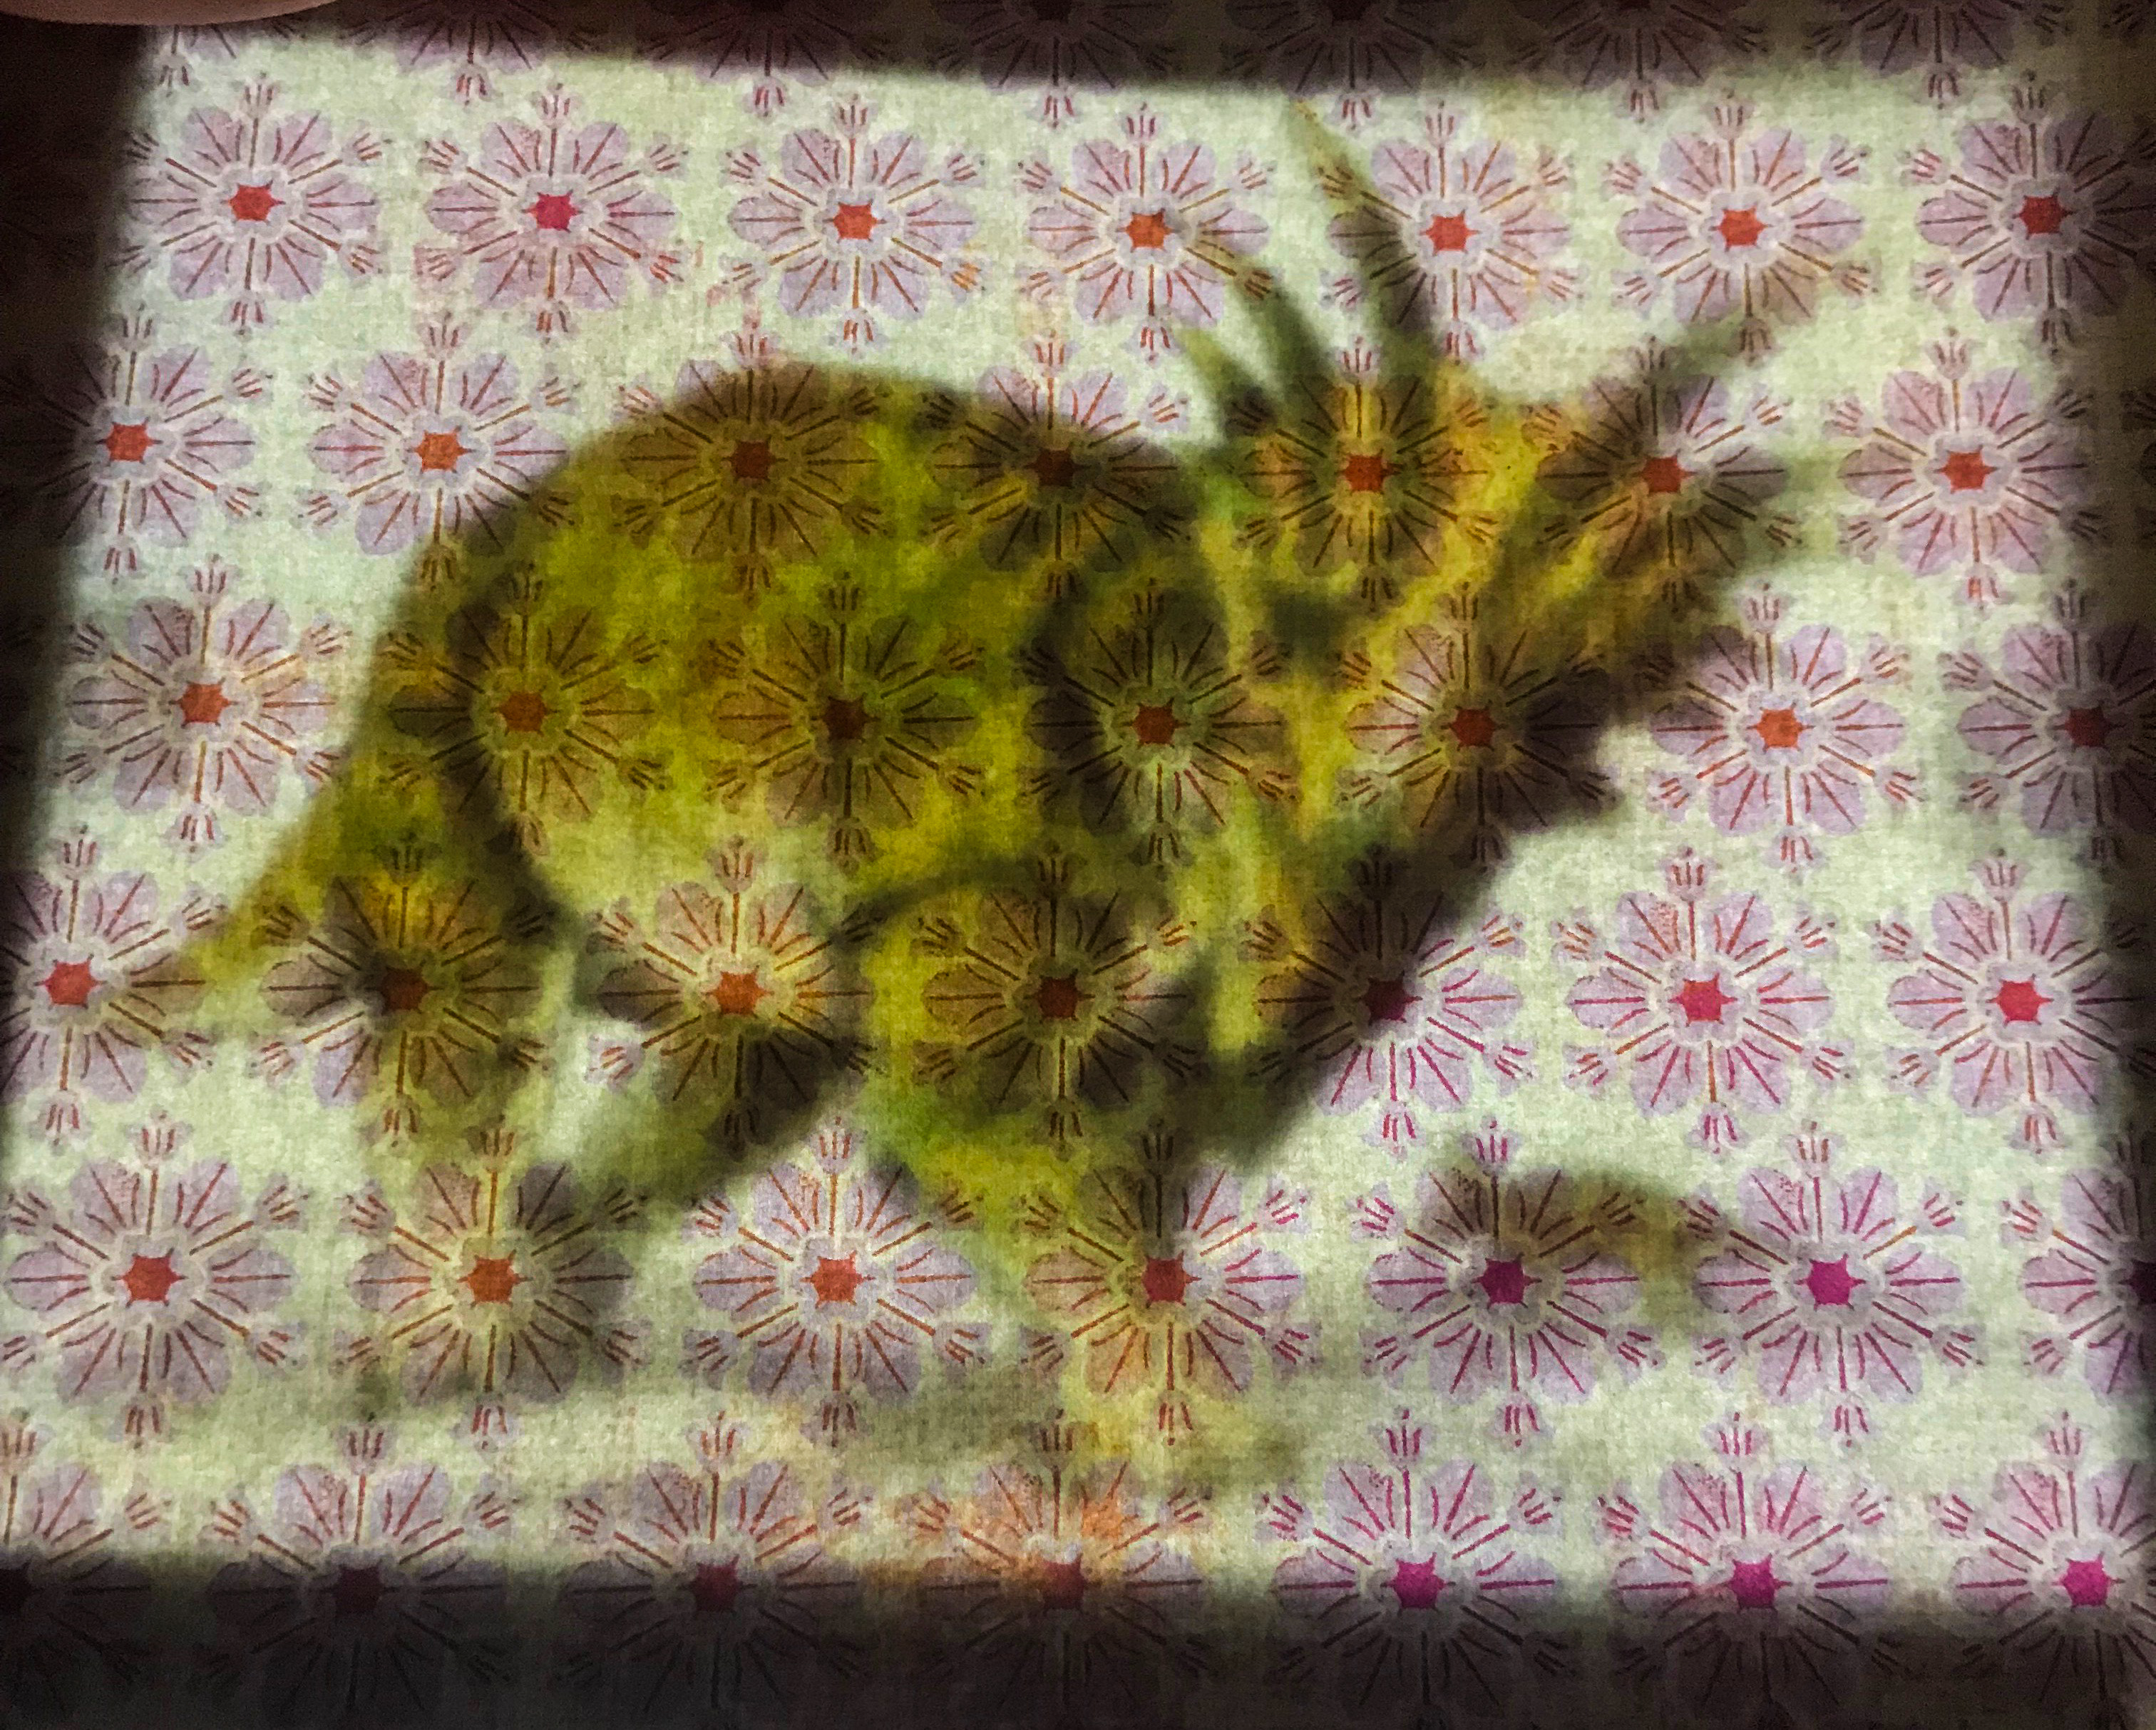
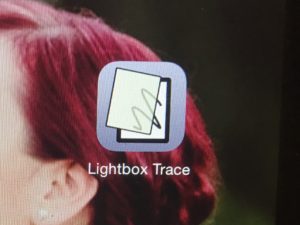
Gently trace the image silhouette (after all remember you are tracing on a tablet with a glass screen). Don’t worry about tracing any interior details.
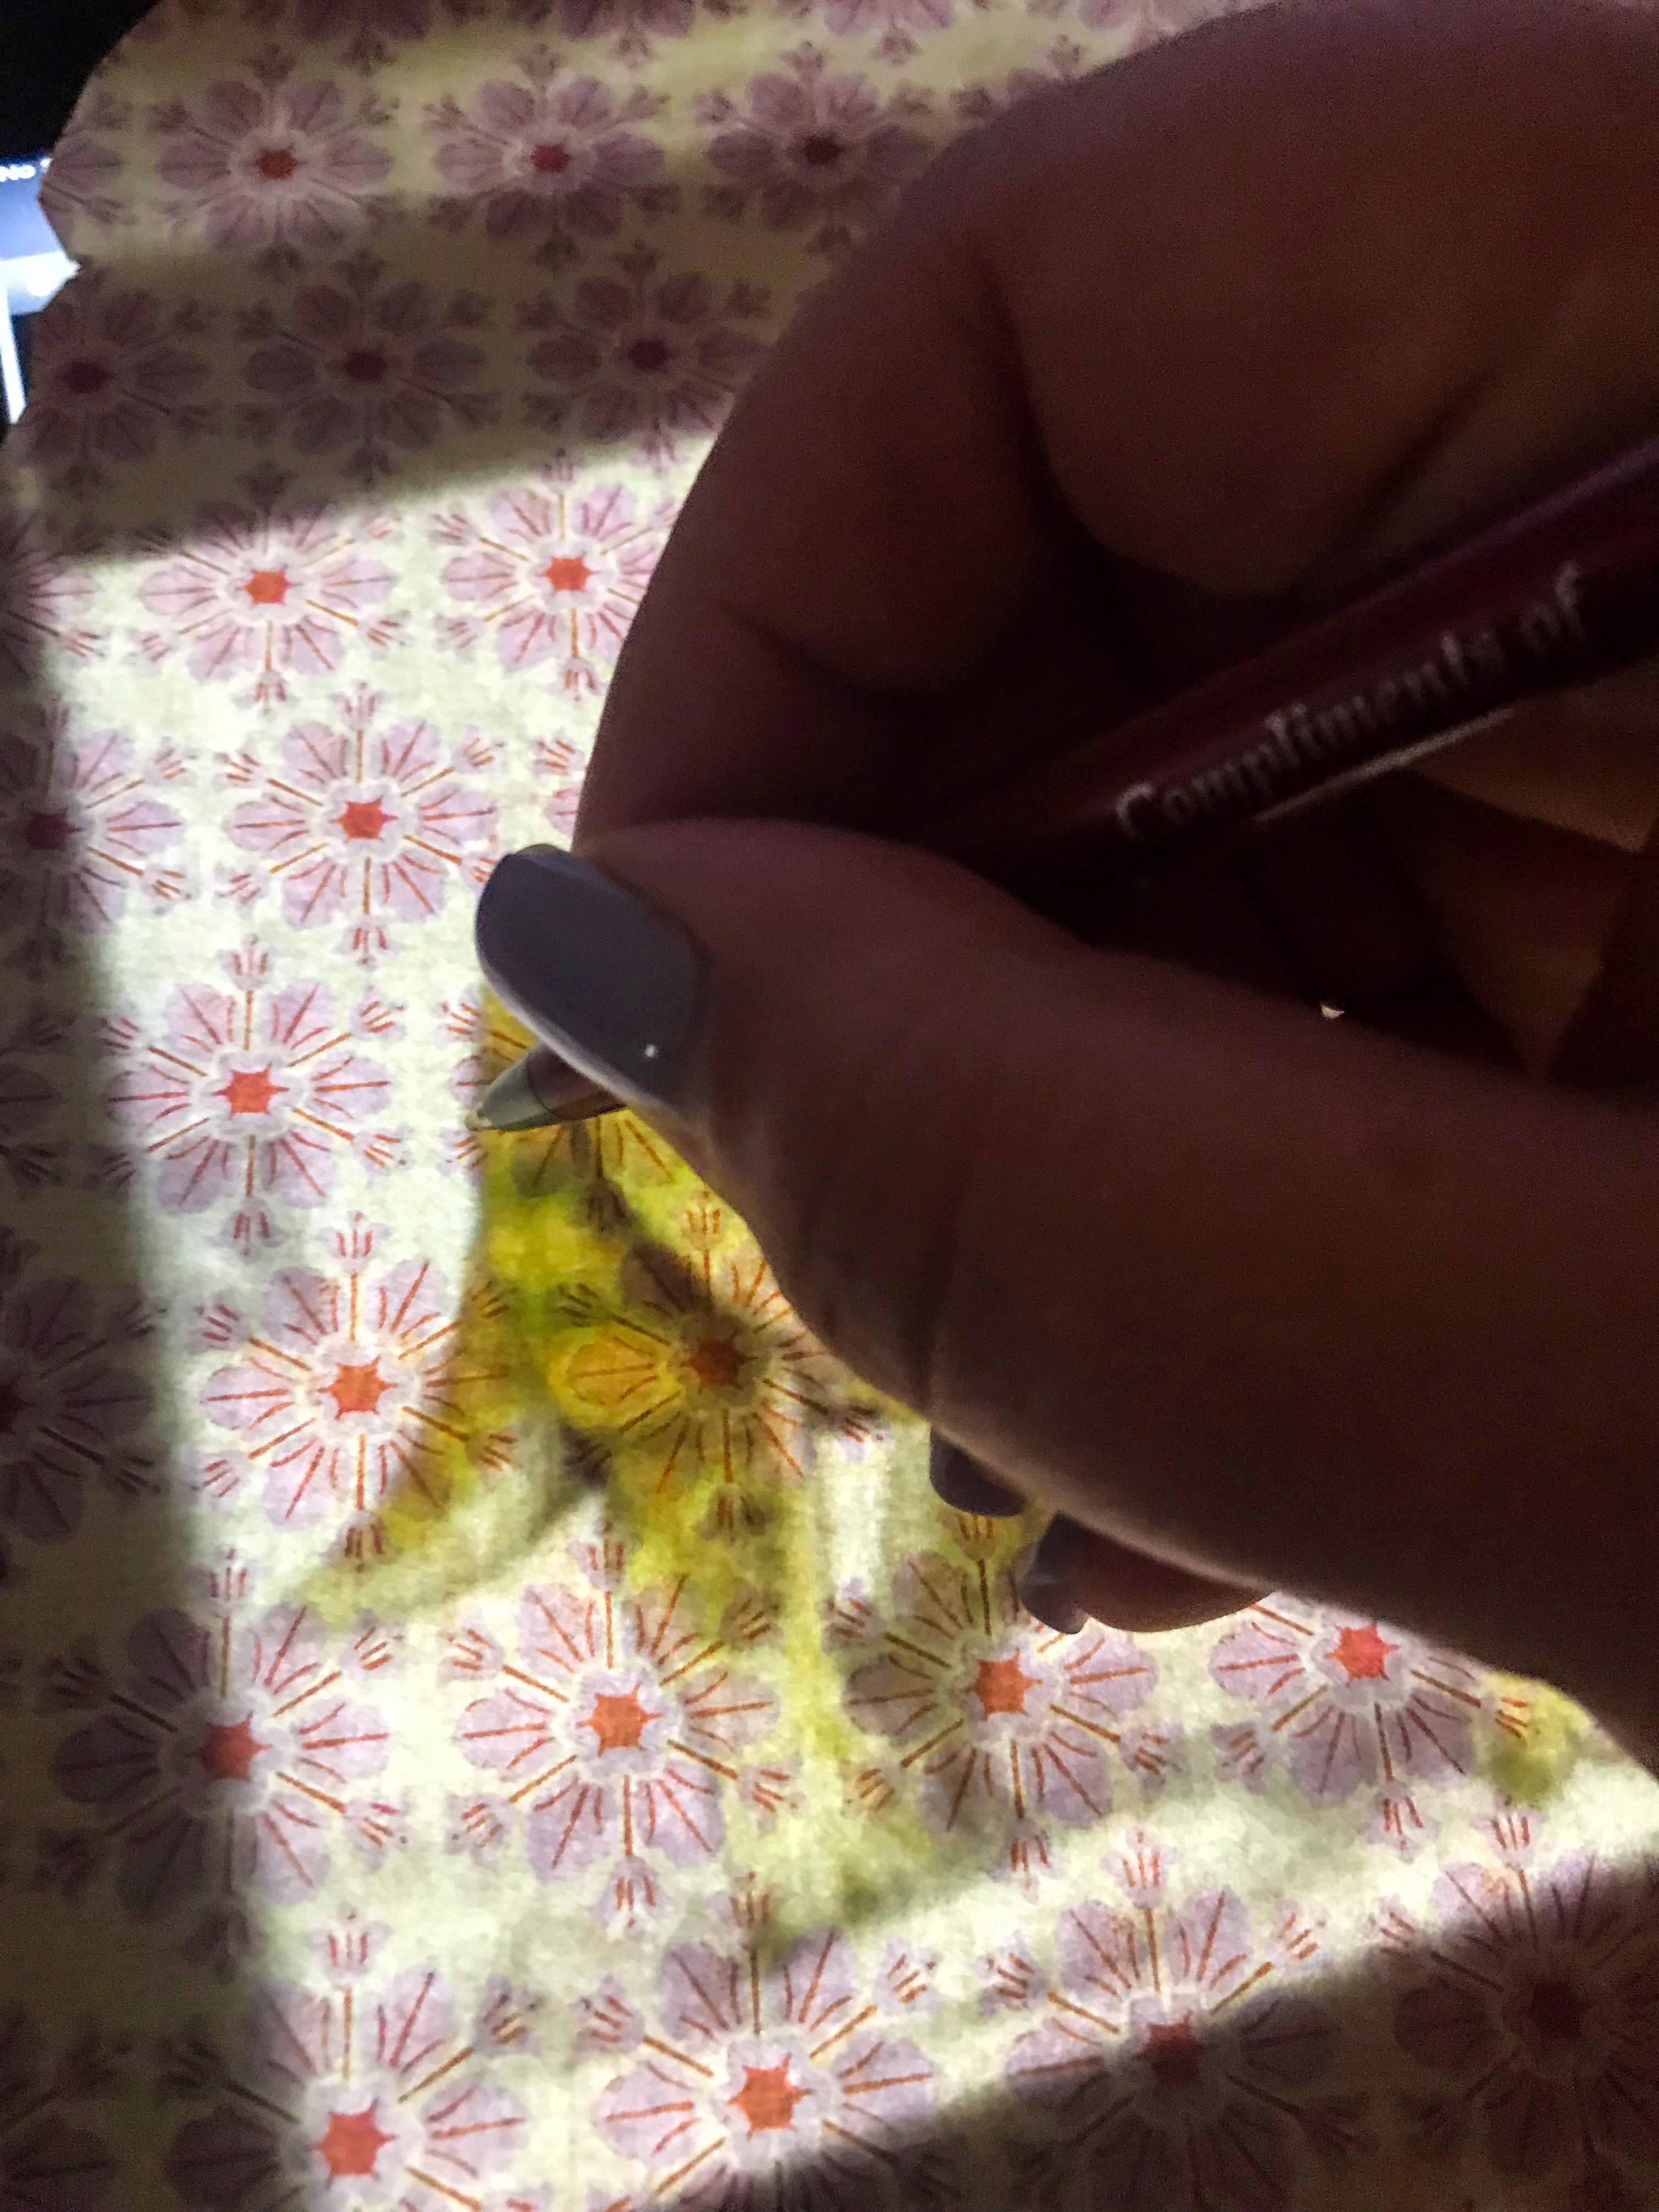
From there carefully cut out each dinosaur.
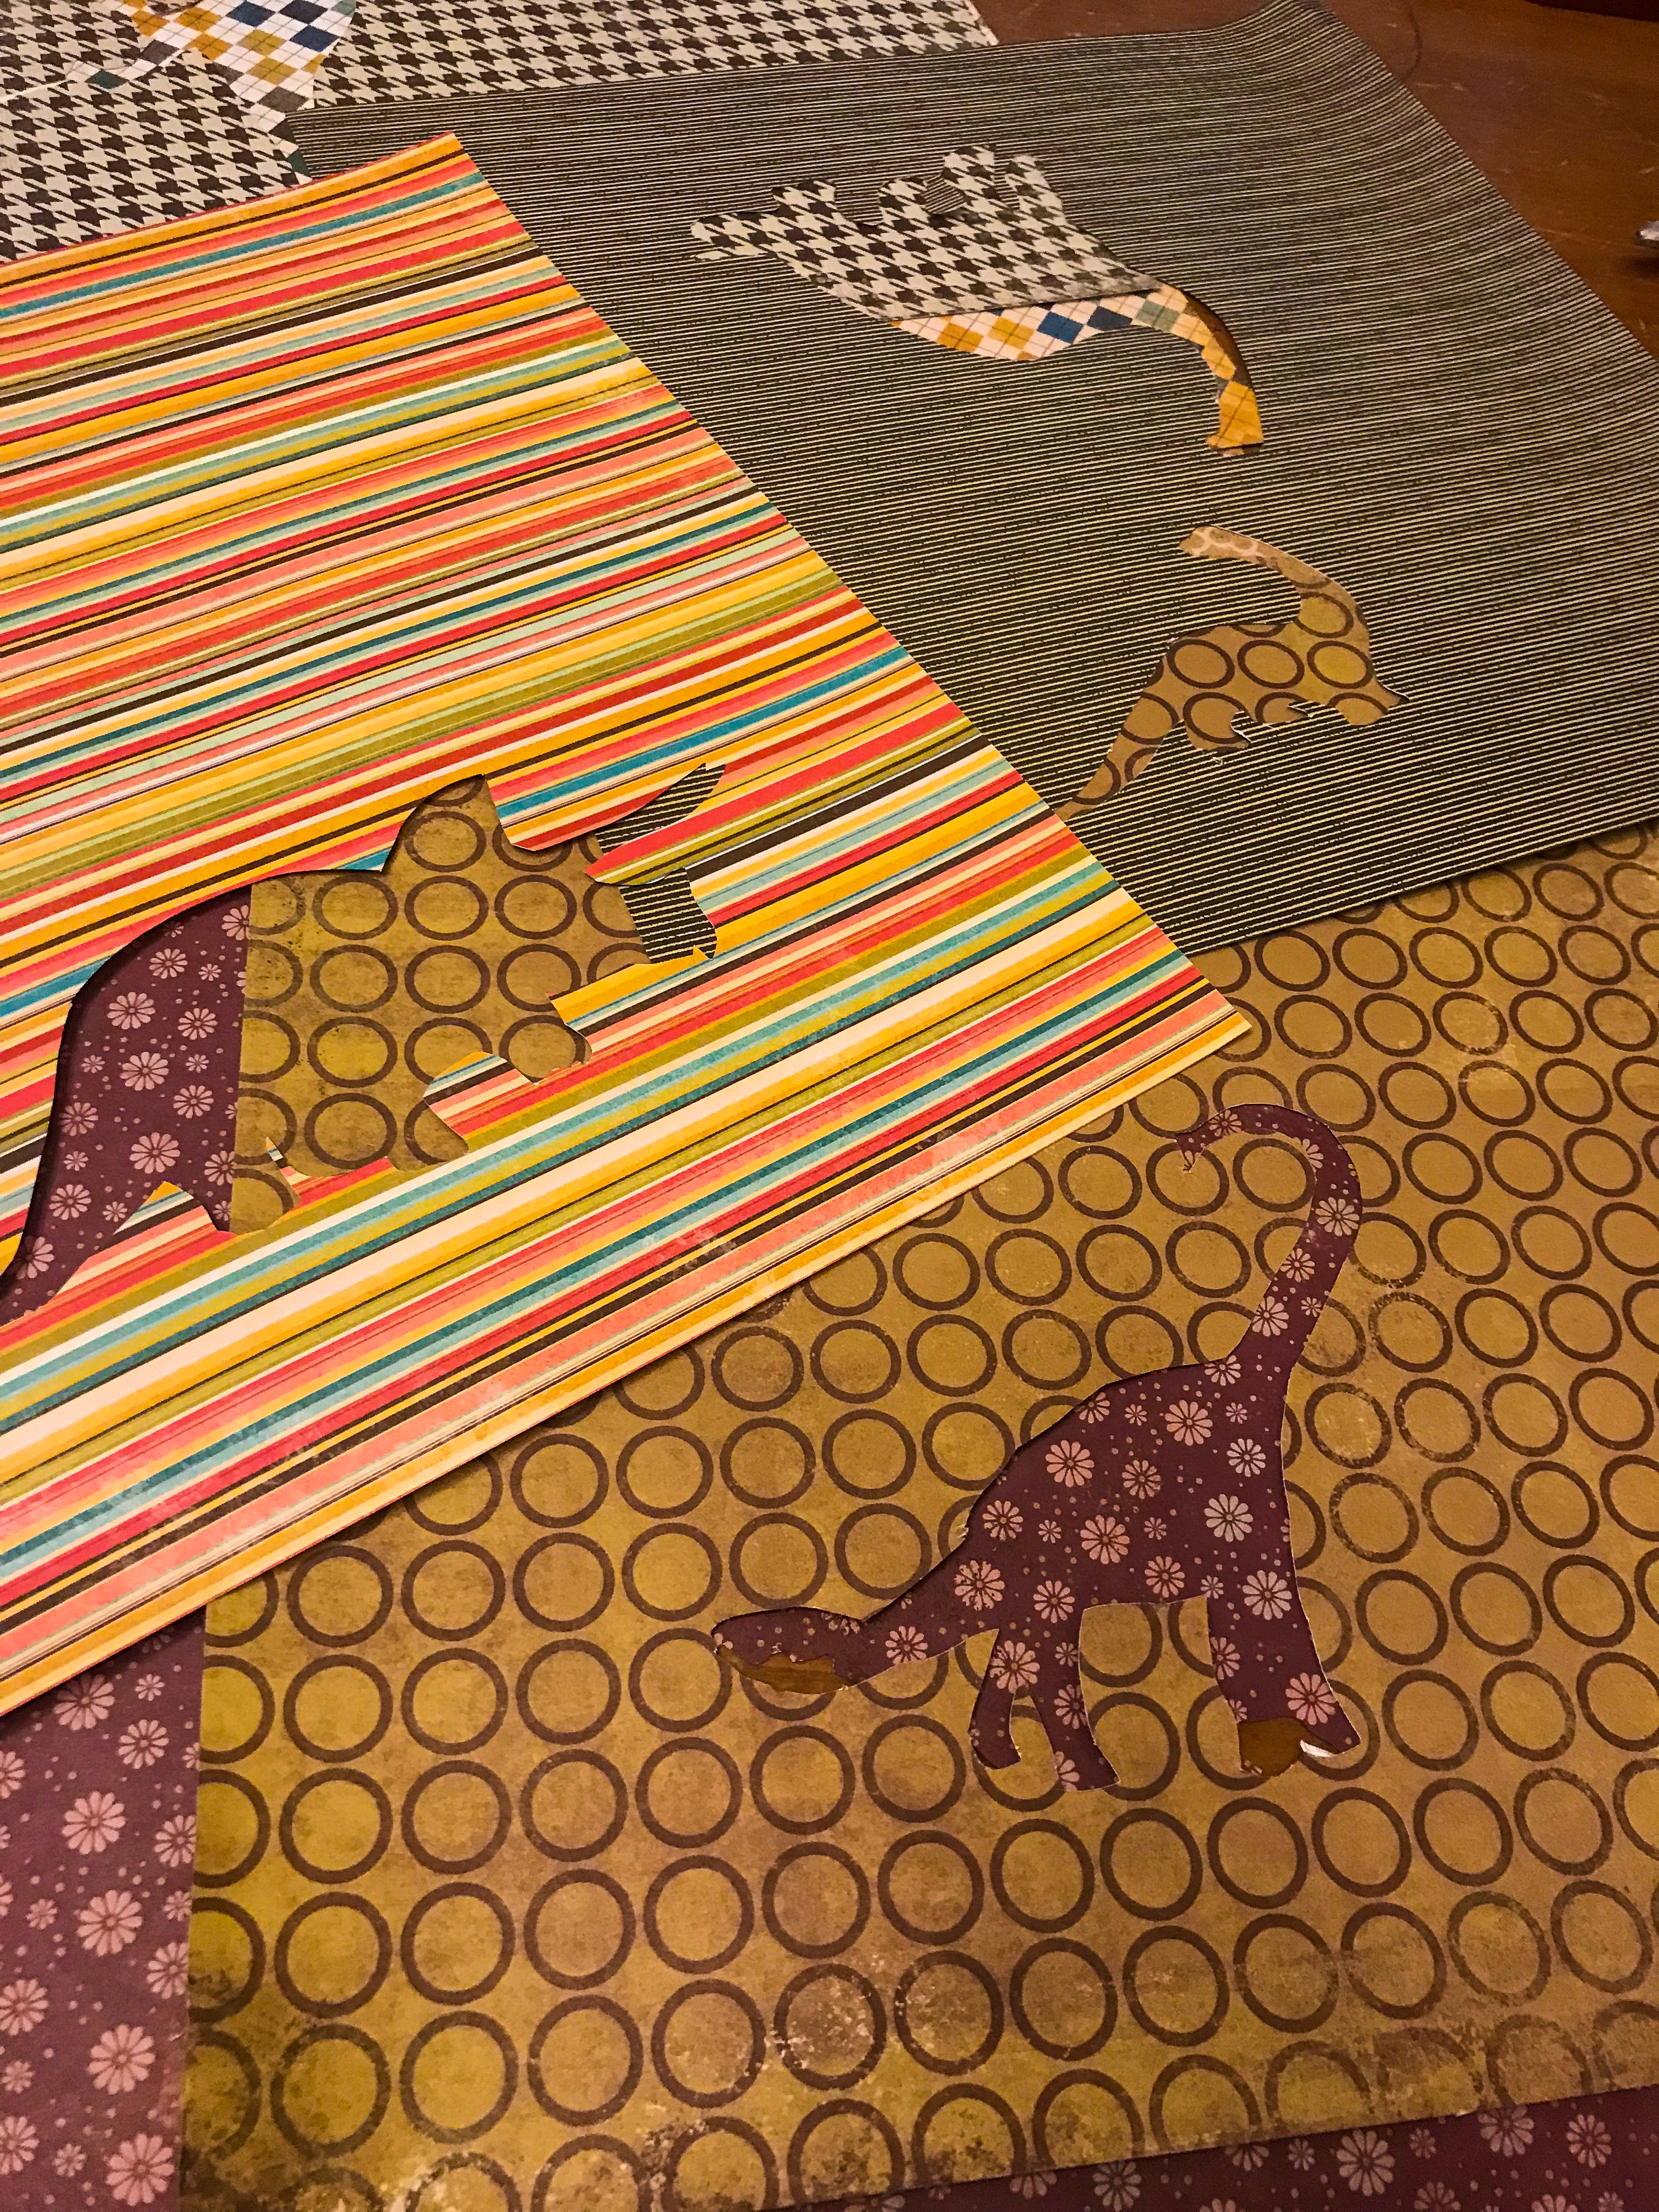
Arrange Your Dinosaur Scene
From there get creative! Cut out stars, trees, watering holes, volcanoes, storm clouds, the sun, or anything else your heart desires.
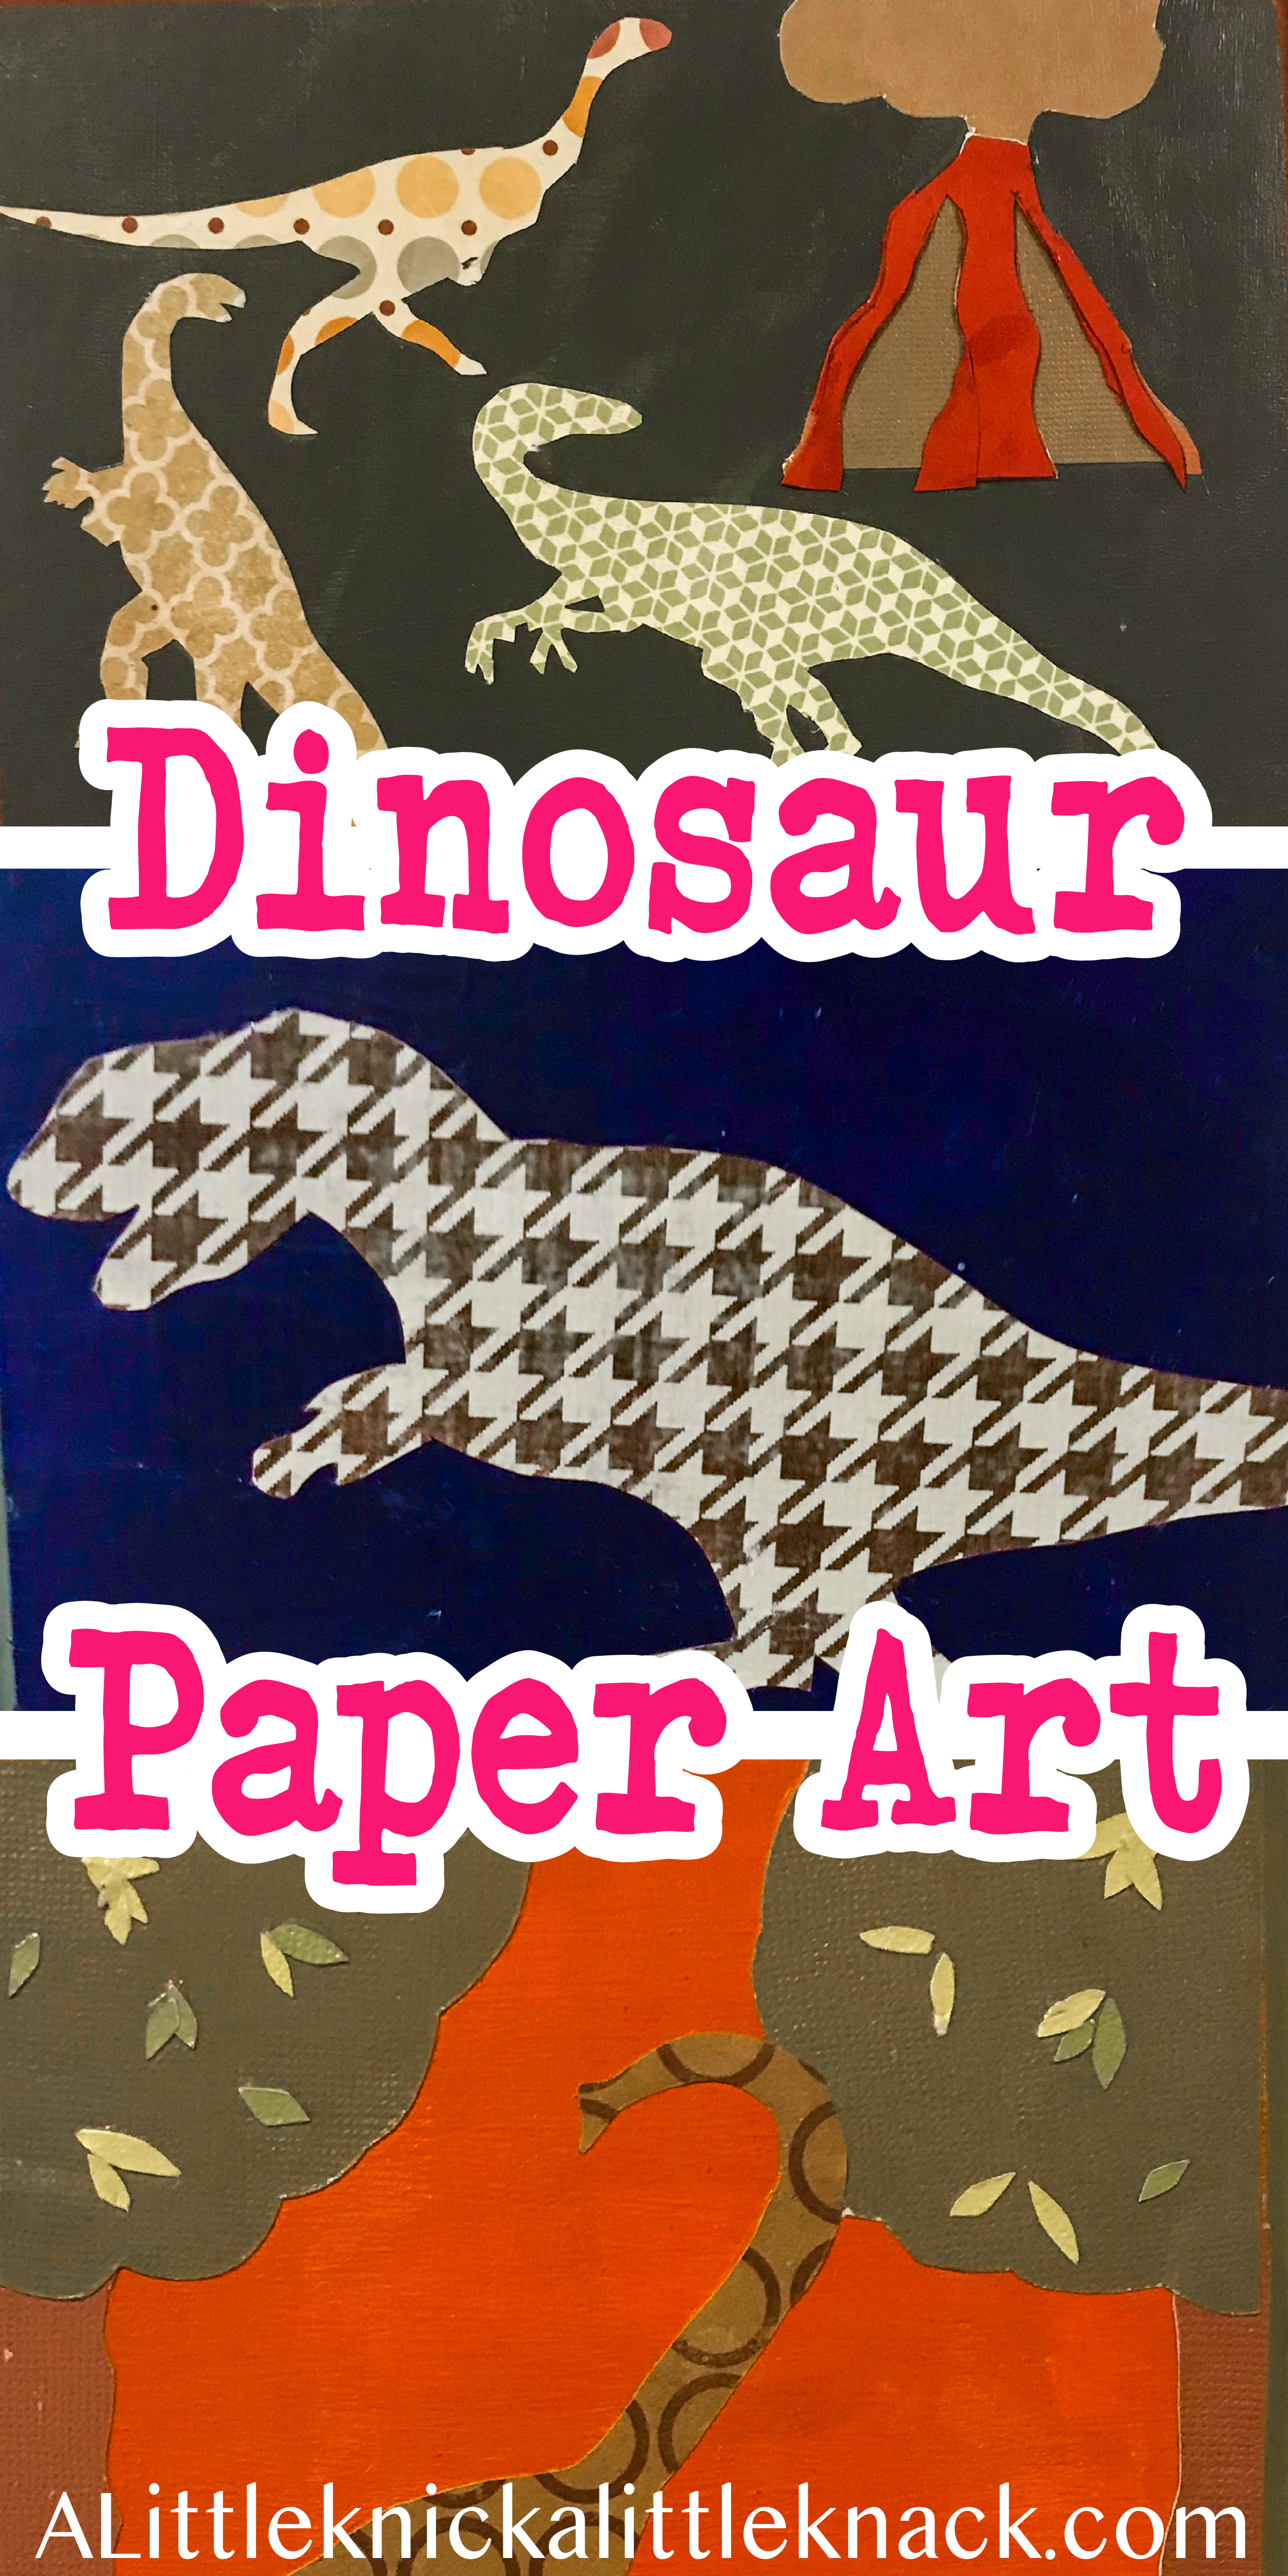
Decide on the placement of where you want each item to go then use a thin layer of matte Mod Podge to glue each piece into place.
I originally sealed mine with Mod Podge but I find that when used as a sealer Mod Podge remains sticky enough to cling to other paper forever, so I highly recommend using either a glossy or matte clear aerosol spray paint to seal it.
I hope you love your scrapbook wall hangings for a long time to come. I know every time I see mine I still love how they turned out considering they were pretty easy to do!
Related Posts
Love this! Perfect for my son’s nursery.