Every year growing up I looked forward to pulling out our family Easter tree and hanging all the easter eggs and other bits and bobbles that had been collected over the years.
Now that I have children of my own I always hoped to keep that tradition alive but year after year I was unable to find an Easter tree.
SO being the crafty mama I am I decided this year enough was enough and made my own!
As you are going through these instructions it may look like a lot of steps but I promise it really couldn’t be easier! I just wanted to include EVERY step to making your own DIY Easter tree no matter how small in case you need them!
*This post may contain affiliate links which may allow us to receive a small commission (at no additional cost to you) for purchases you make after clicking on product links in our posts, to view our full affiliate disclosure click here.
But rest assured we fully believe in every product we endorse..
Time: 1-2 hours
Materials:
-
- Low Temp Glue Sticks
- Green Tissue Paper
- Hot pink / Light Pink Tissue Paper (Or Other Paper of Your Choice)
- Scissors
- Small Round Wood Slice (for base)
- 1/2 Drill Bit (for base)
- Drill (for base)
- Washi Tape (for base)
- Yarn ( I used Baby Bee Sweet Delight in Pattycake but you could use any!)
hint: If you don’t have access to a drill you could most likely form a base from fabric covered styrofoam or moulding clay
Prep the Flowers
Fold the tissue paper into approximately a 1 inch by 2 inch rectangle (It doesn’t need to be perfect)
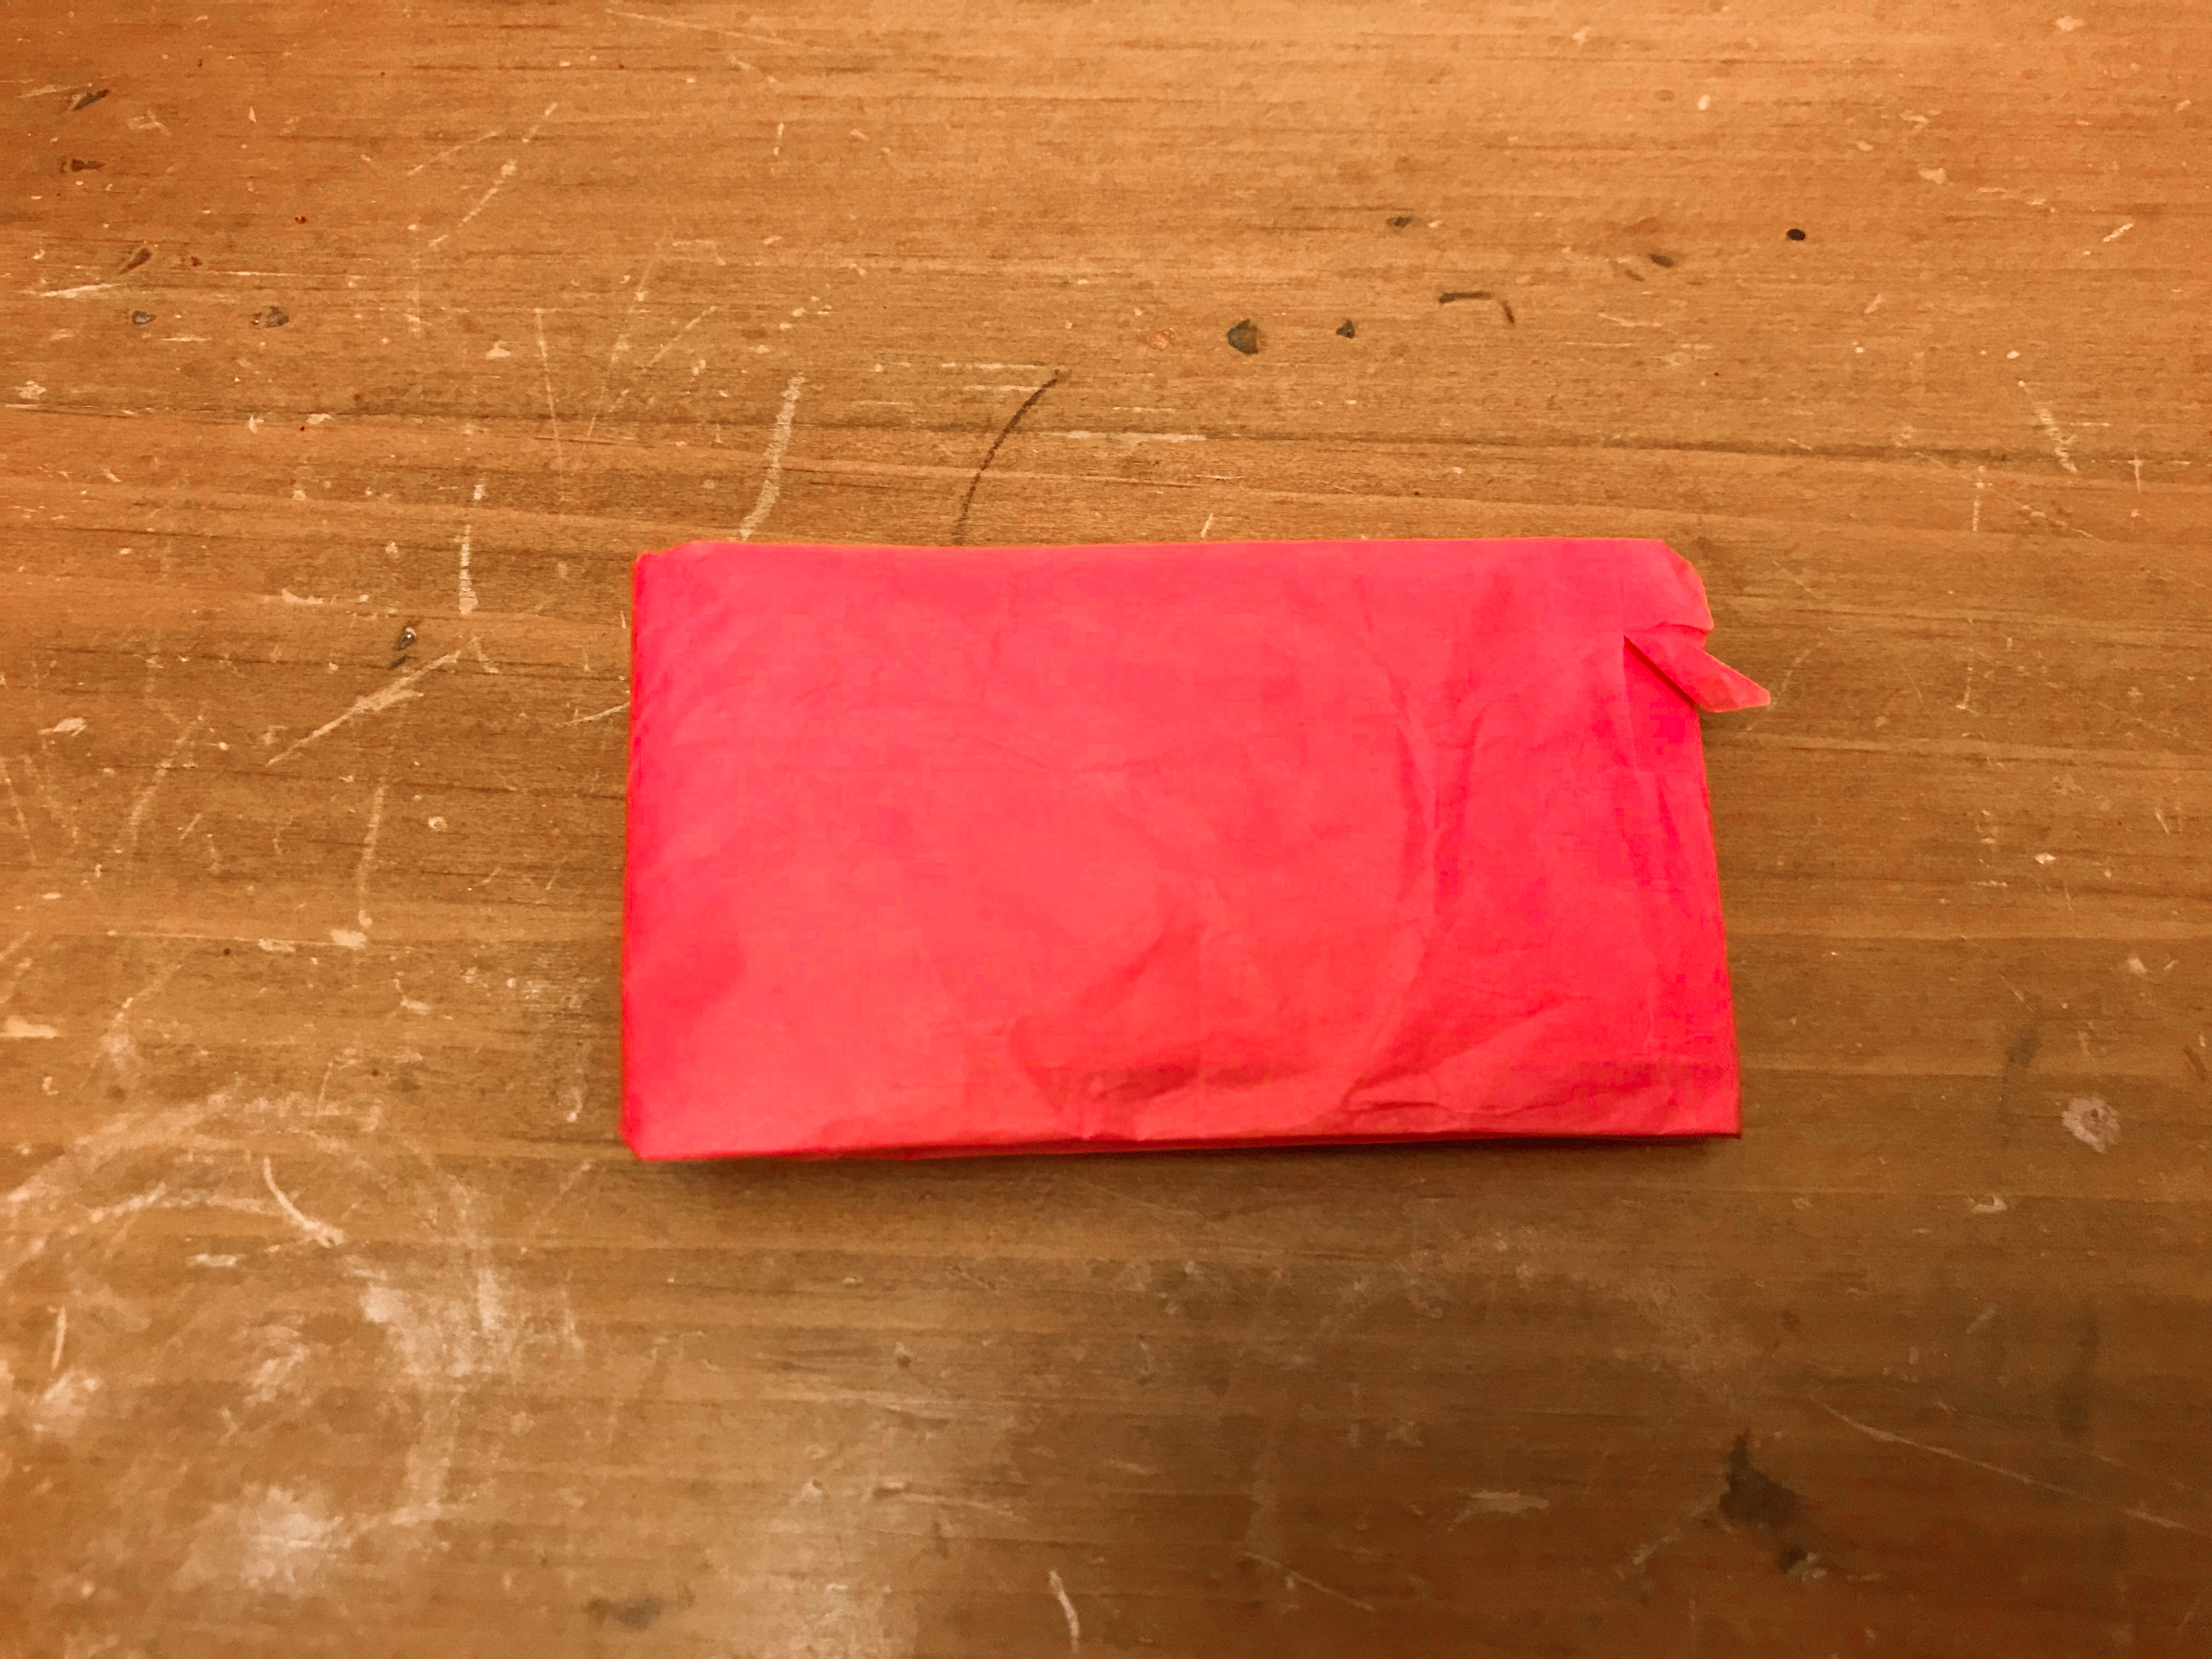
Cut out a 6- petal flower shape from the folded tissue paper.
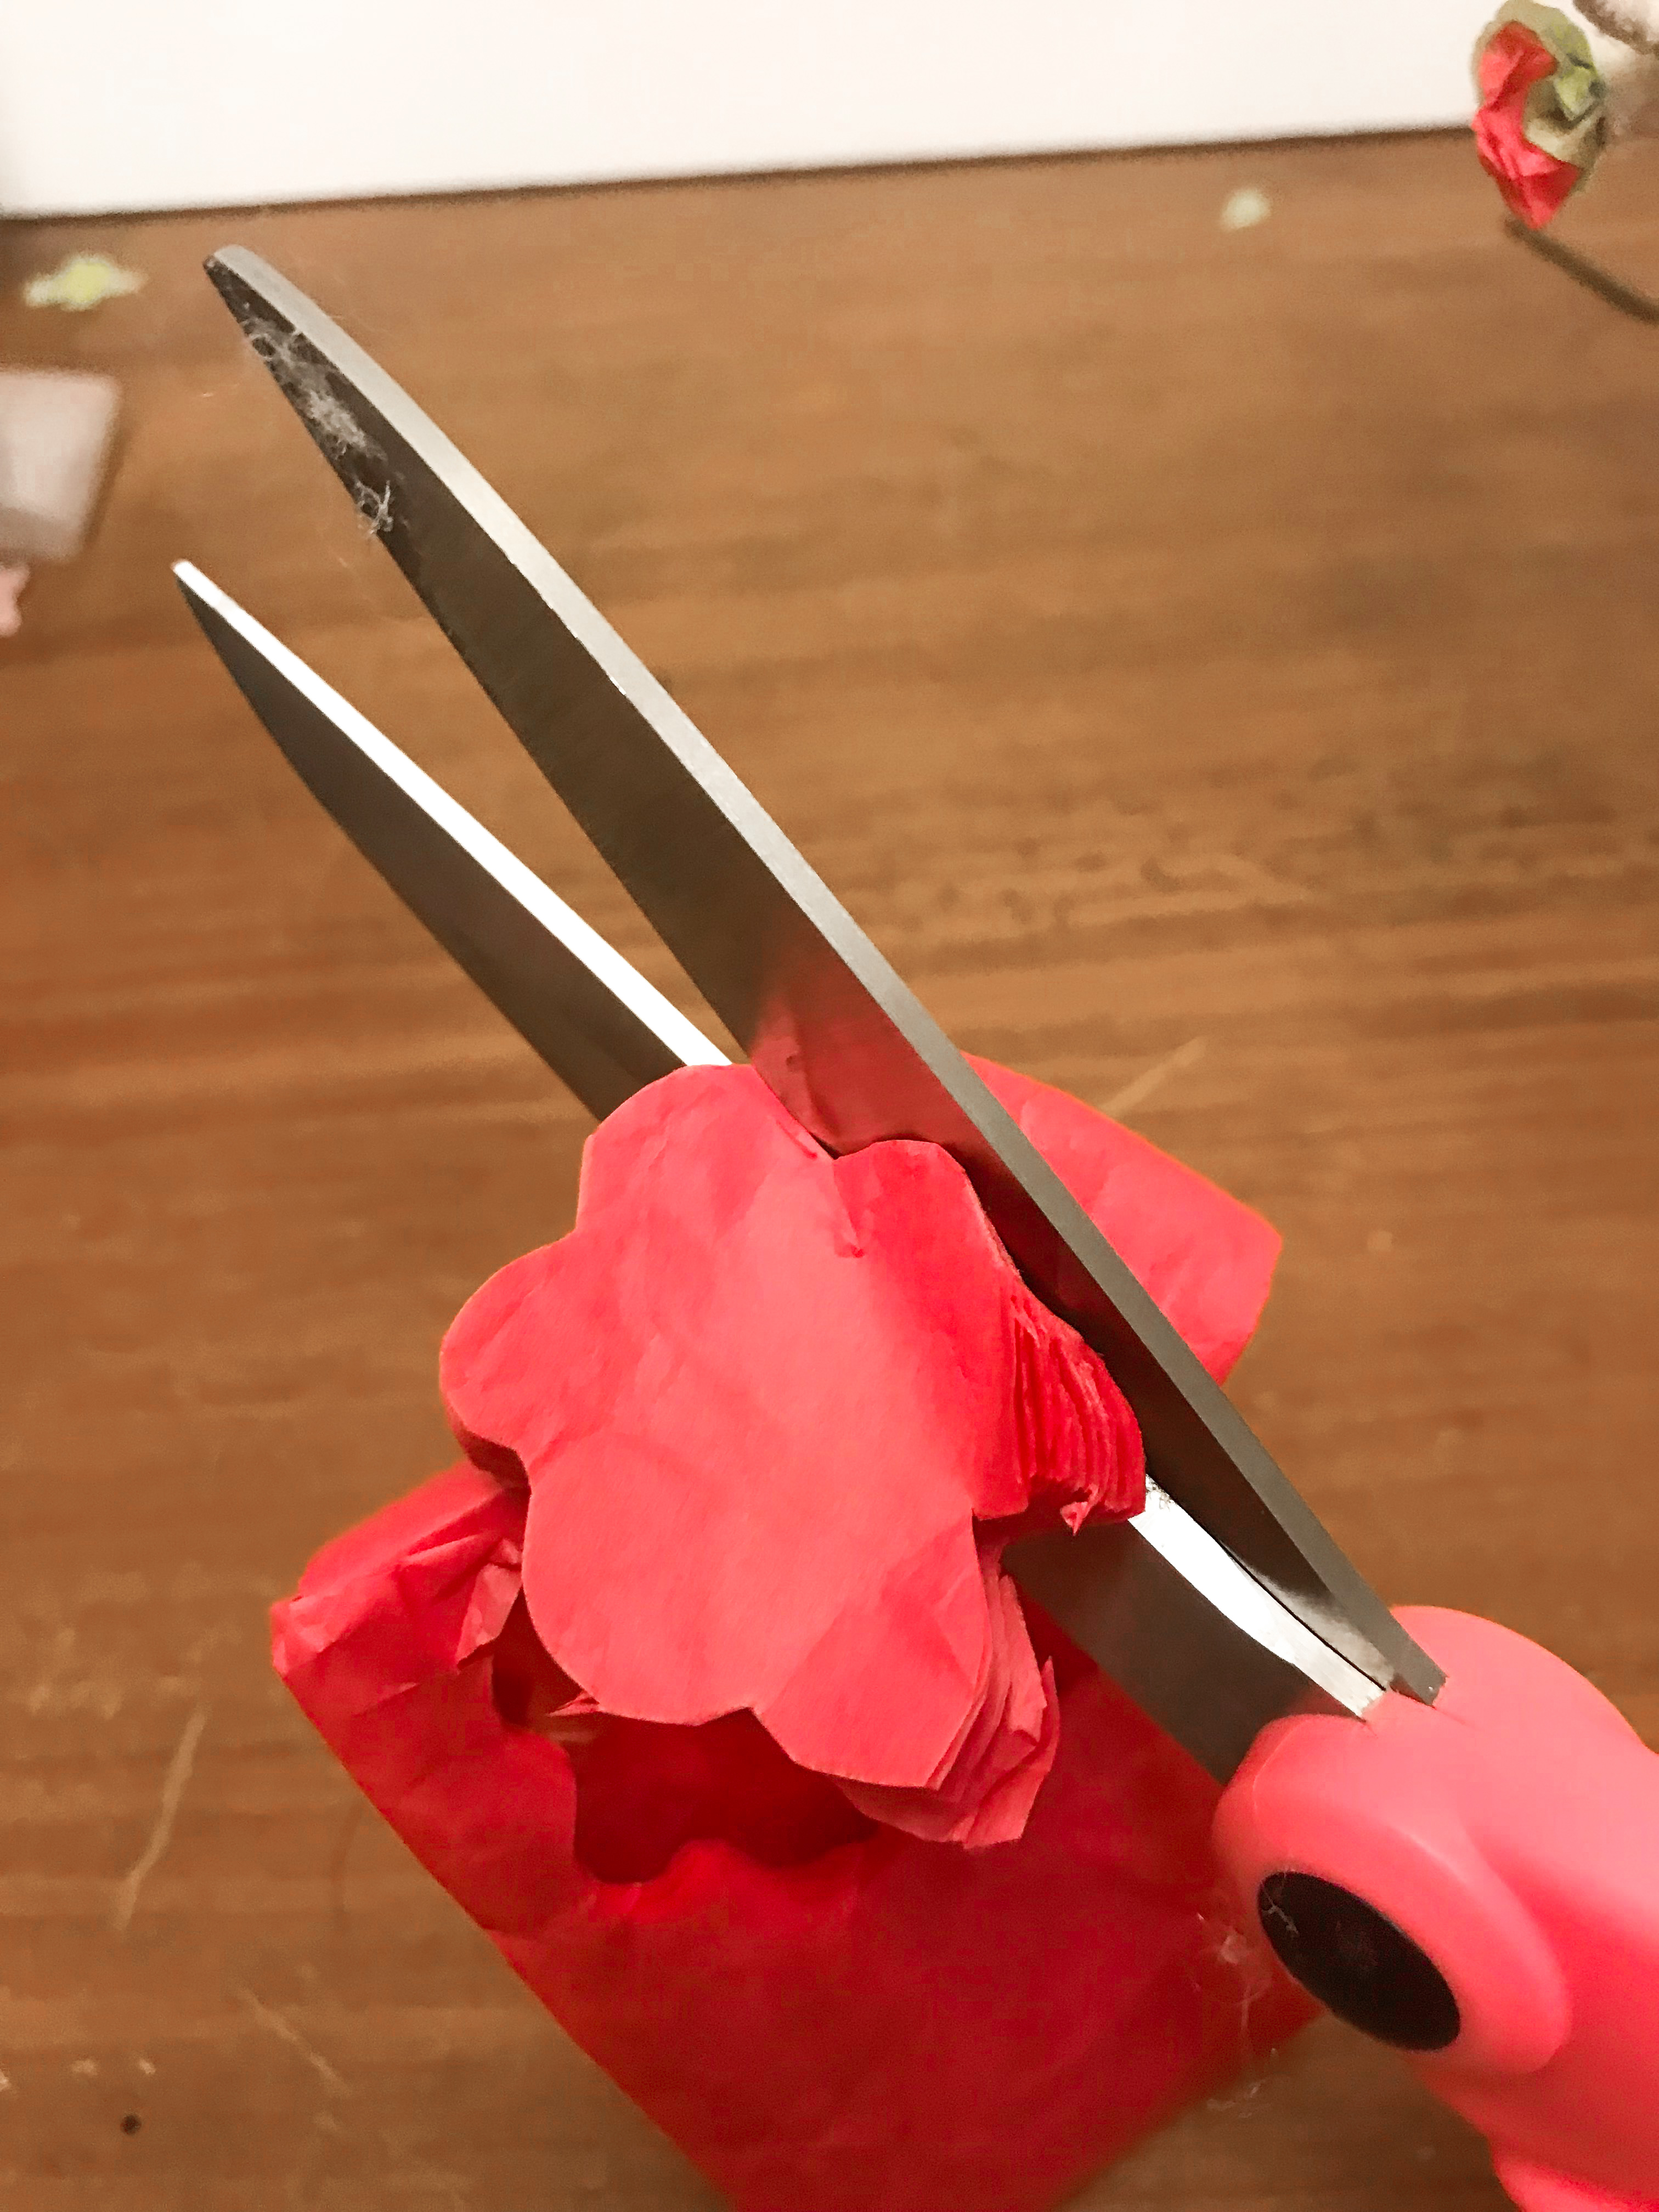
Repeat with the light pink tissue paper.
Cut out a slightly smaller version from the hot pink as well
Cut out a 4 “petaled flower” from the green.
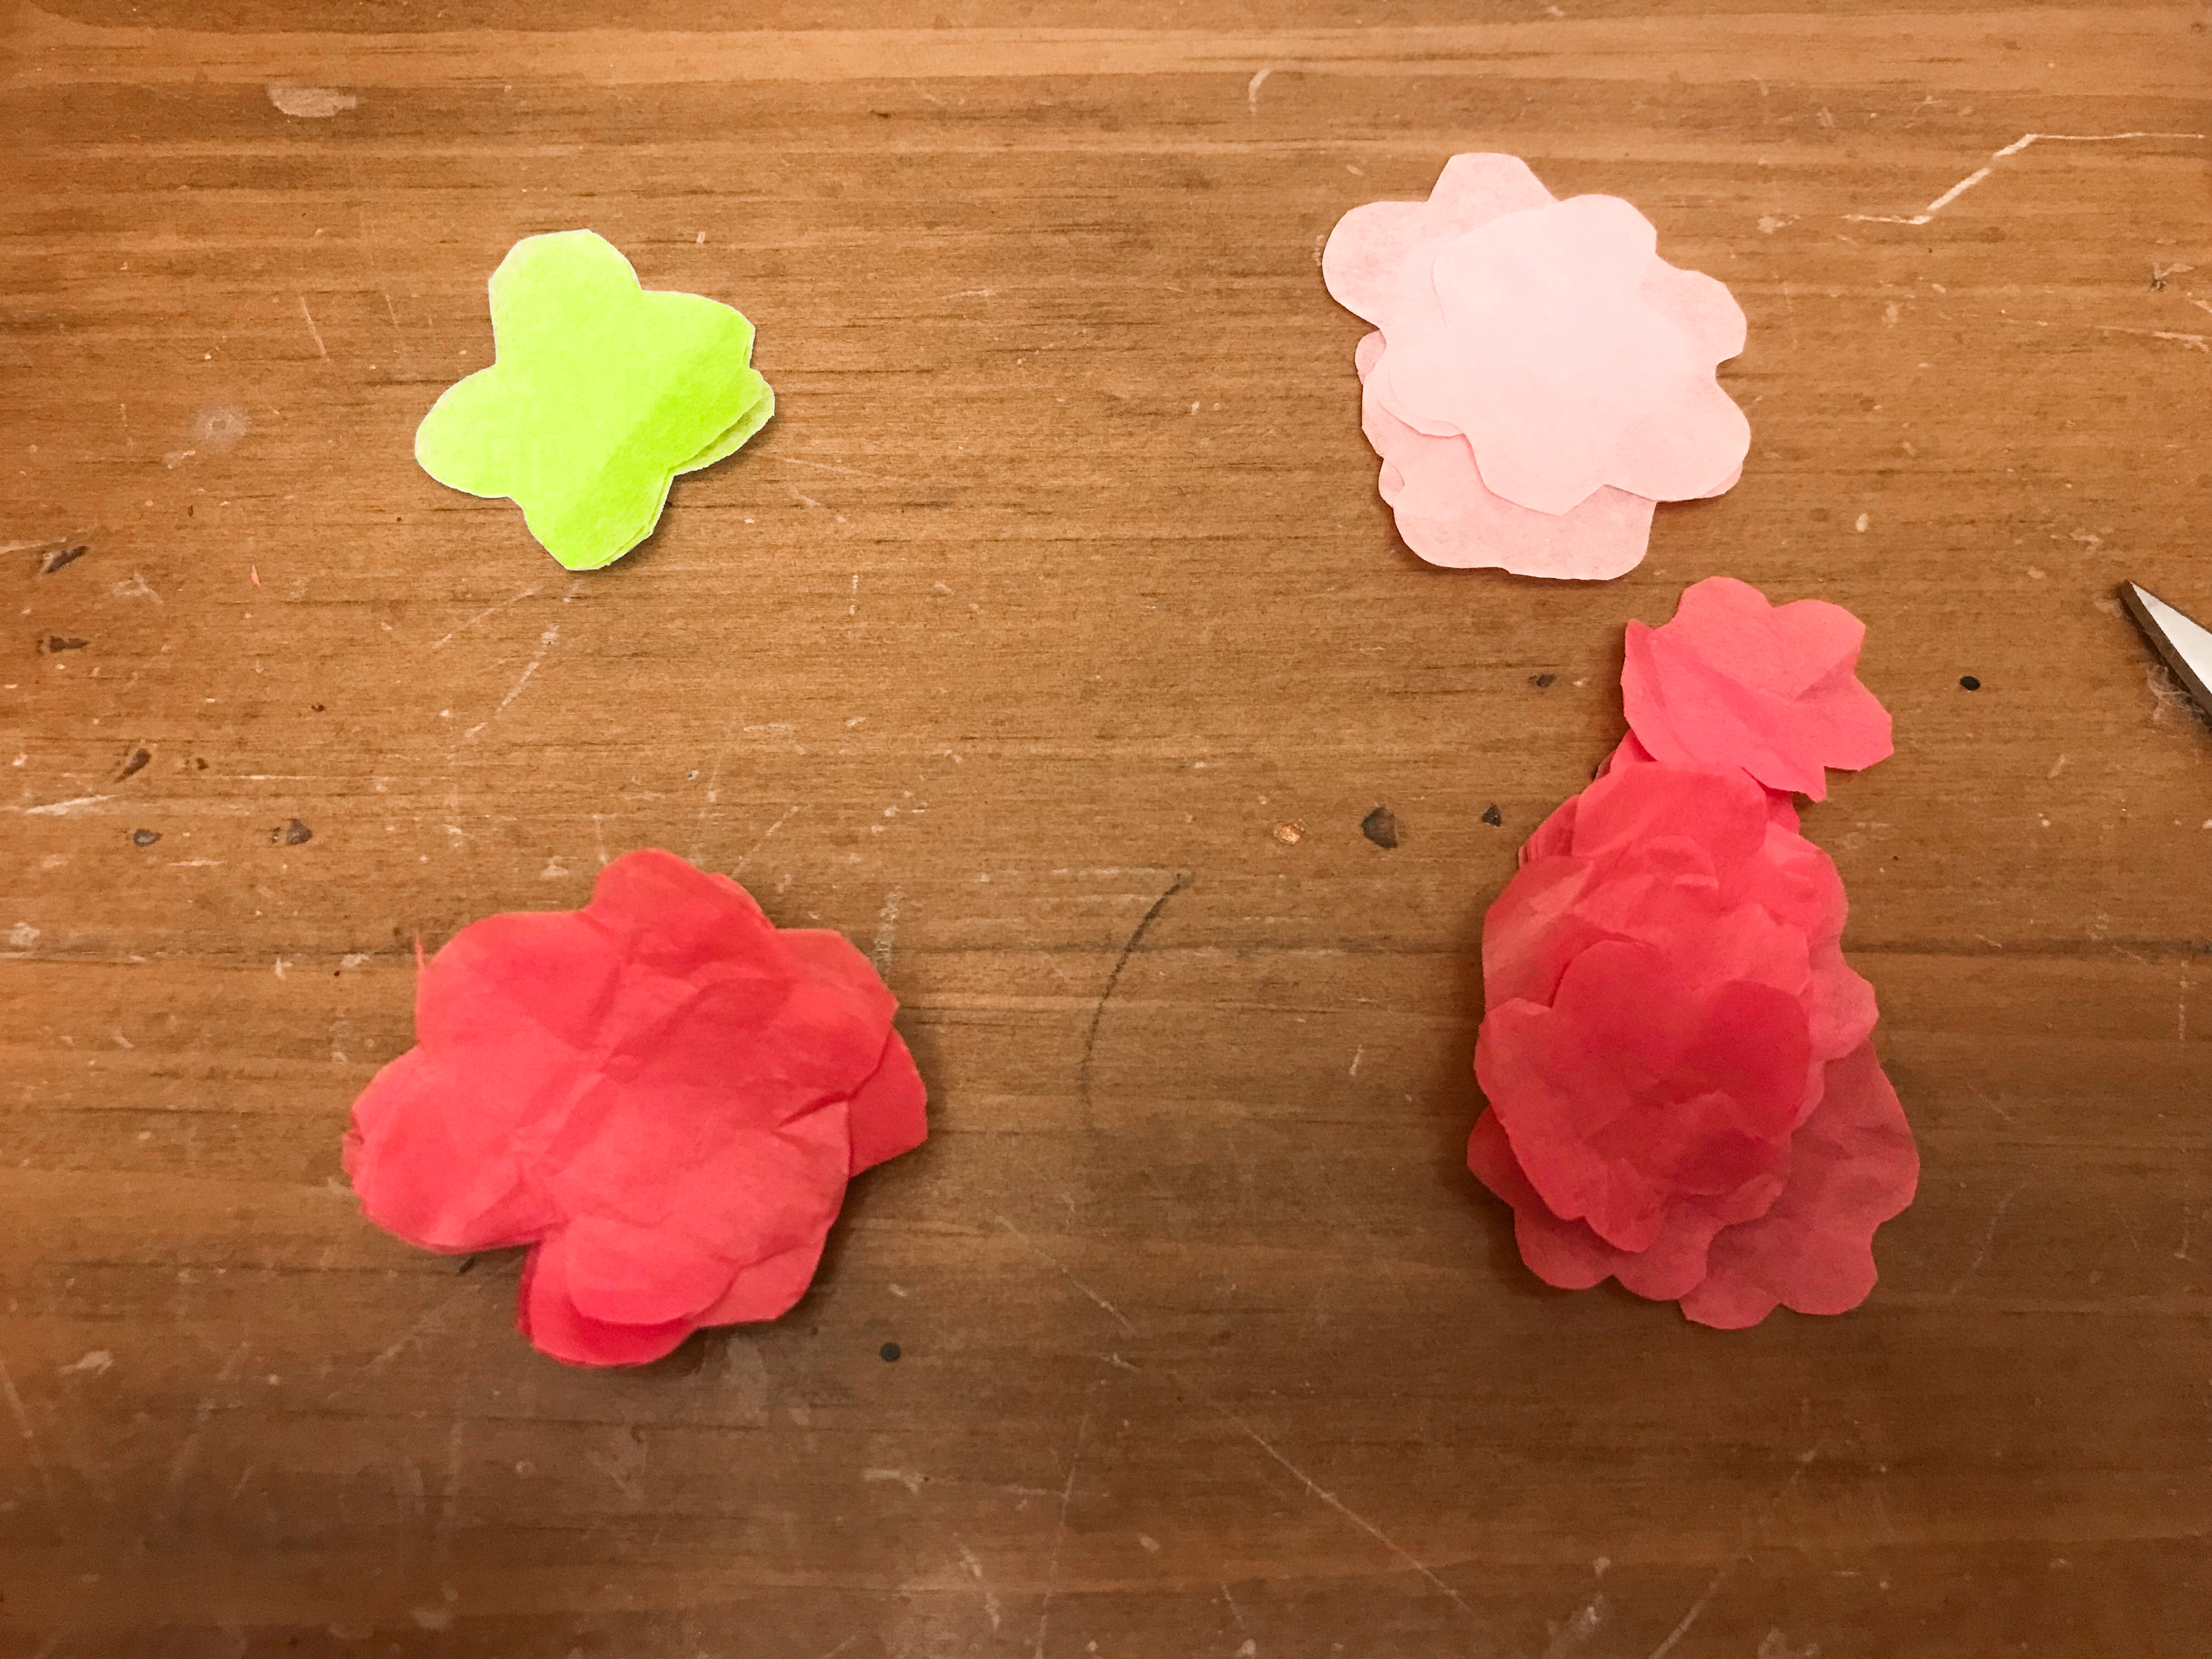
Put aside for use in a few minutes!
Prepare the Easter Tree Base
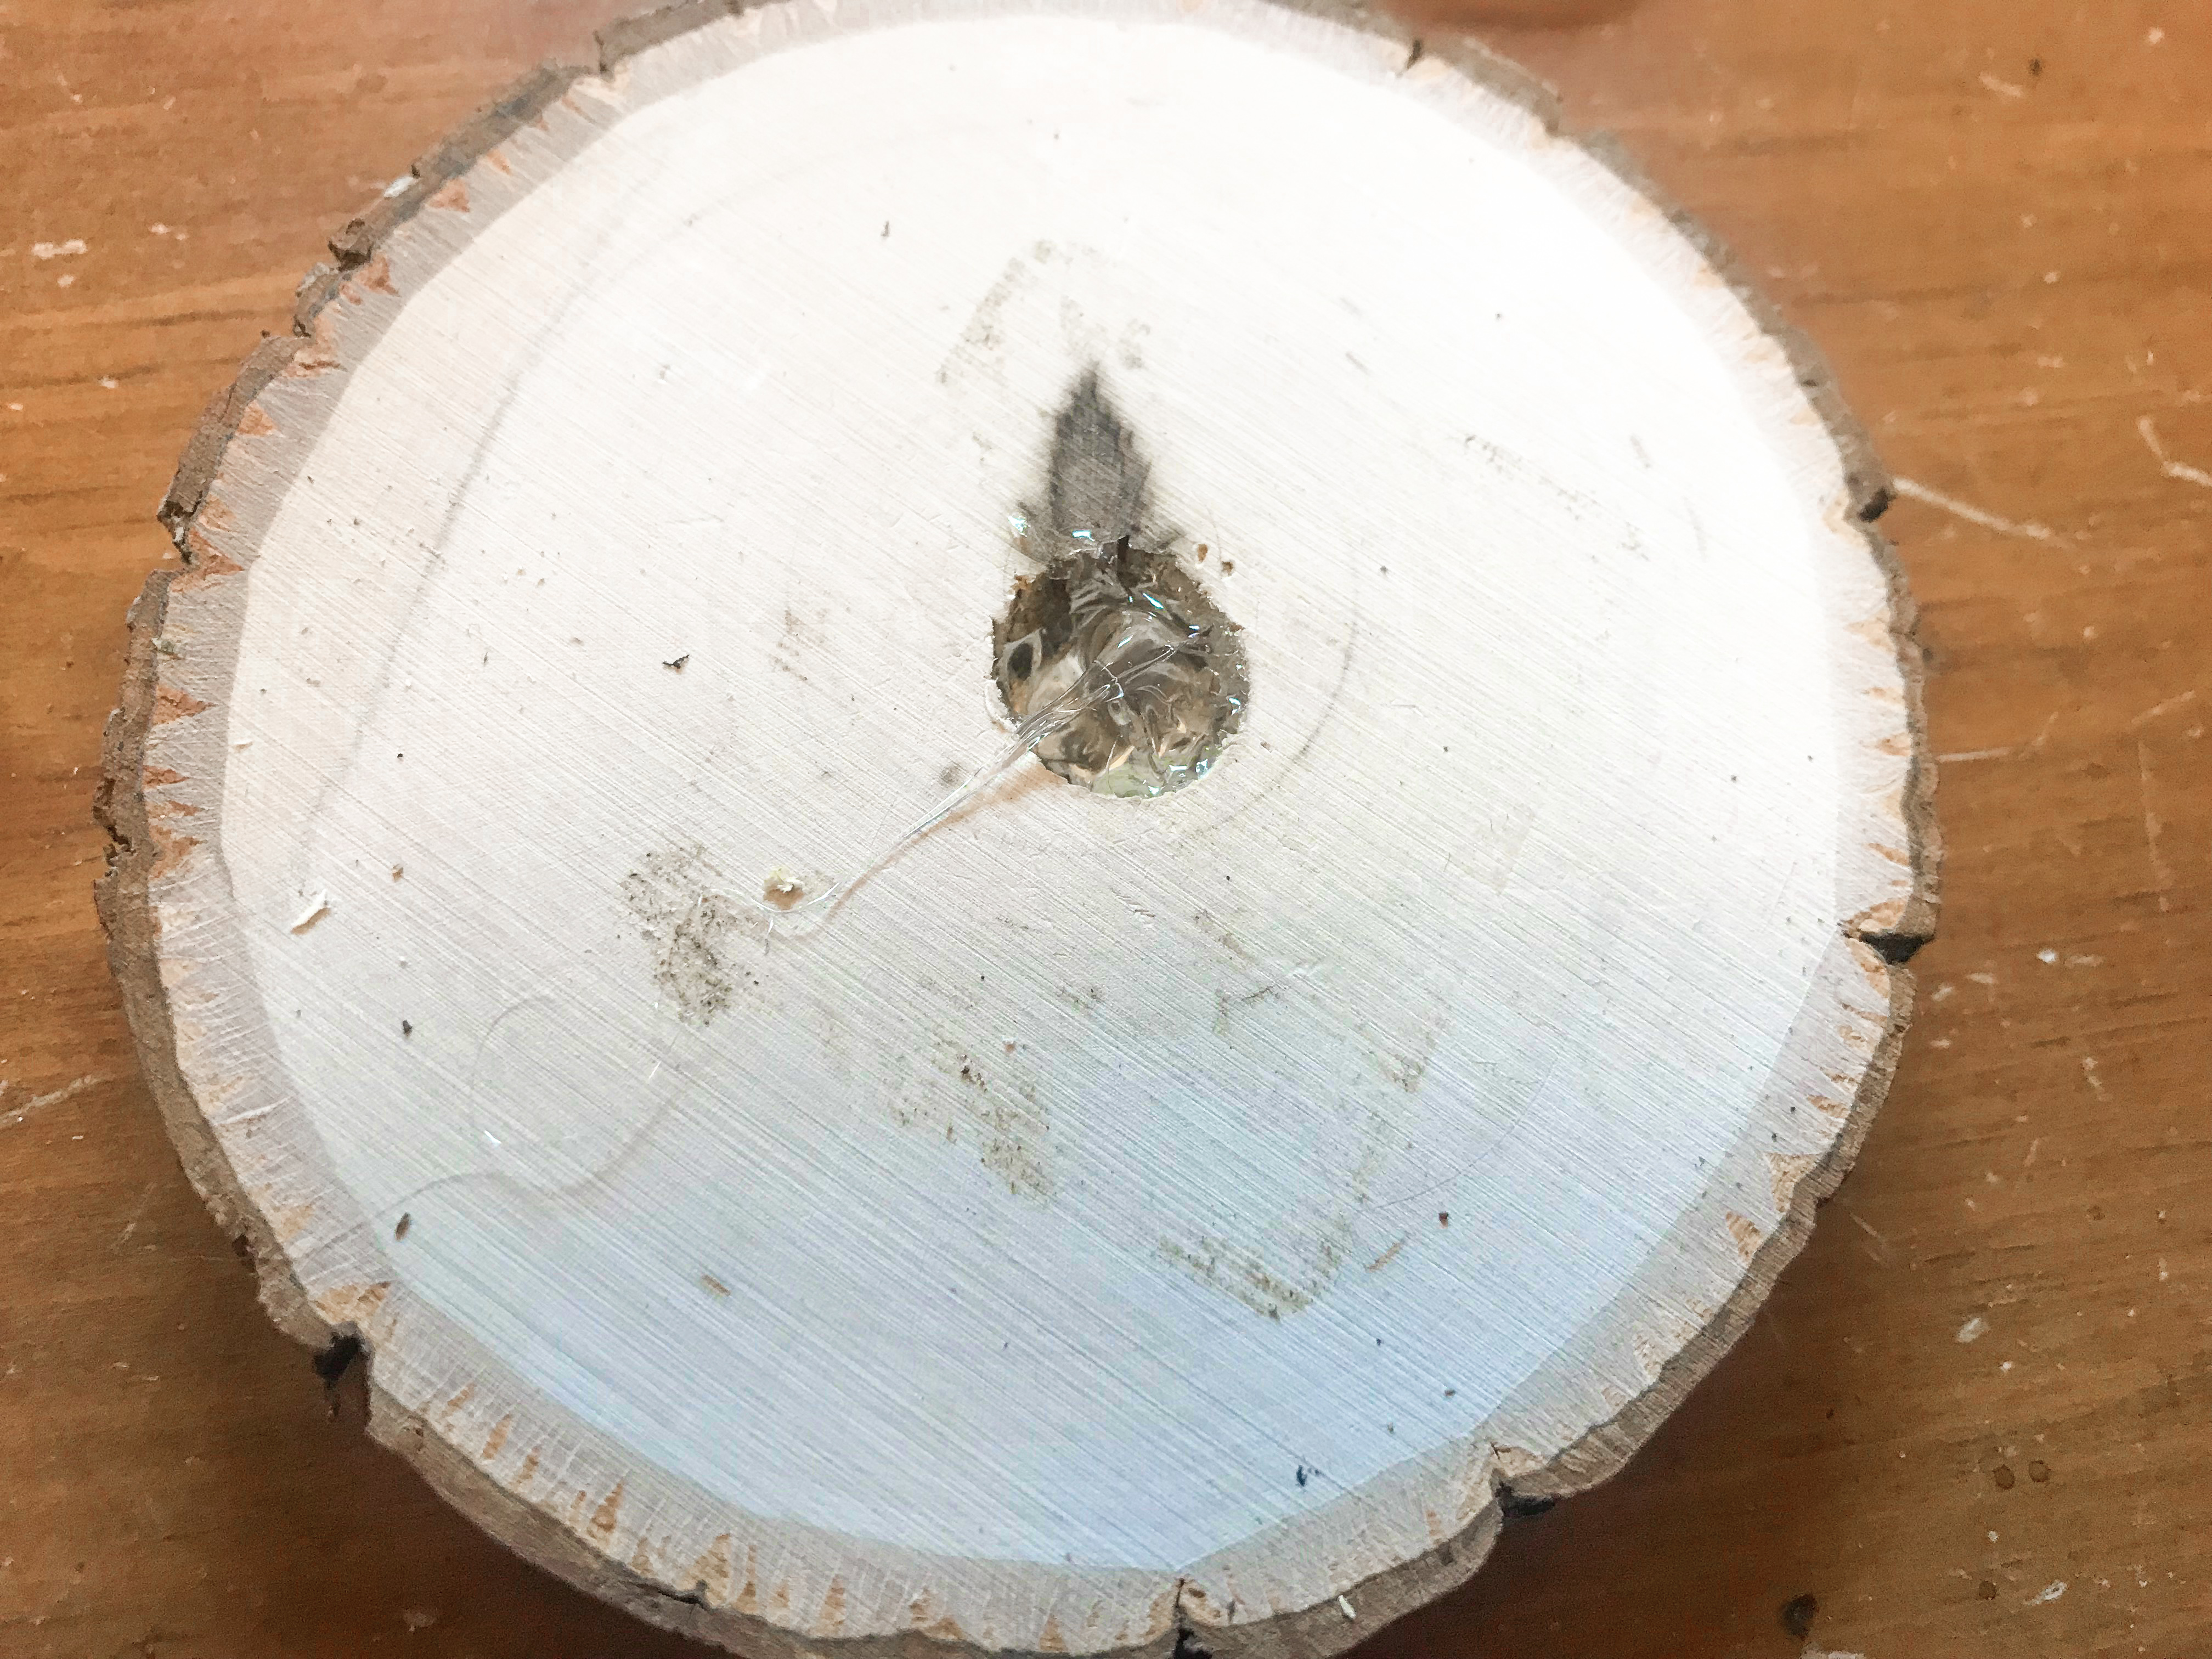
If using wood first mark the center of the wood circle.
hint: I used Washi Tape but you could just as easily measure and mark!
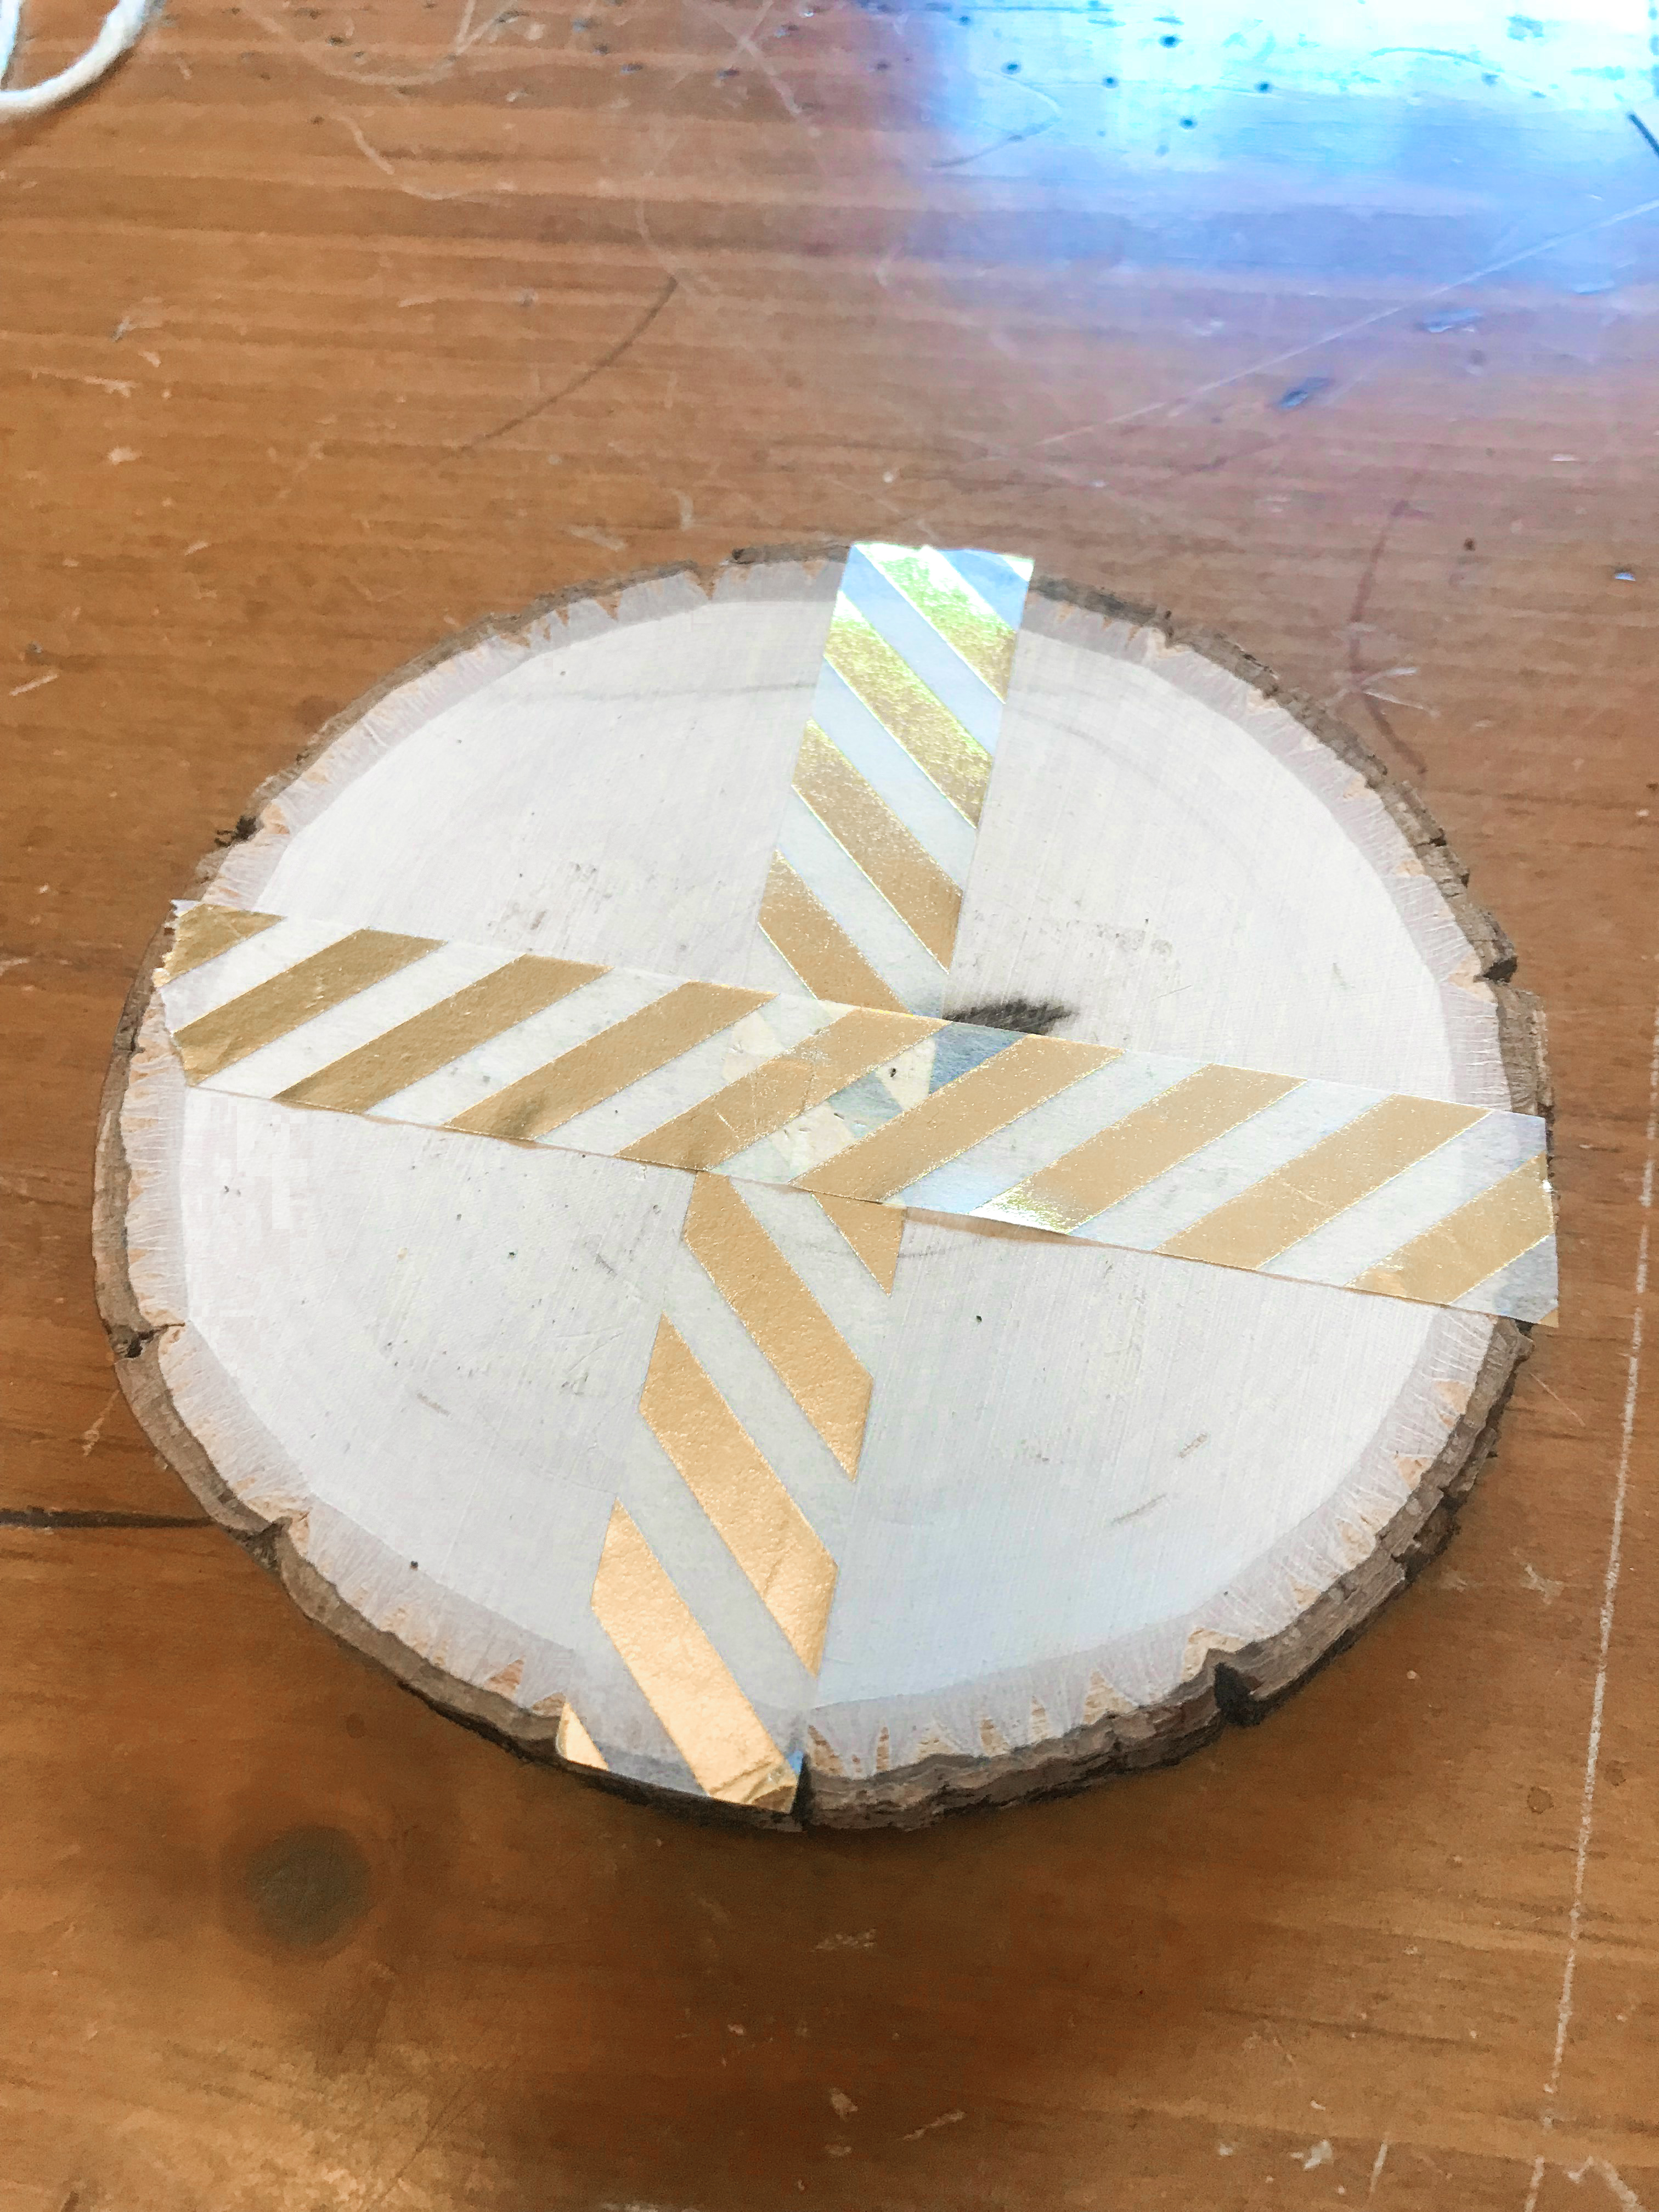
Drill approximately 3/4 of the way through the wood.
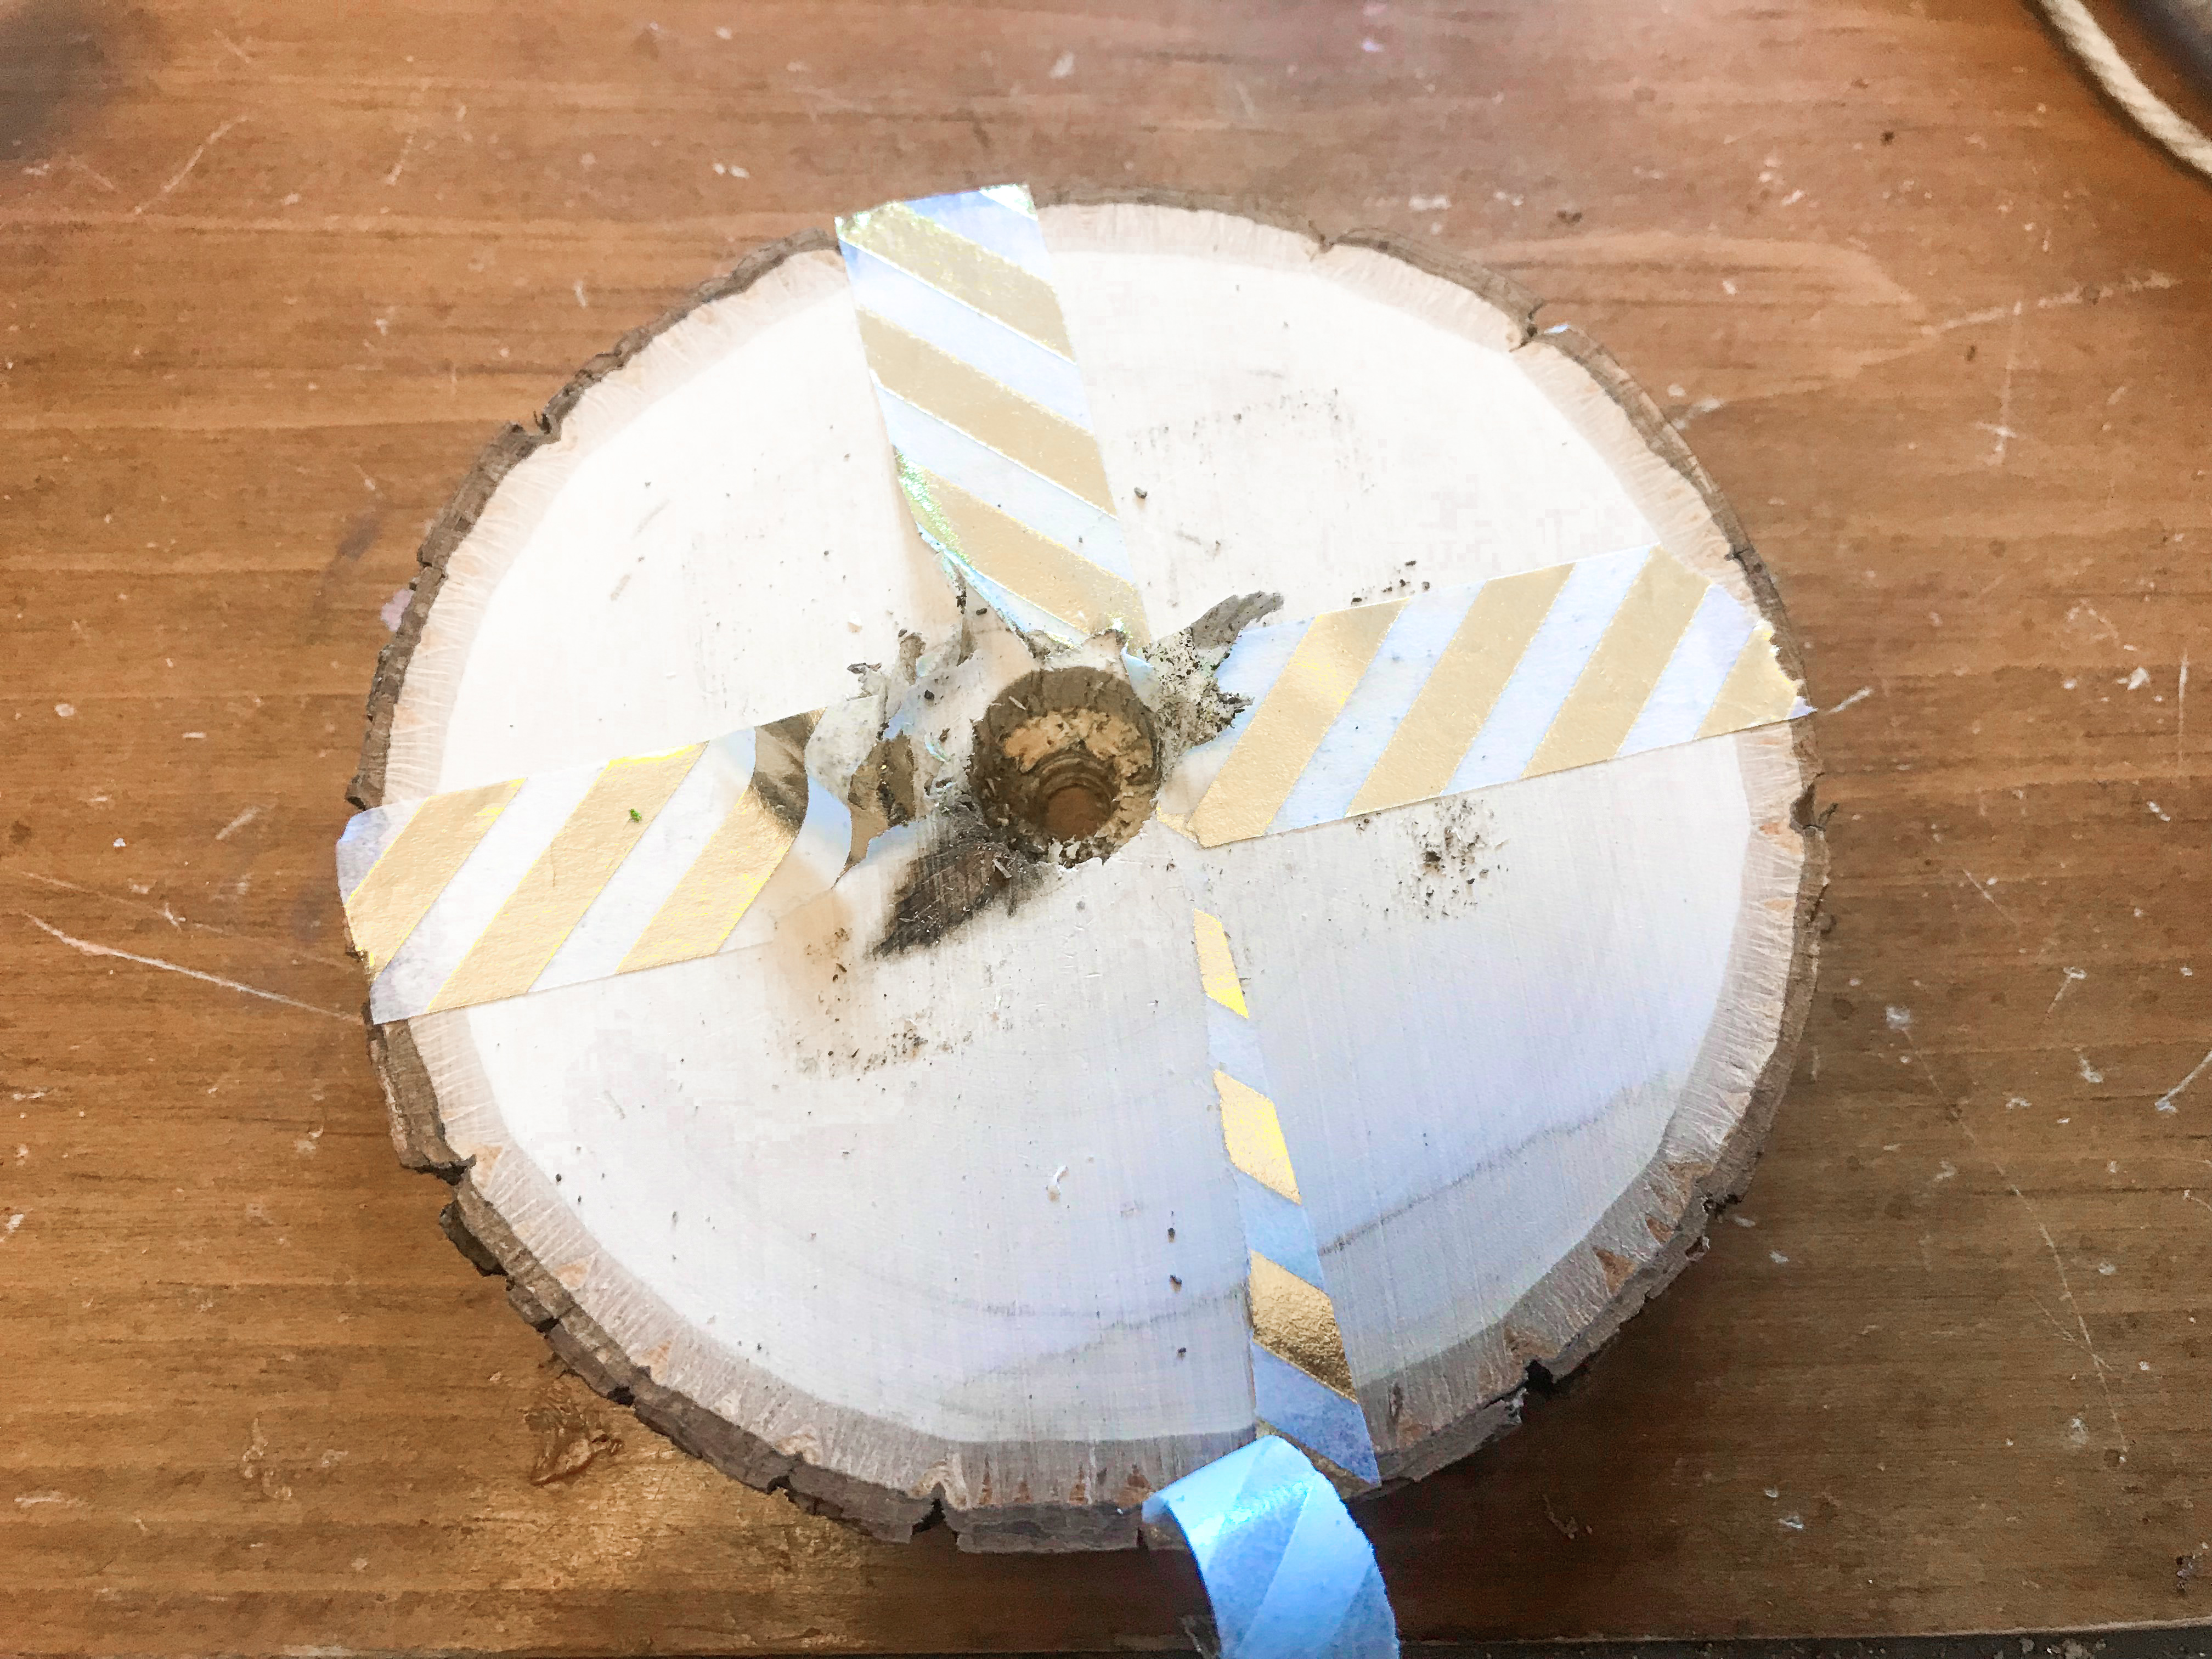
Remove the Washi tape and flip over so the little hole is visible.
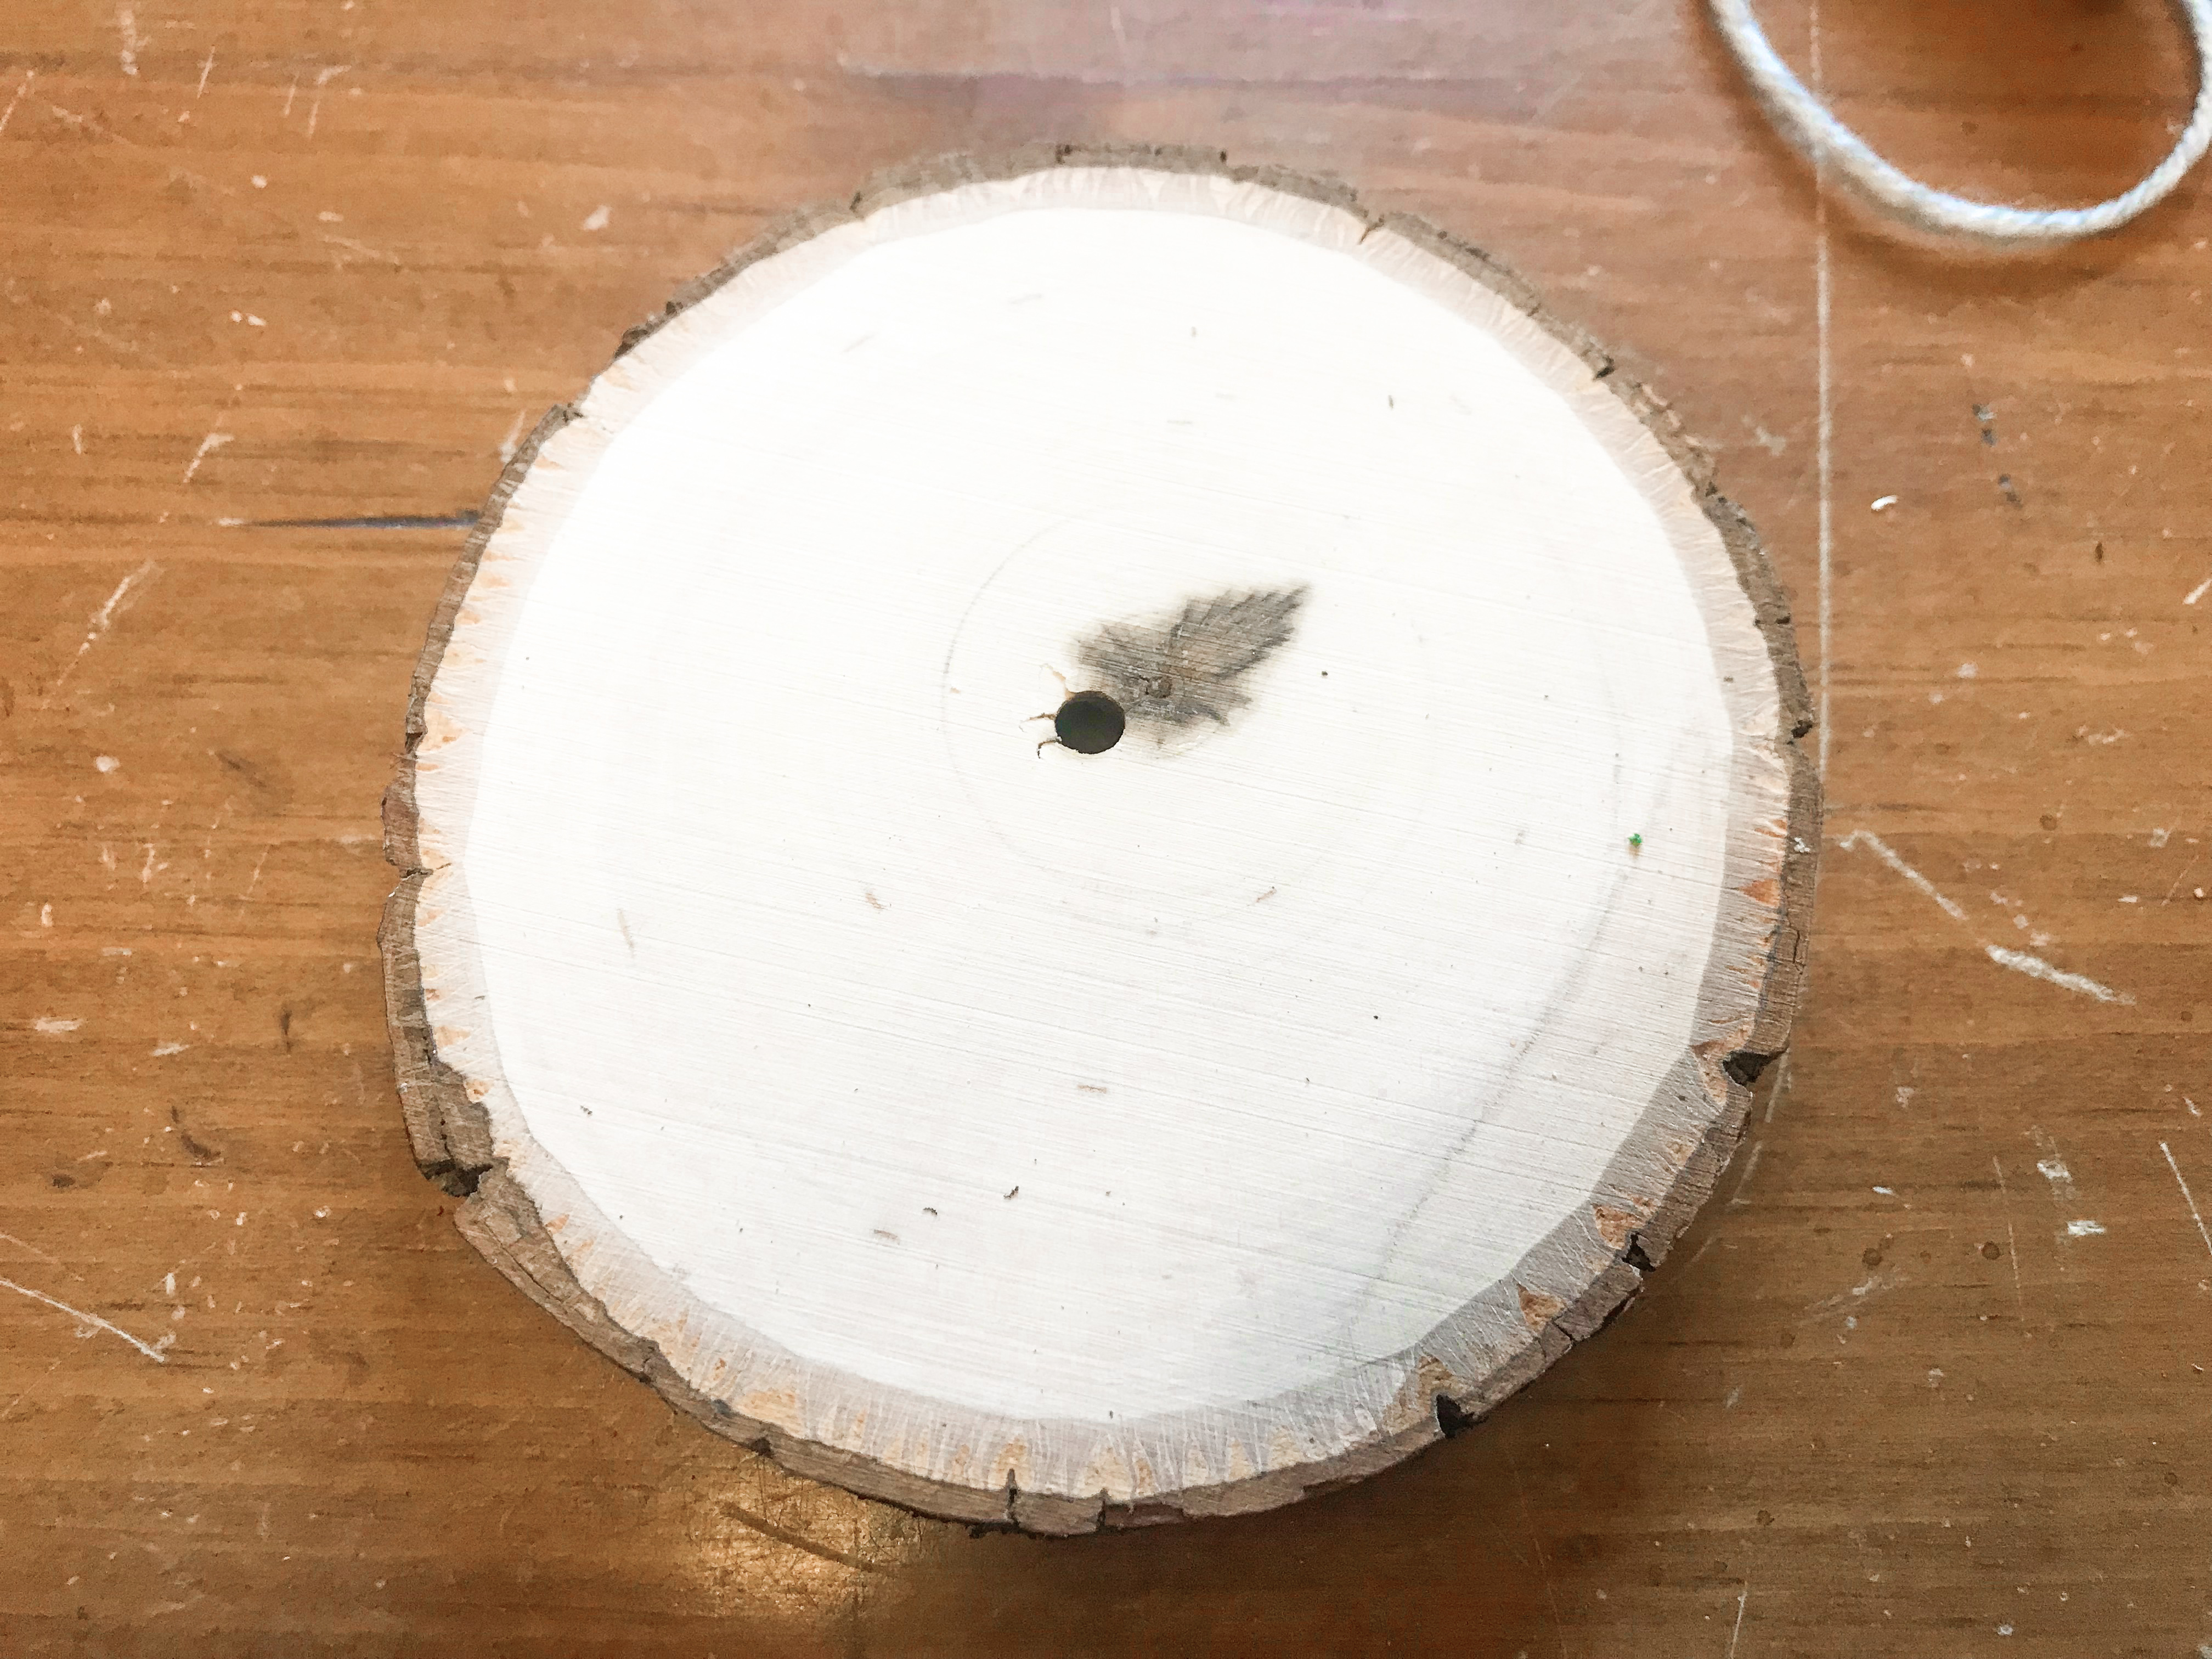
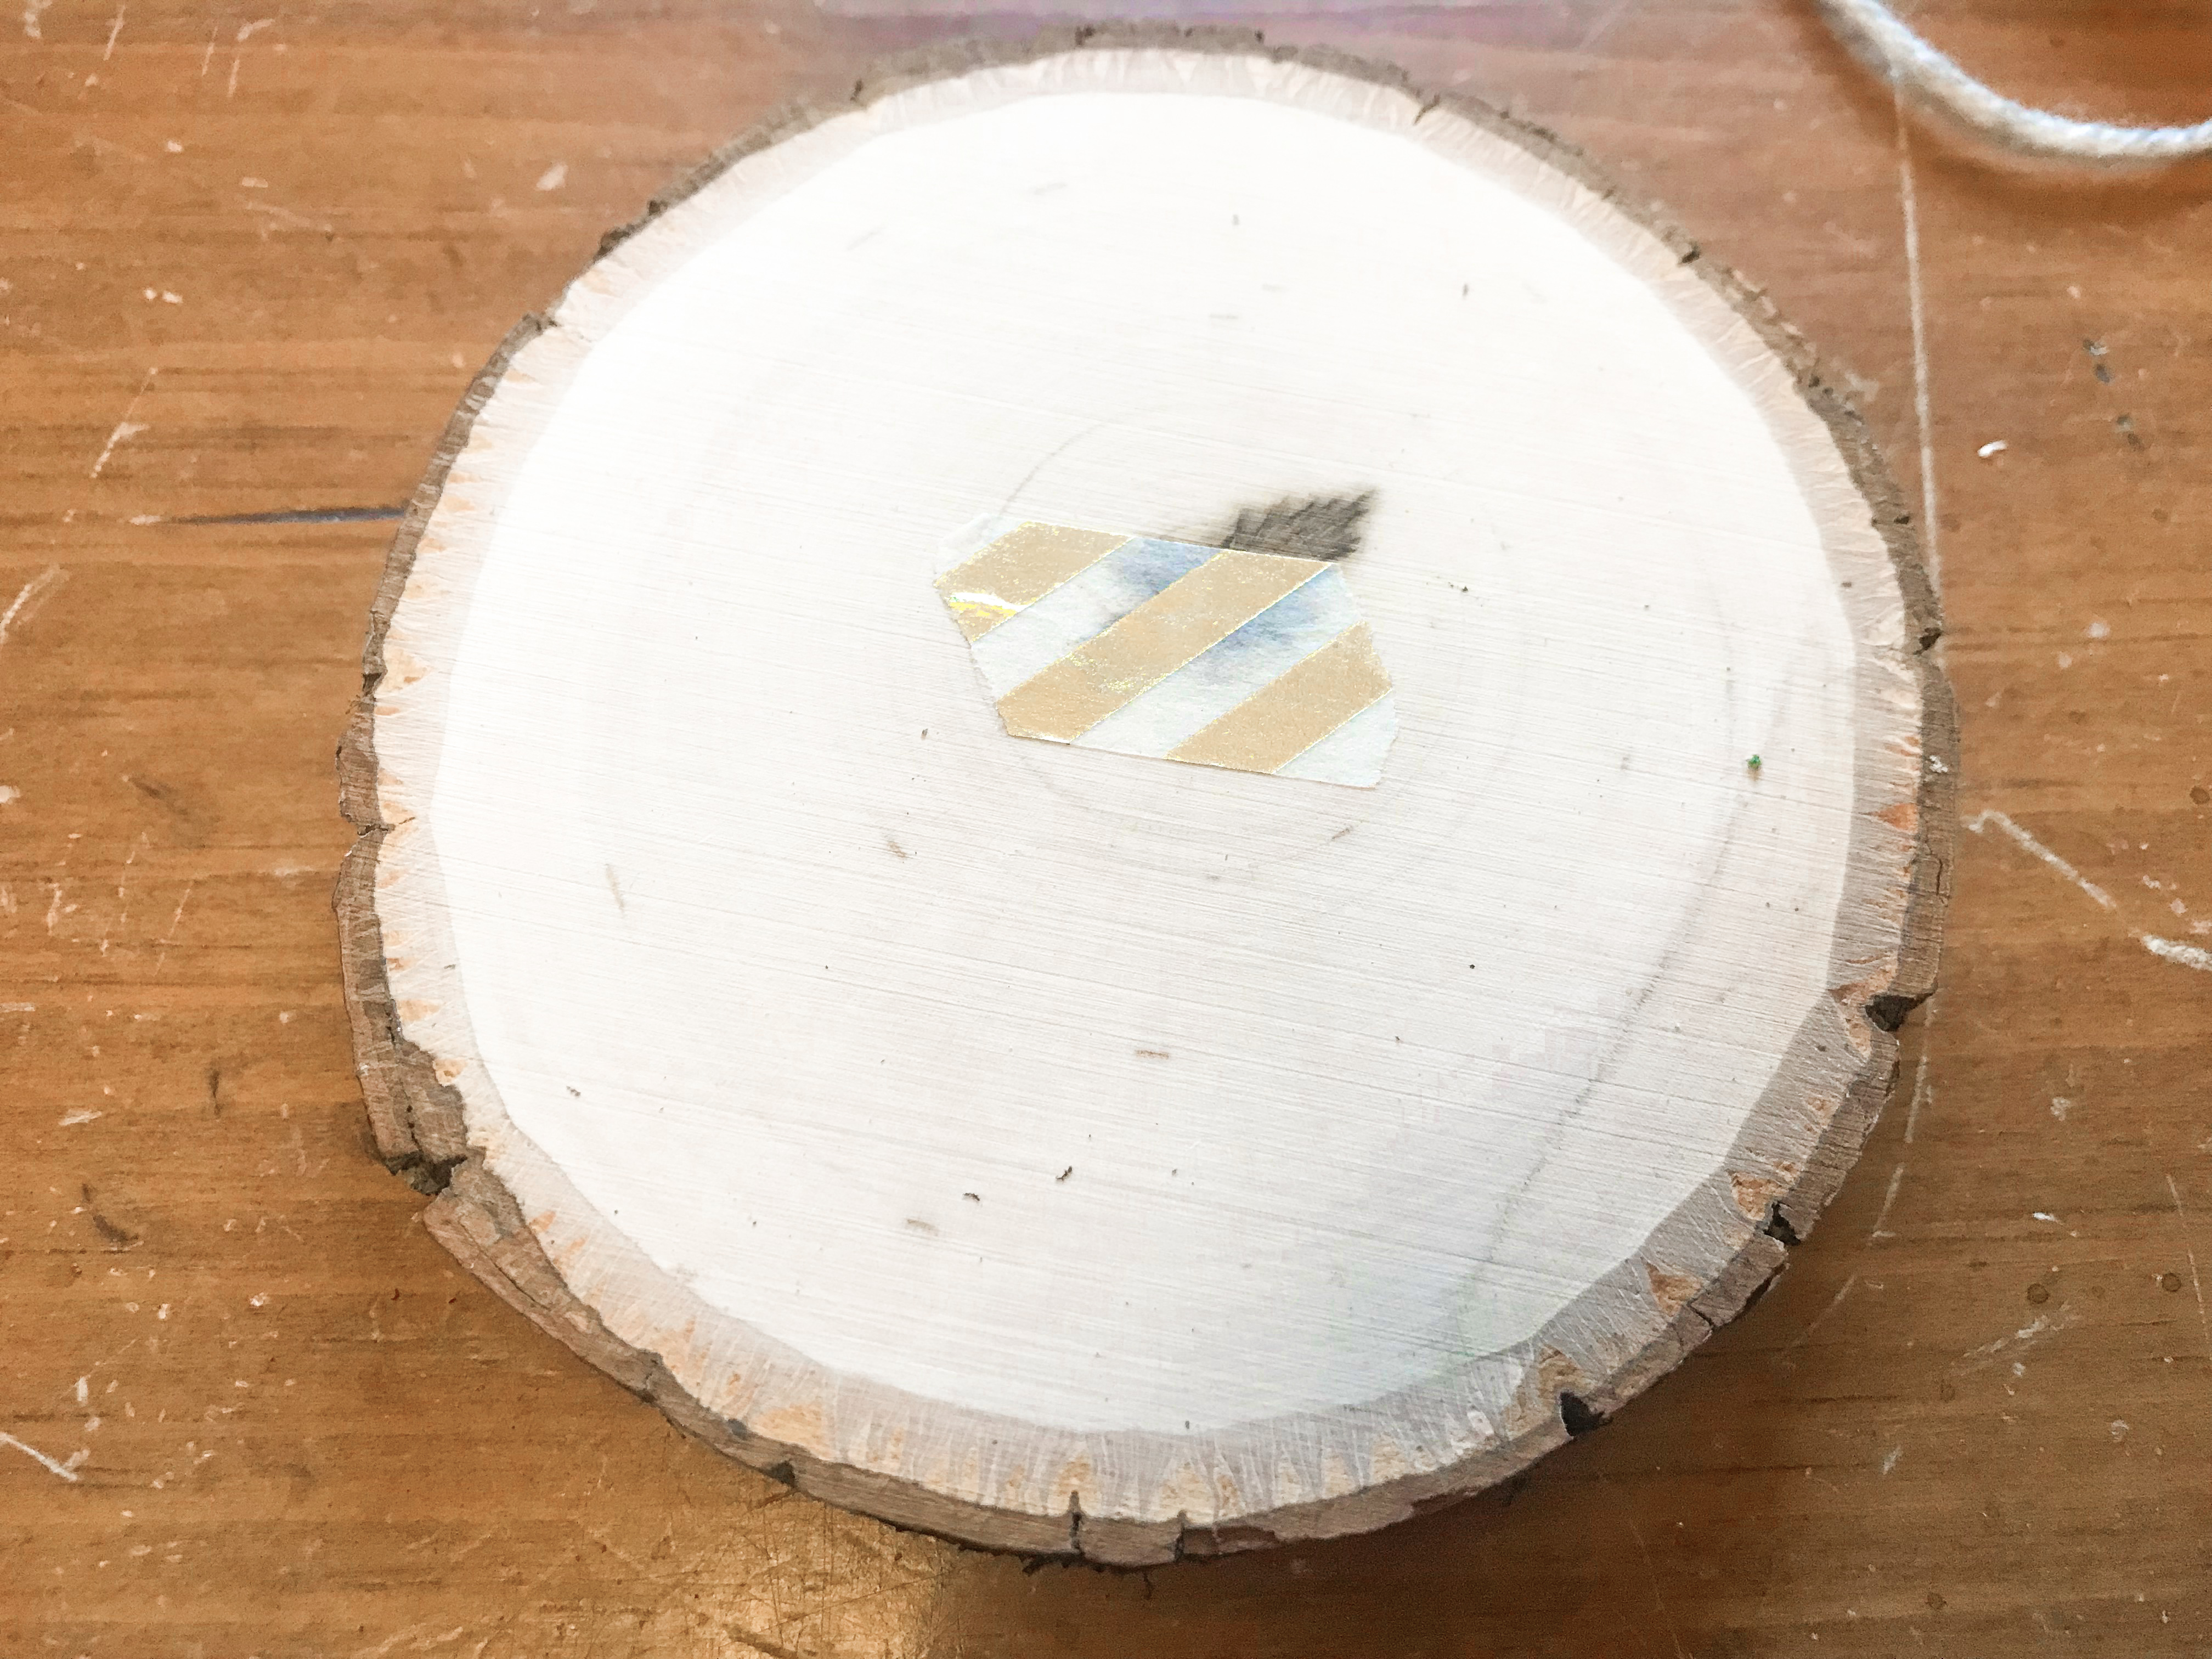
Cover the little hole with Washi tape.
Put aside for use in a few minutes!
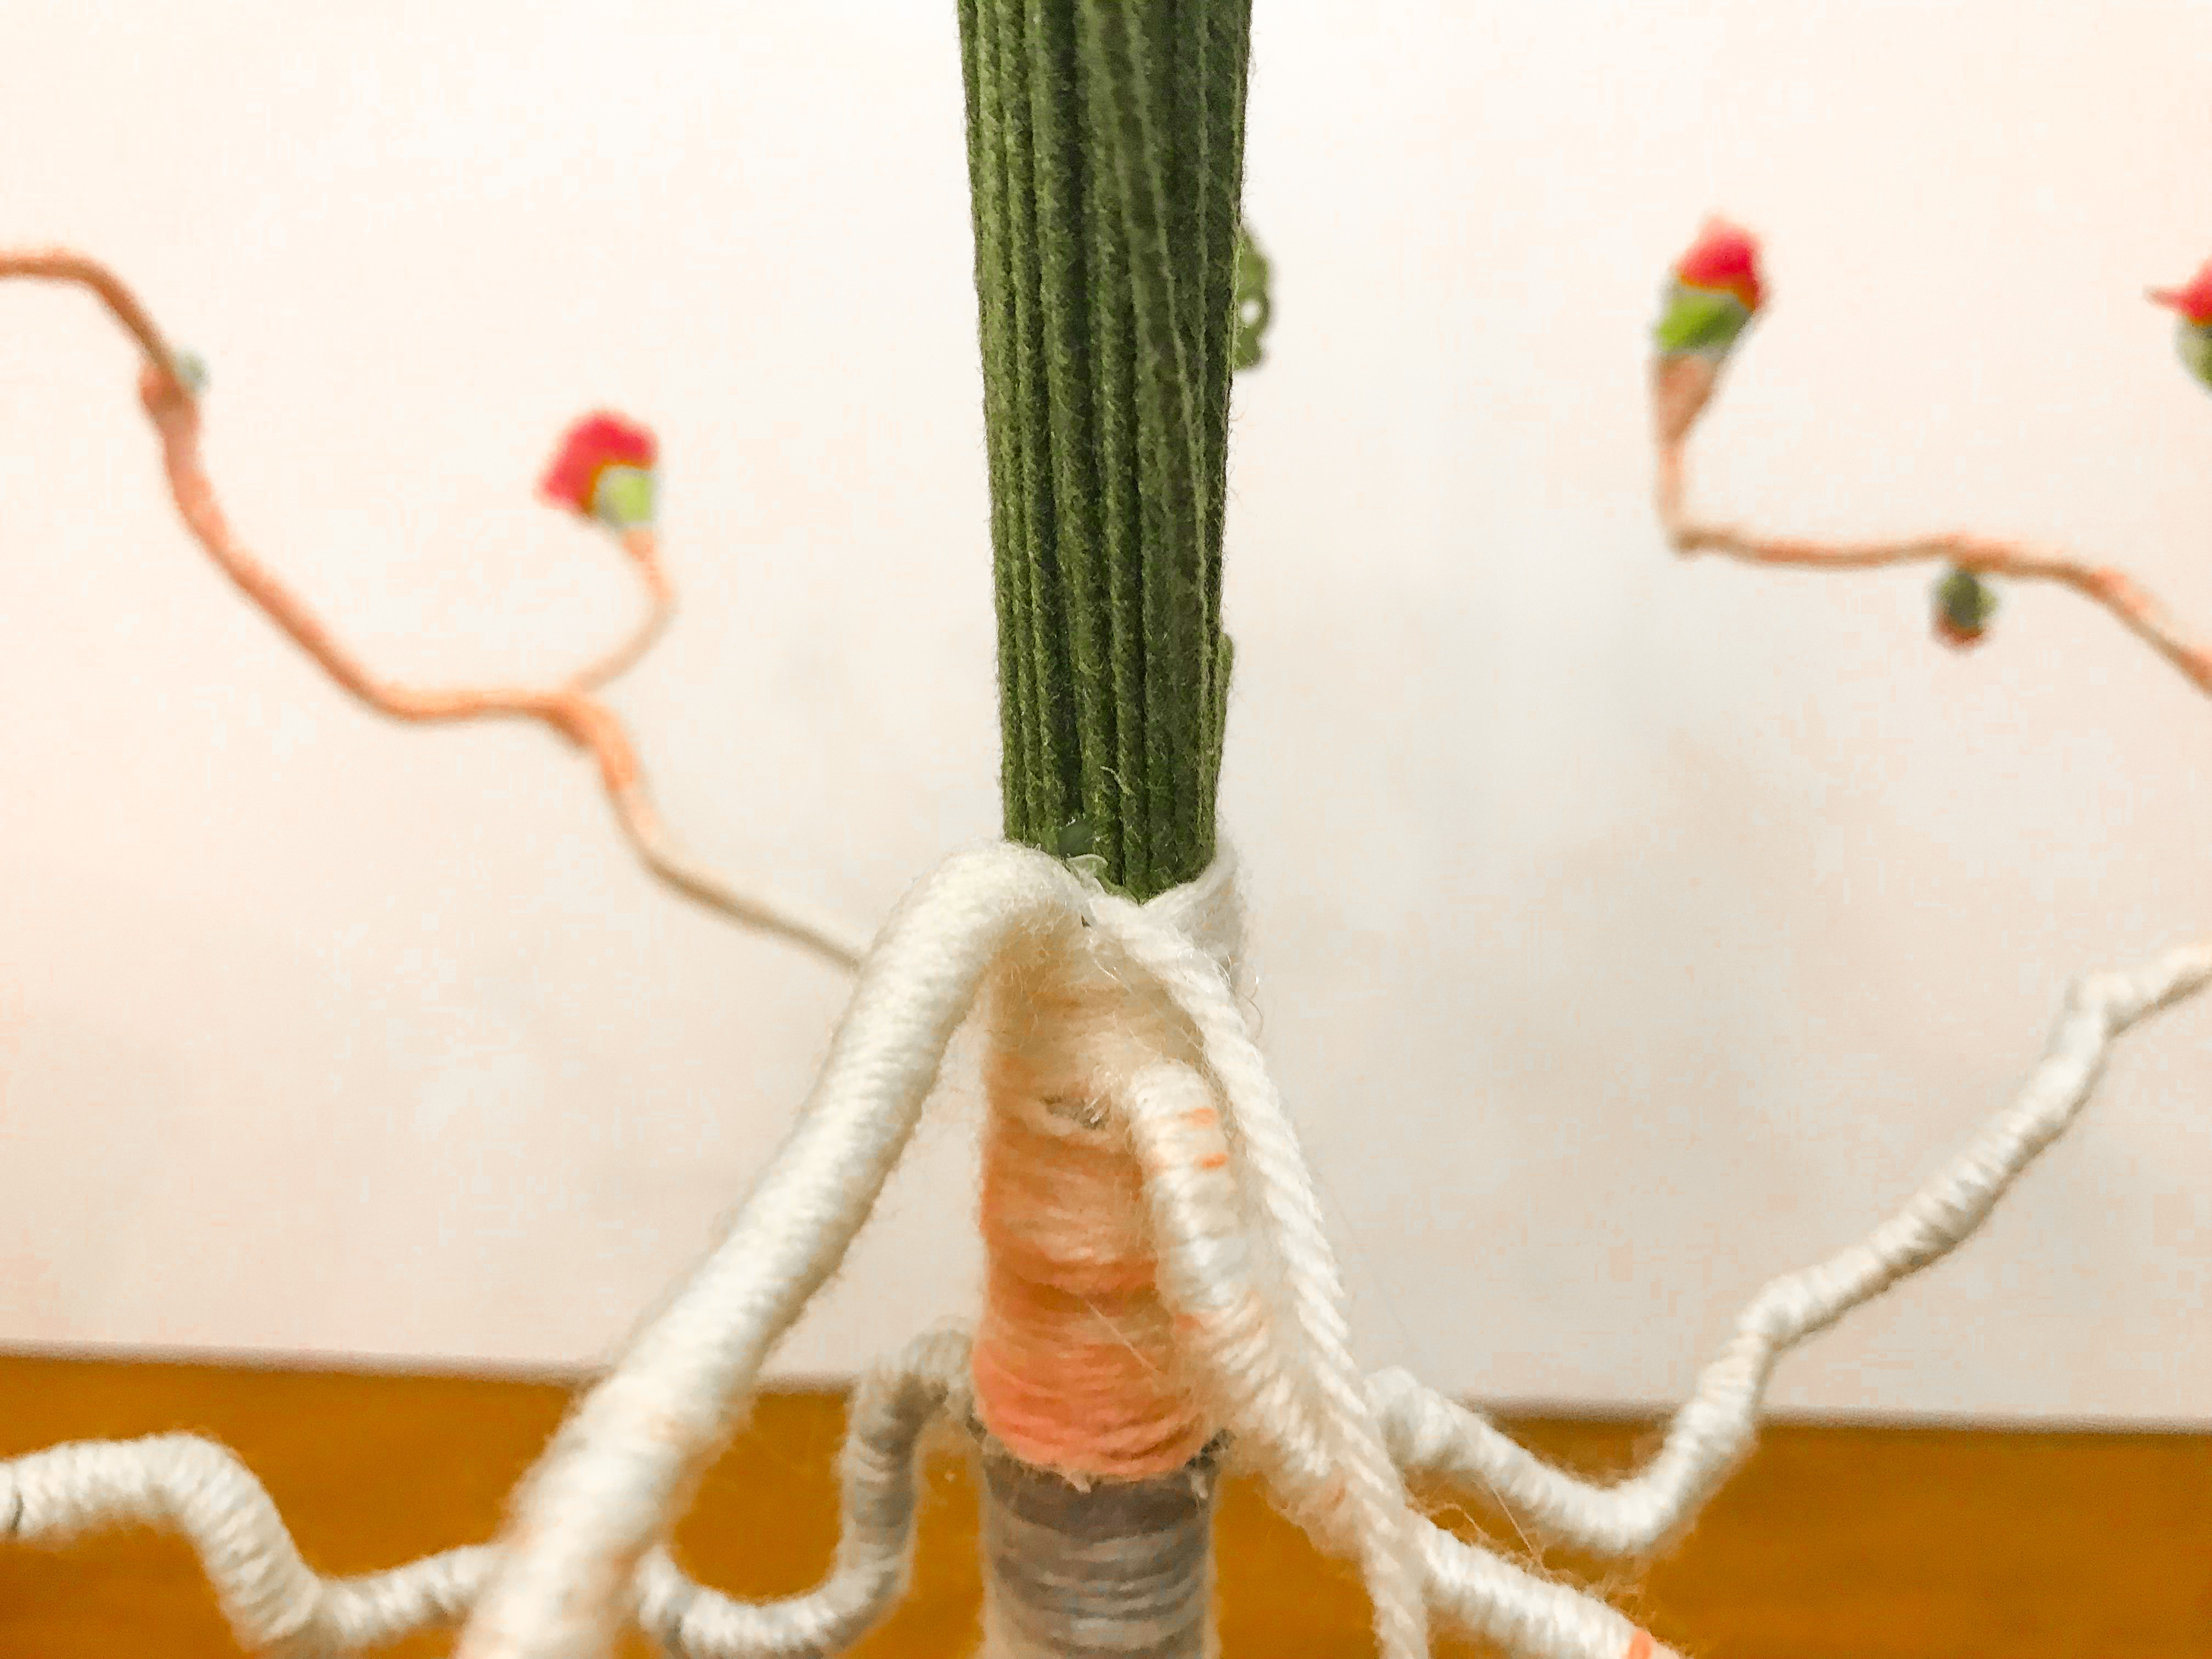
Assemble the Easter Tree
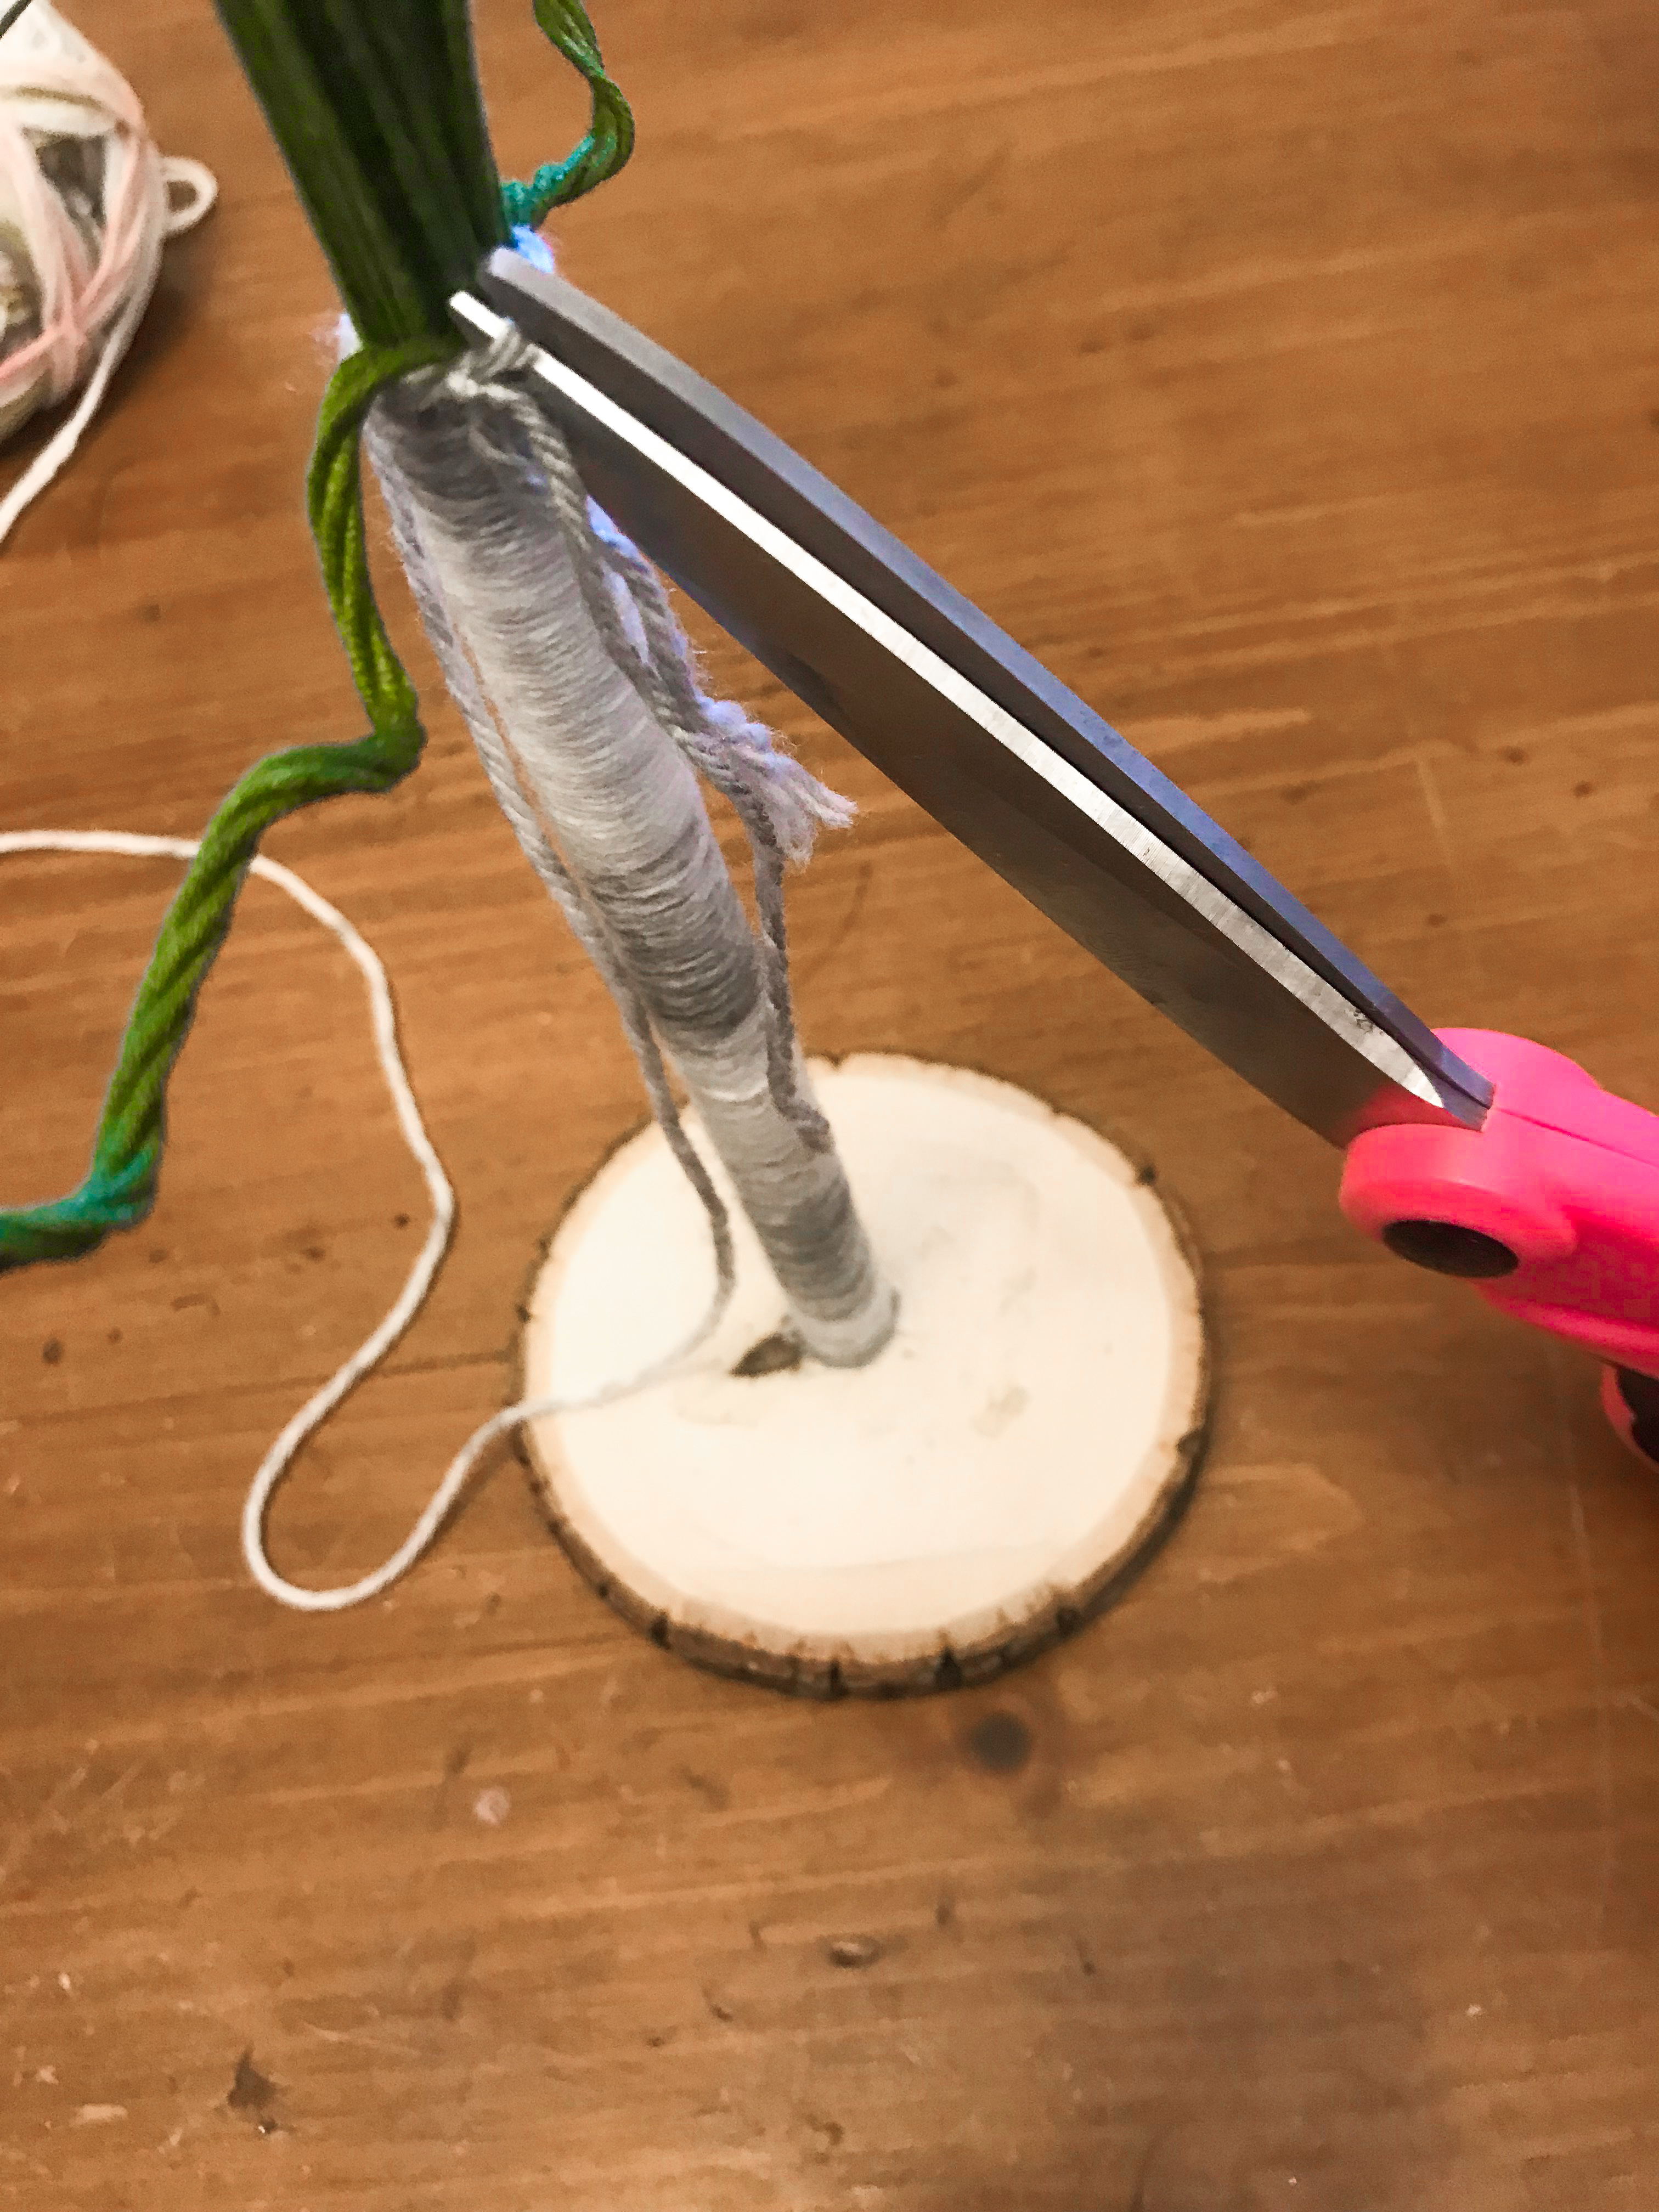
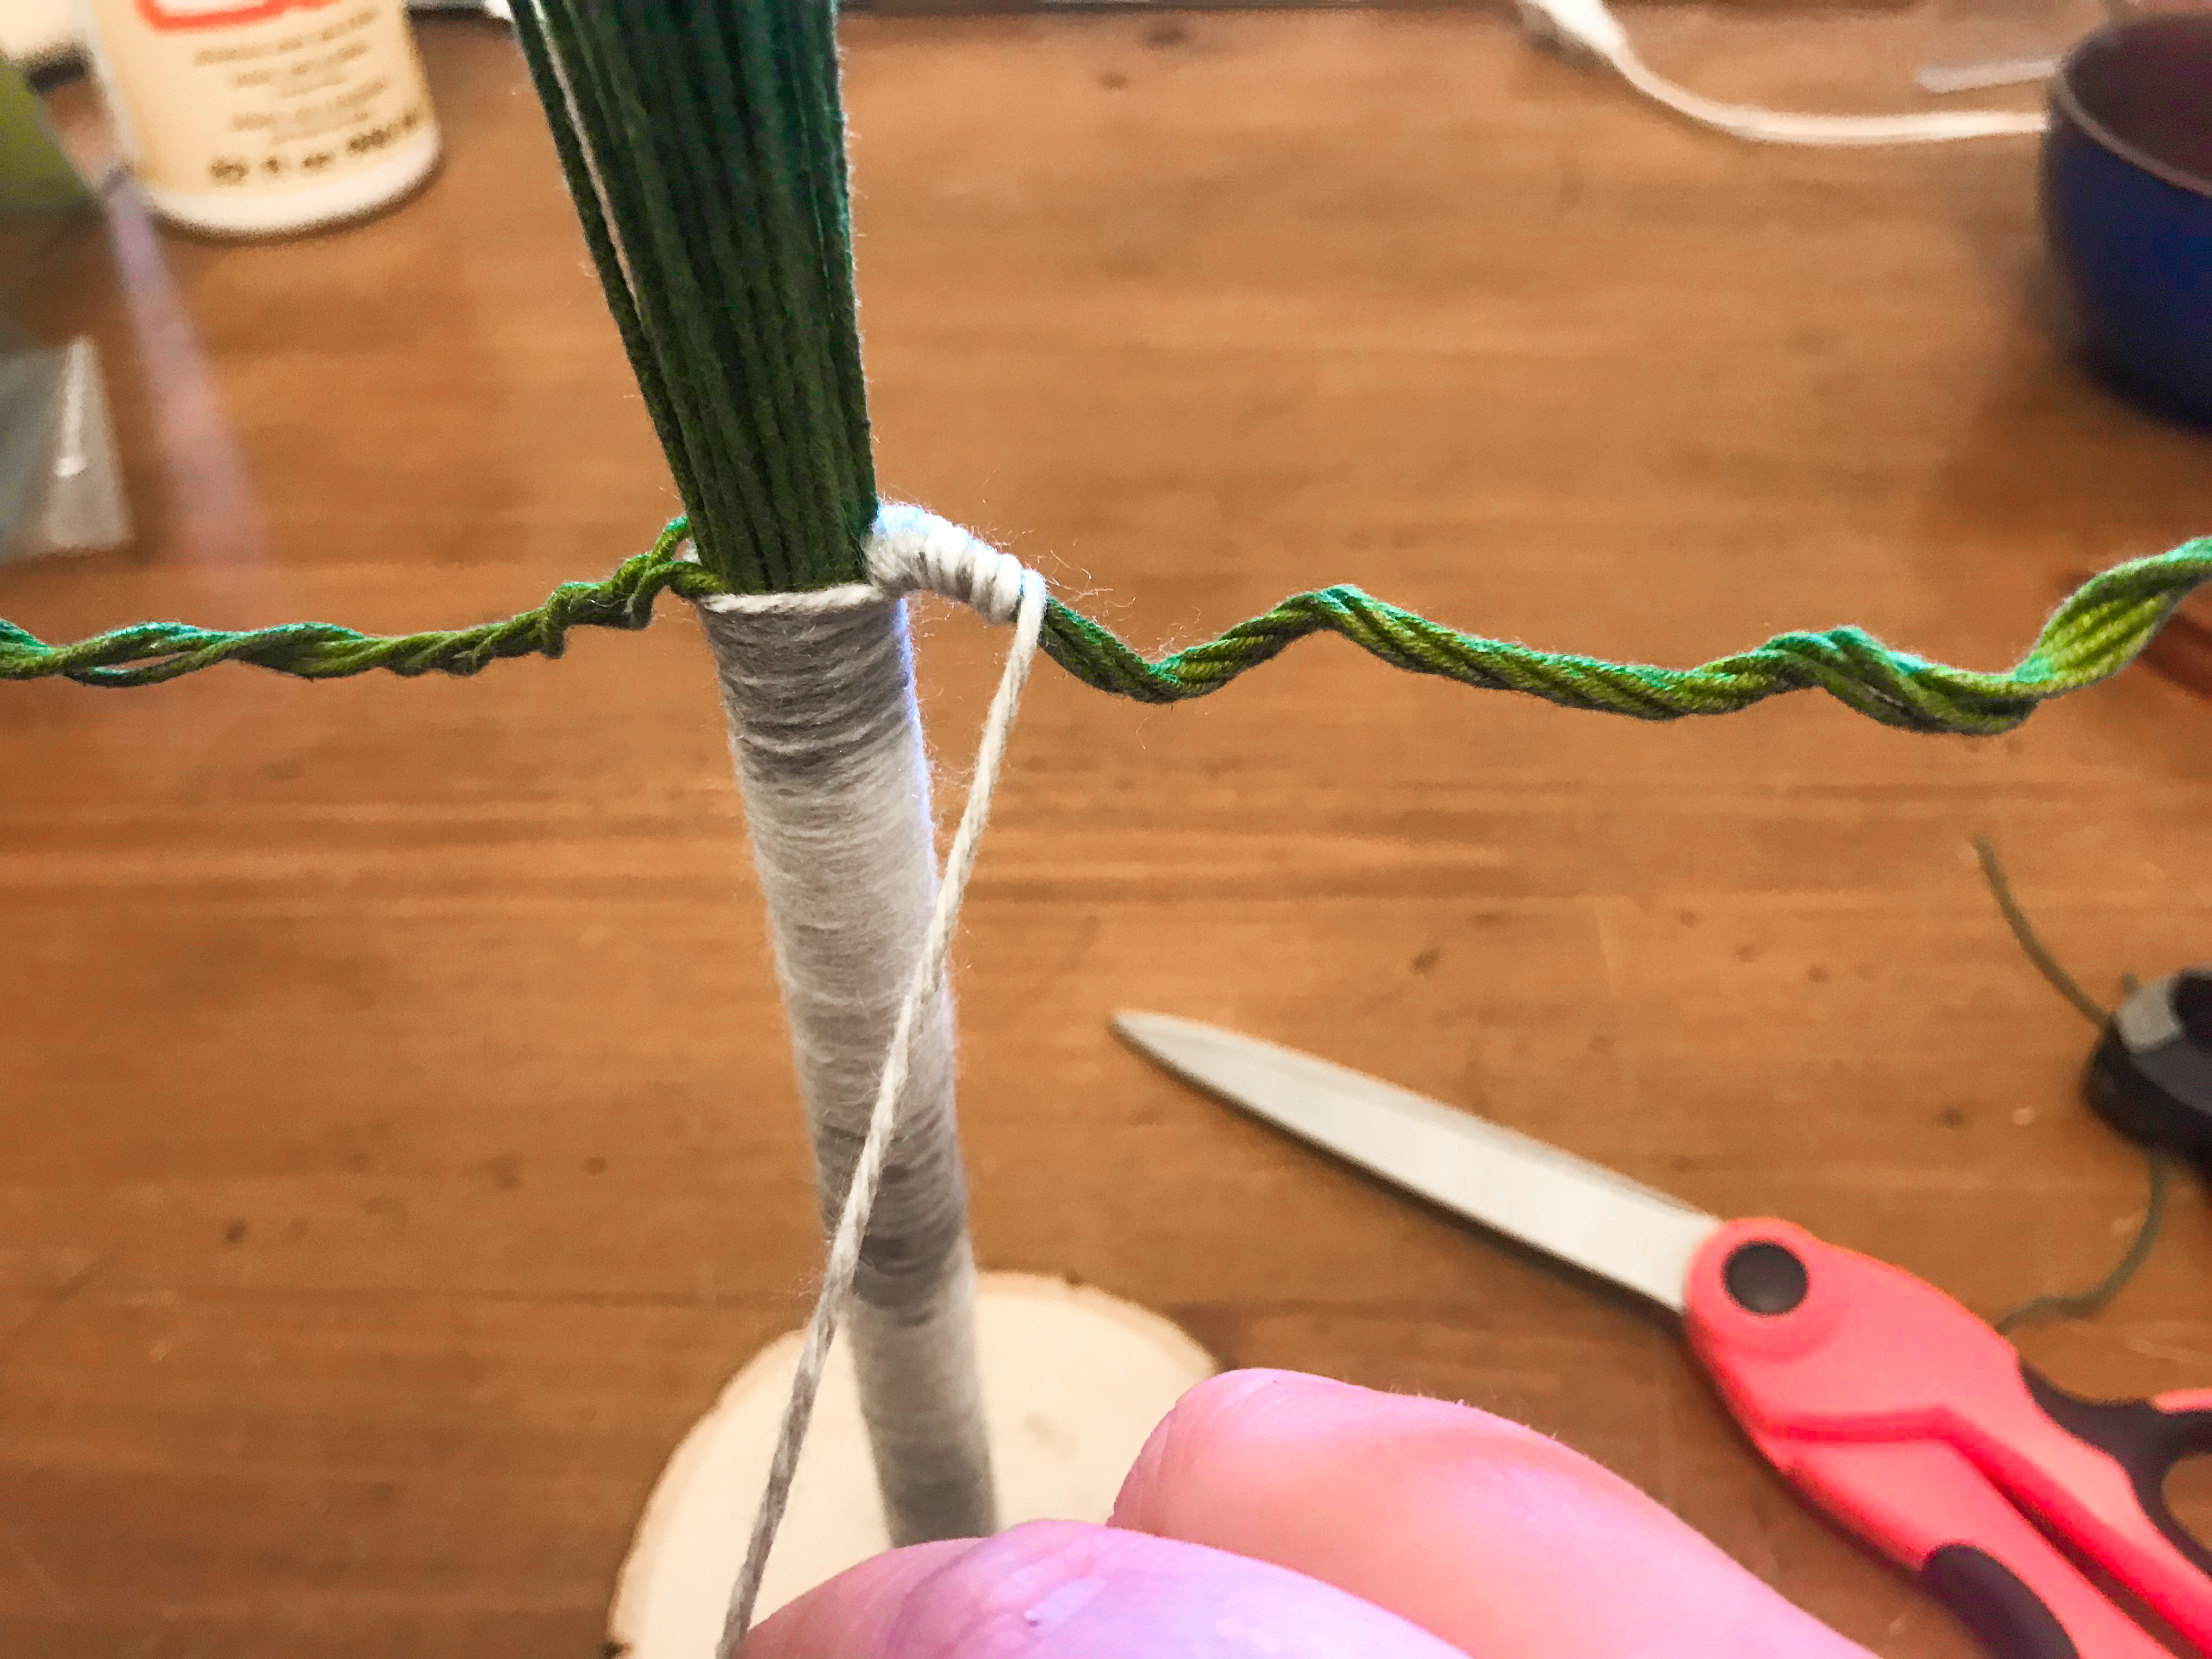
Tie a piece of yarn about 5 inches from one side of the bundle of floral stems.
Then tie the string attached to the skien about a quarter of an inch from the end of the floral stems.
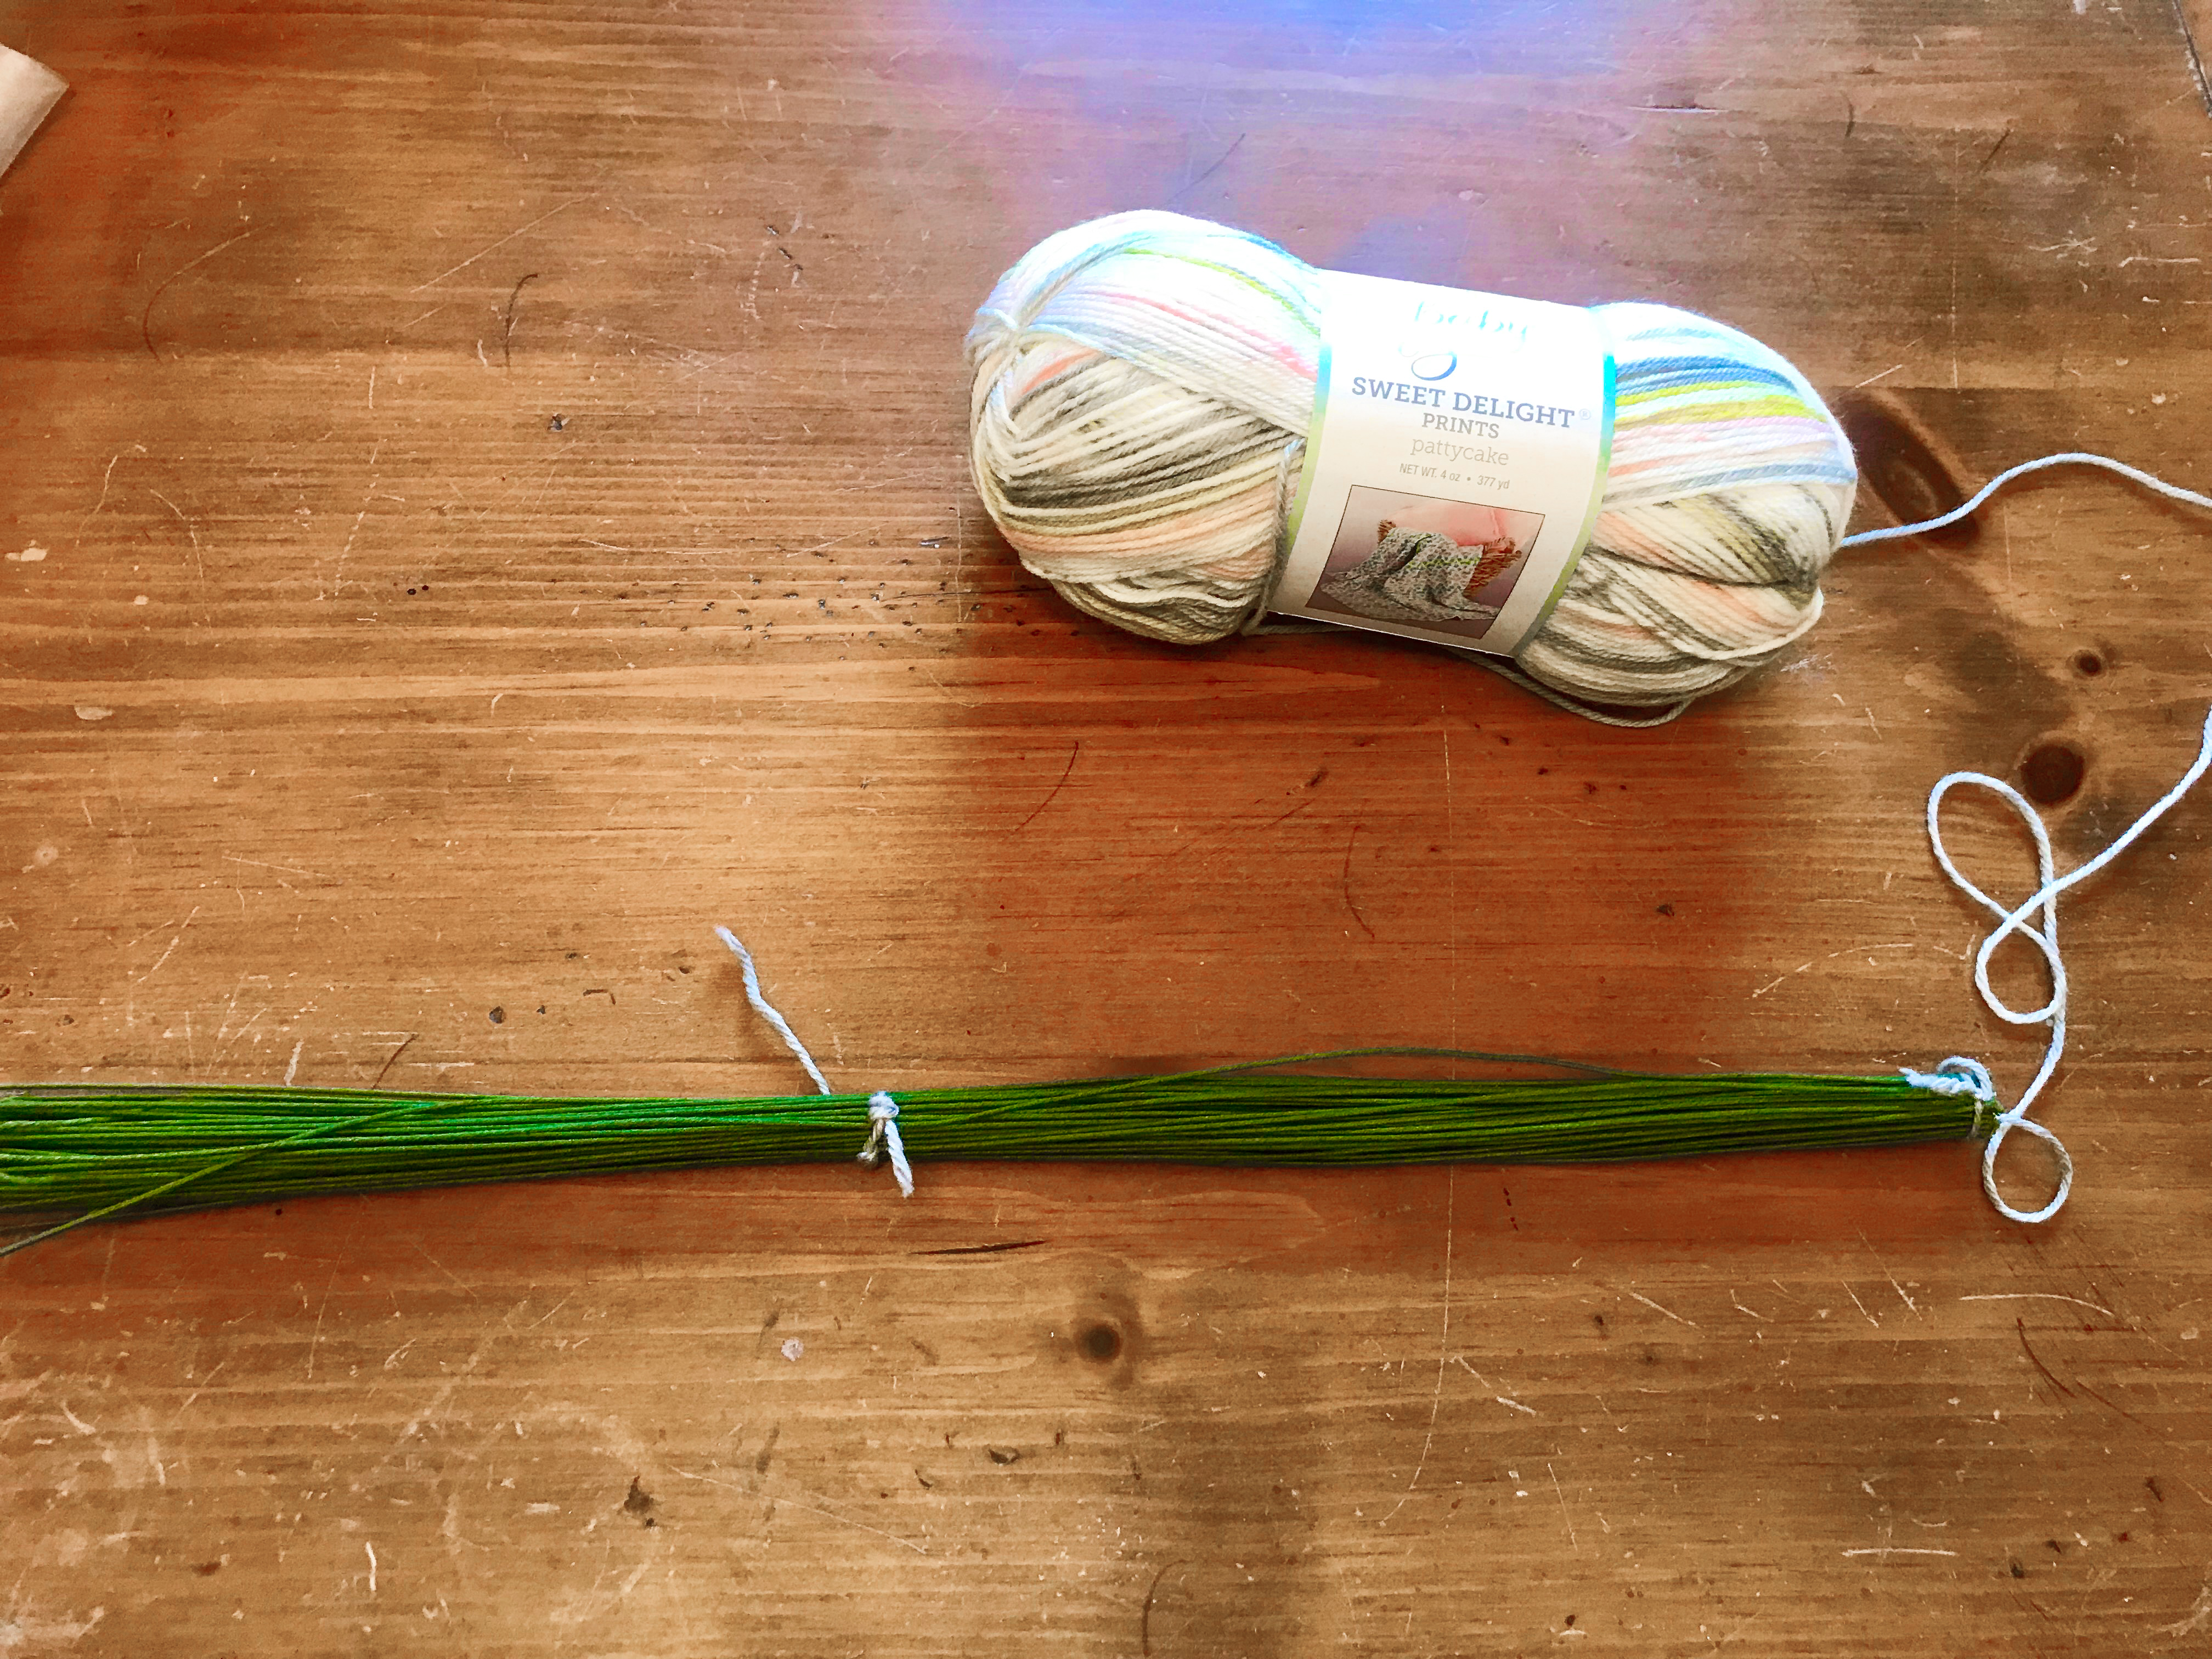
Wrap the yarn tightly around the bundle of floral stems starting at the end attached to the skien.
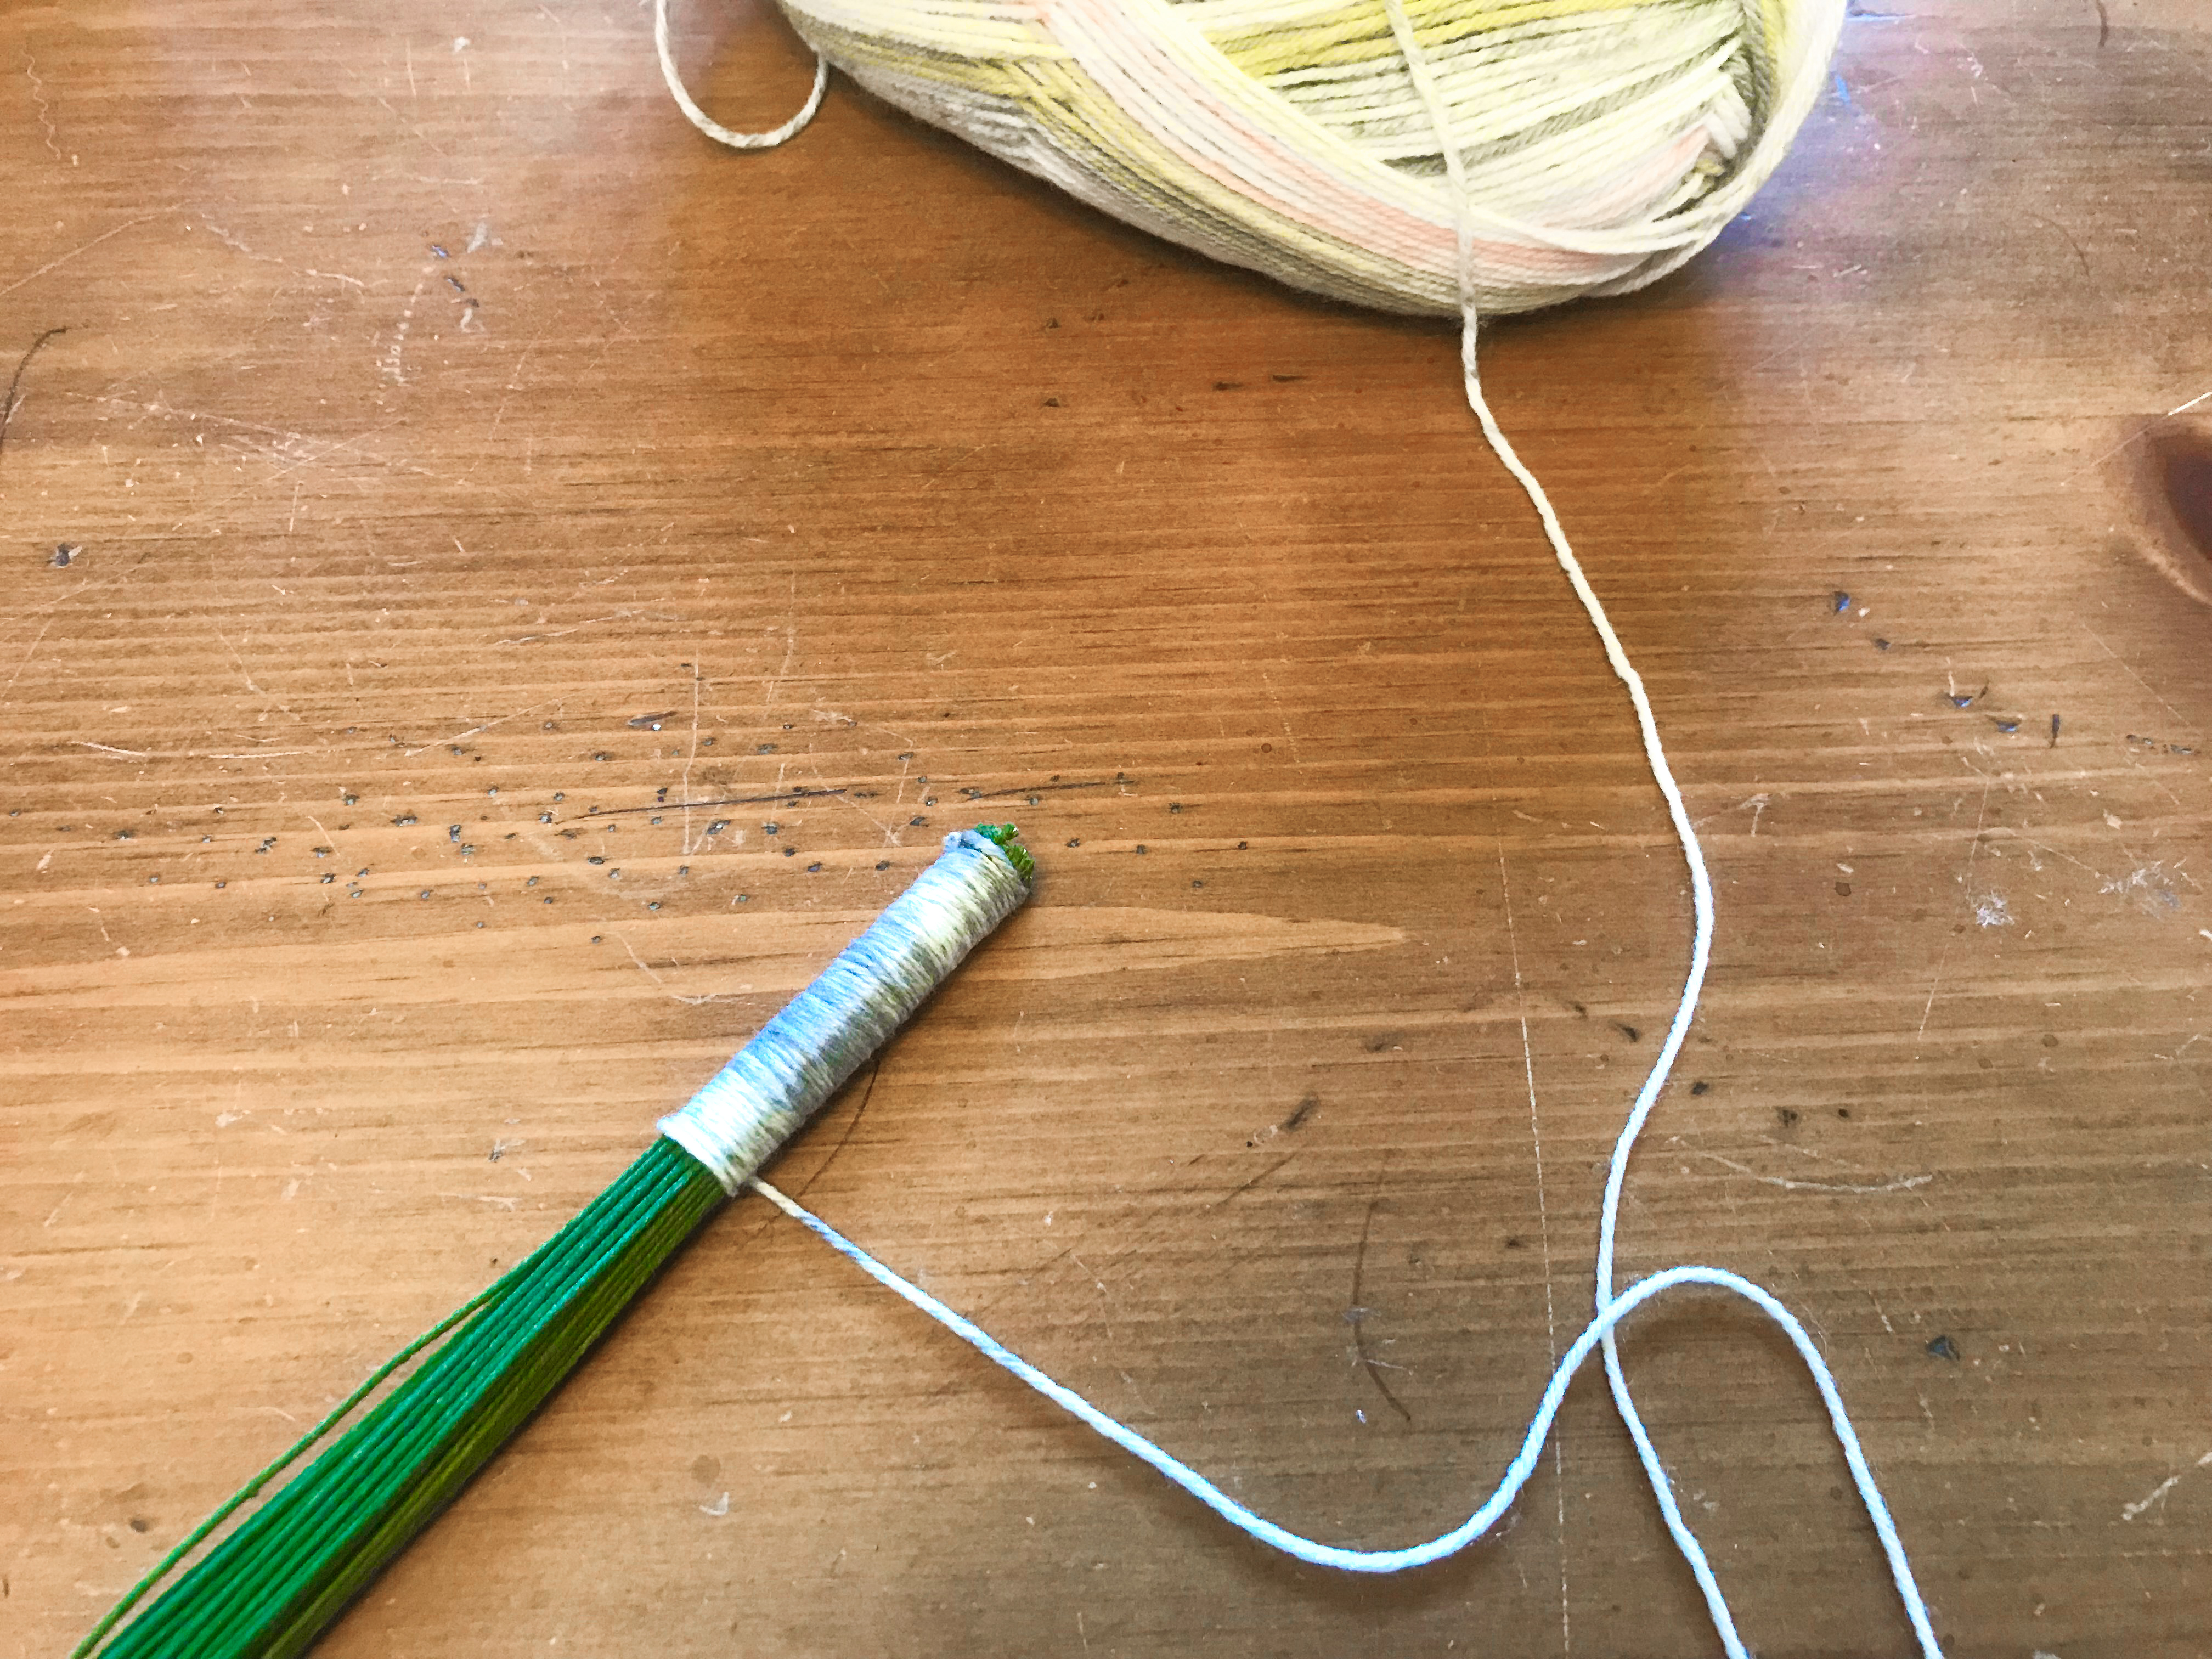
Stop wrapping when you reach the second piece of string.
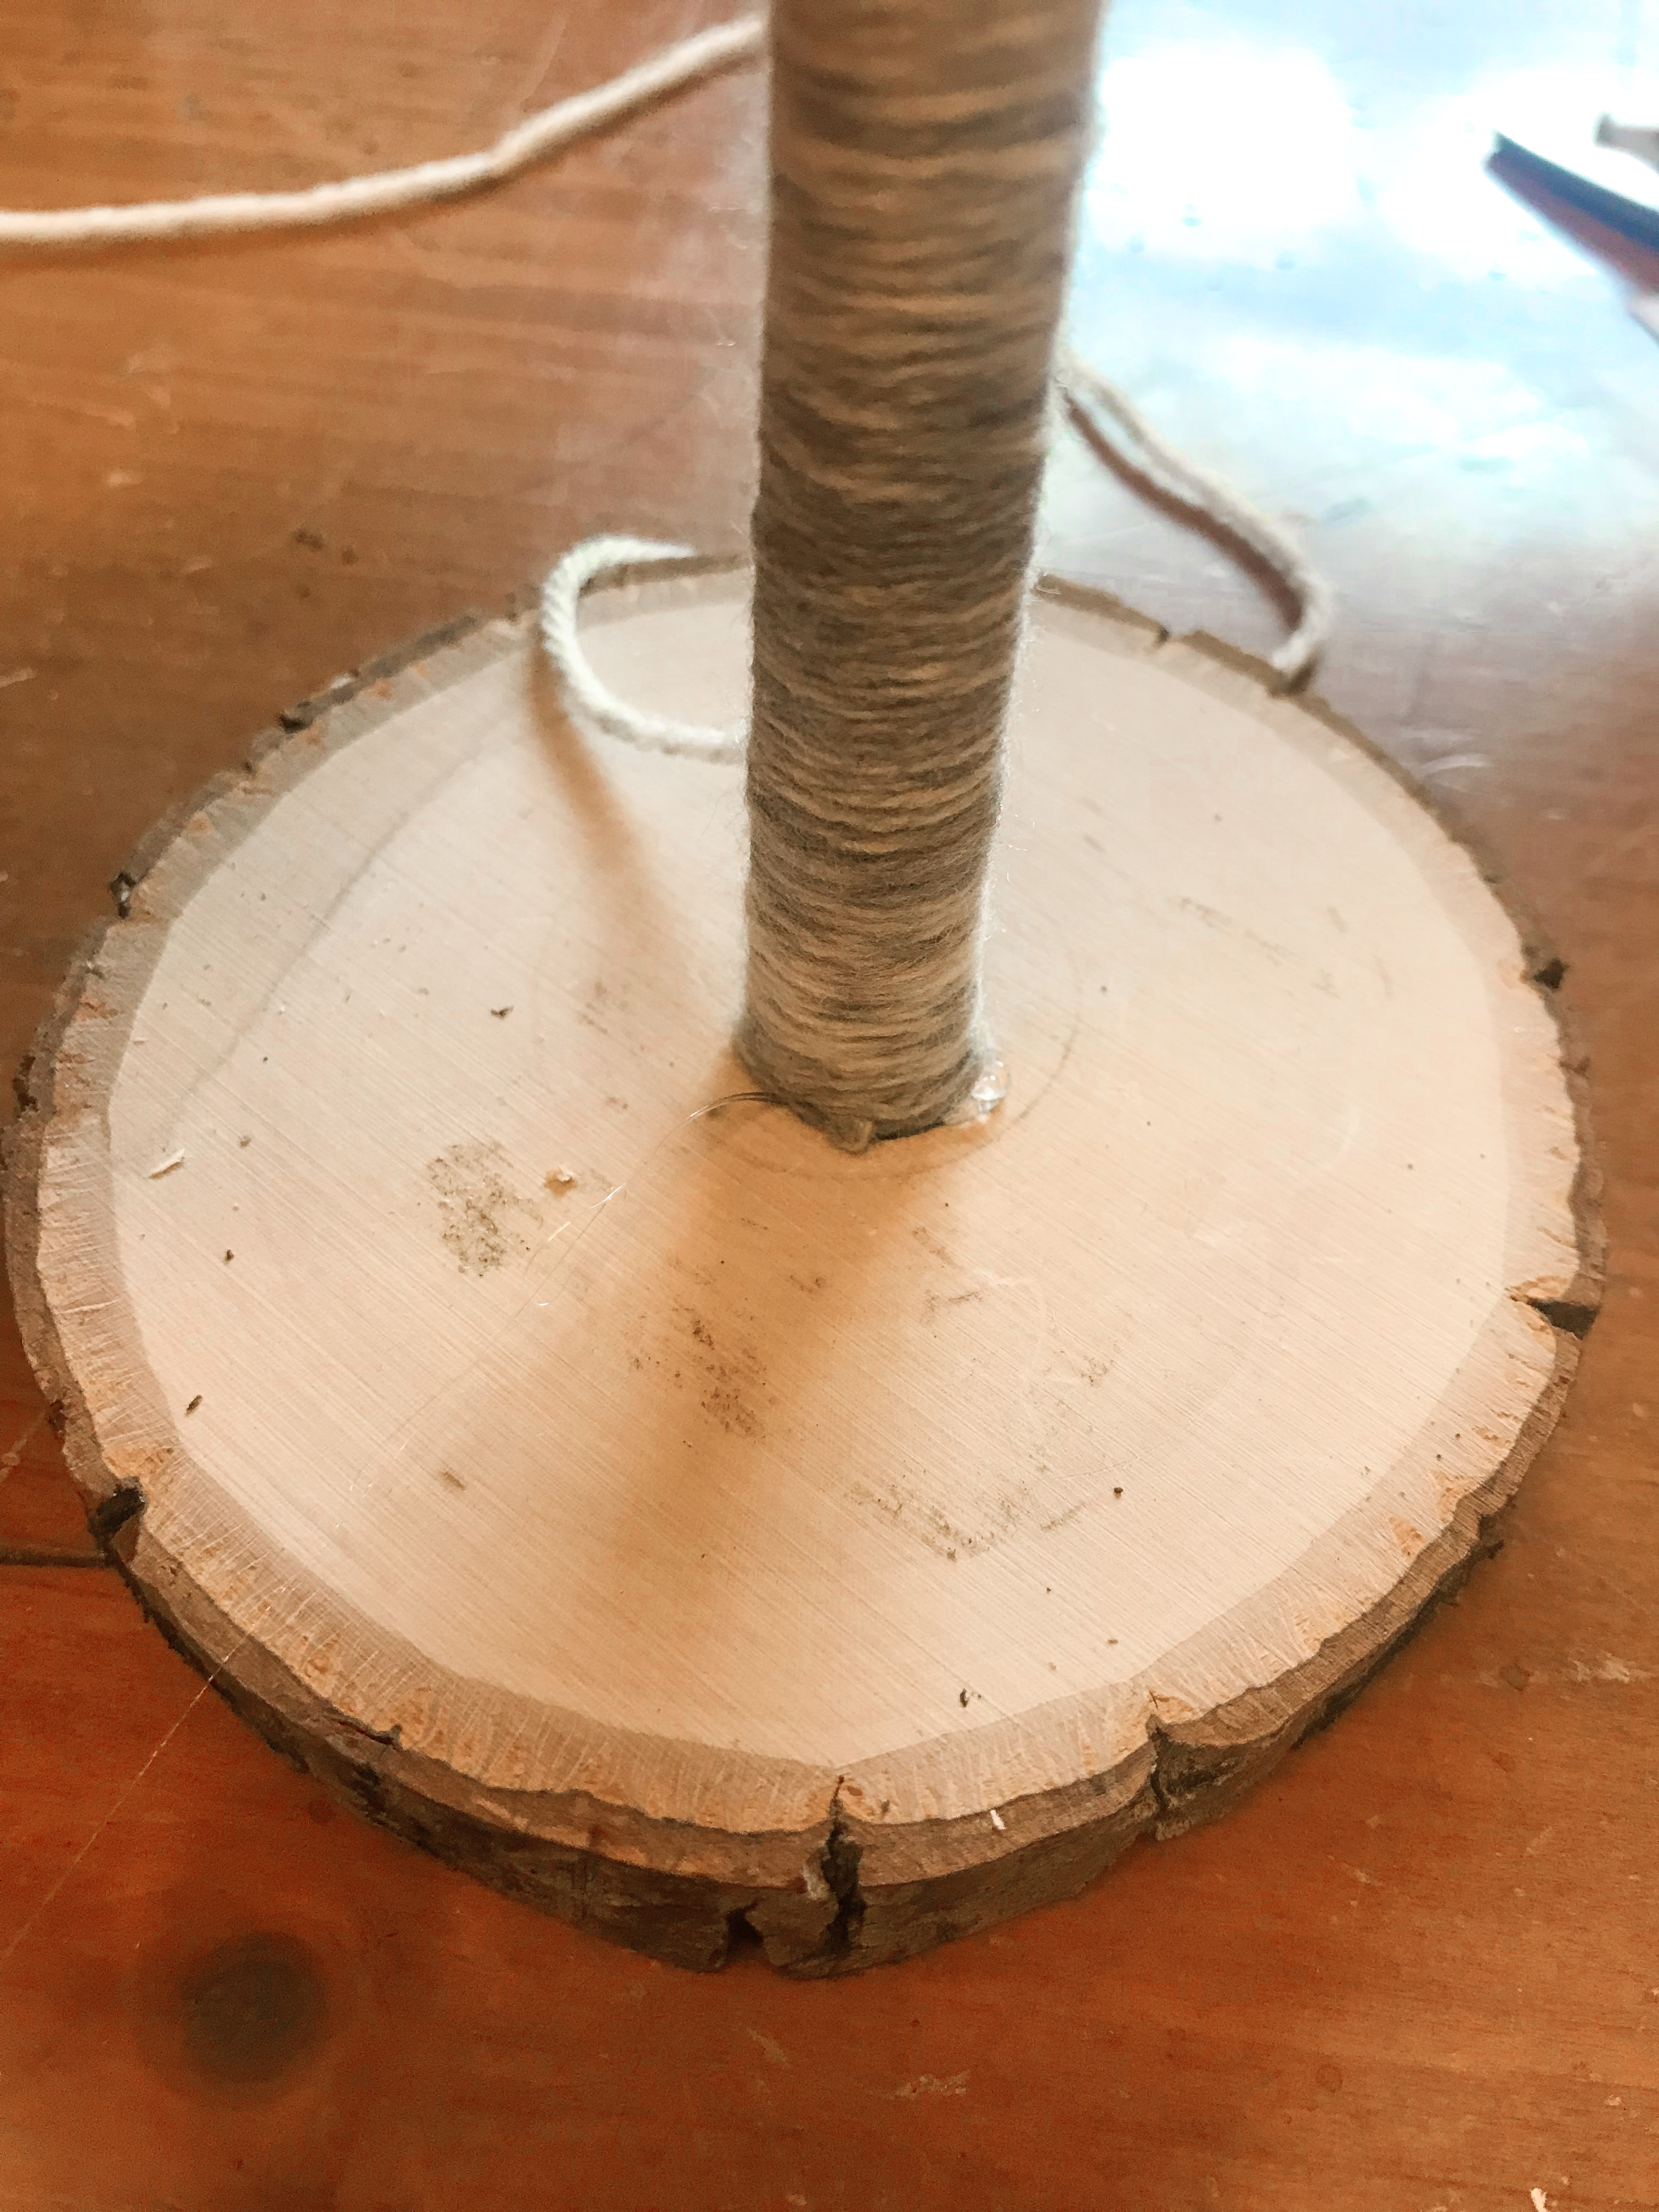
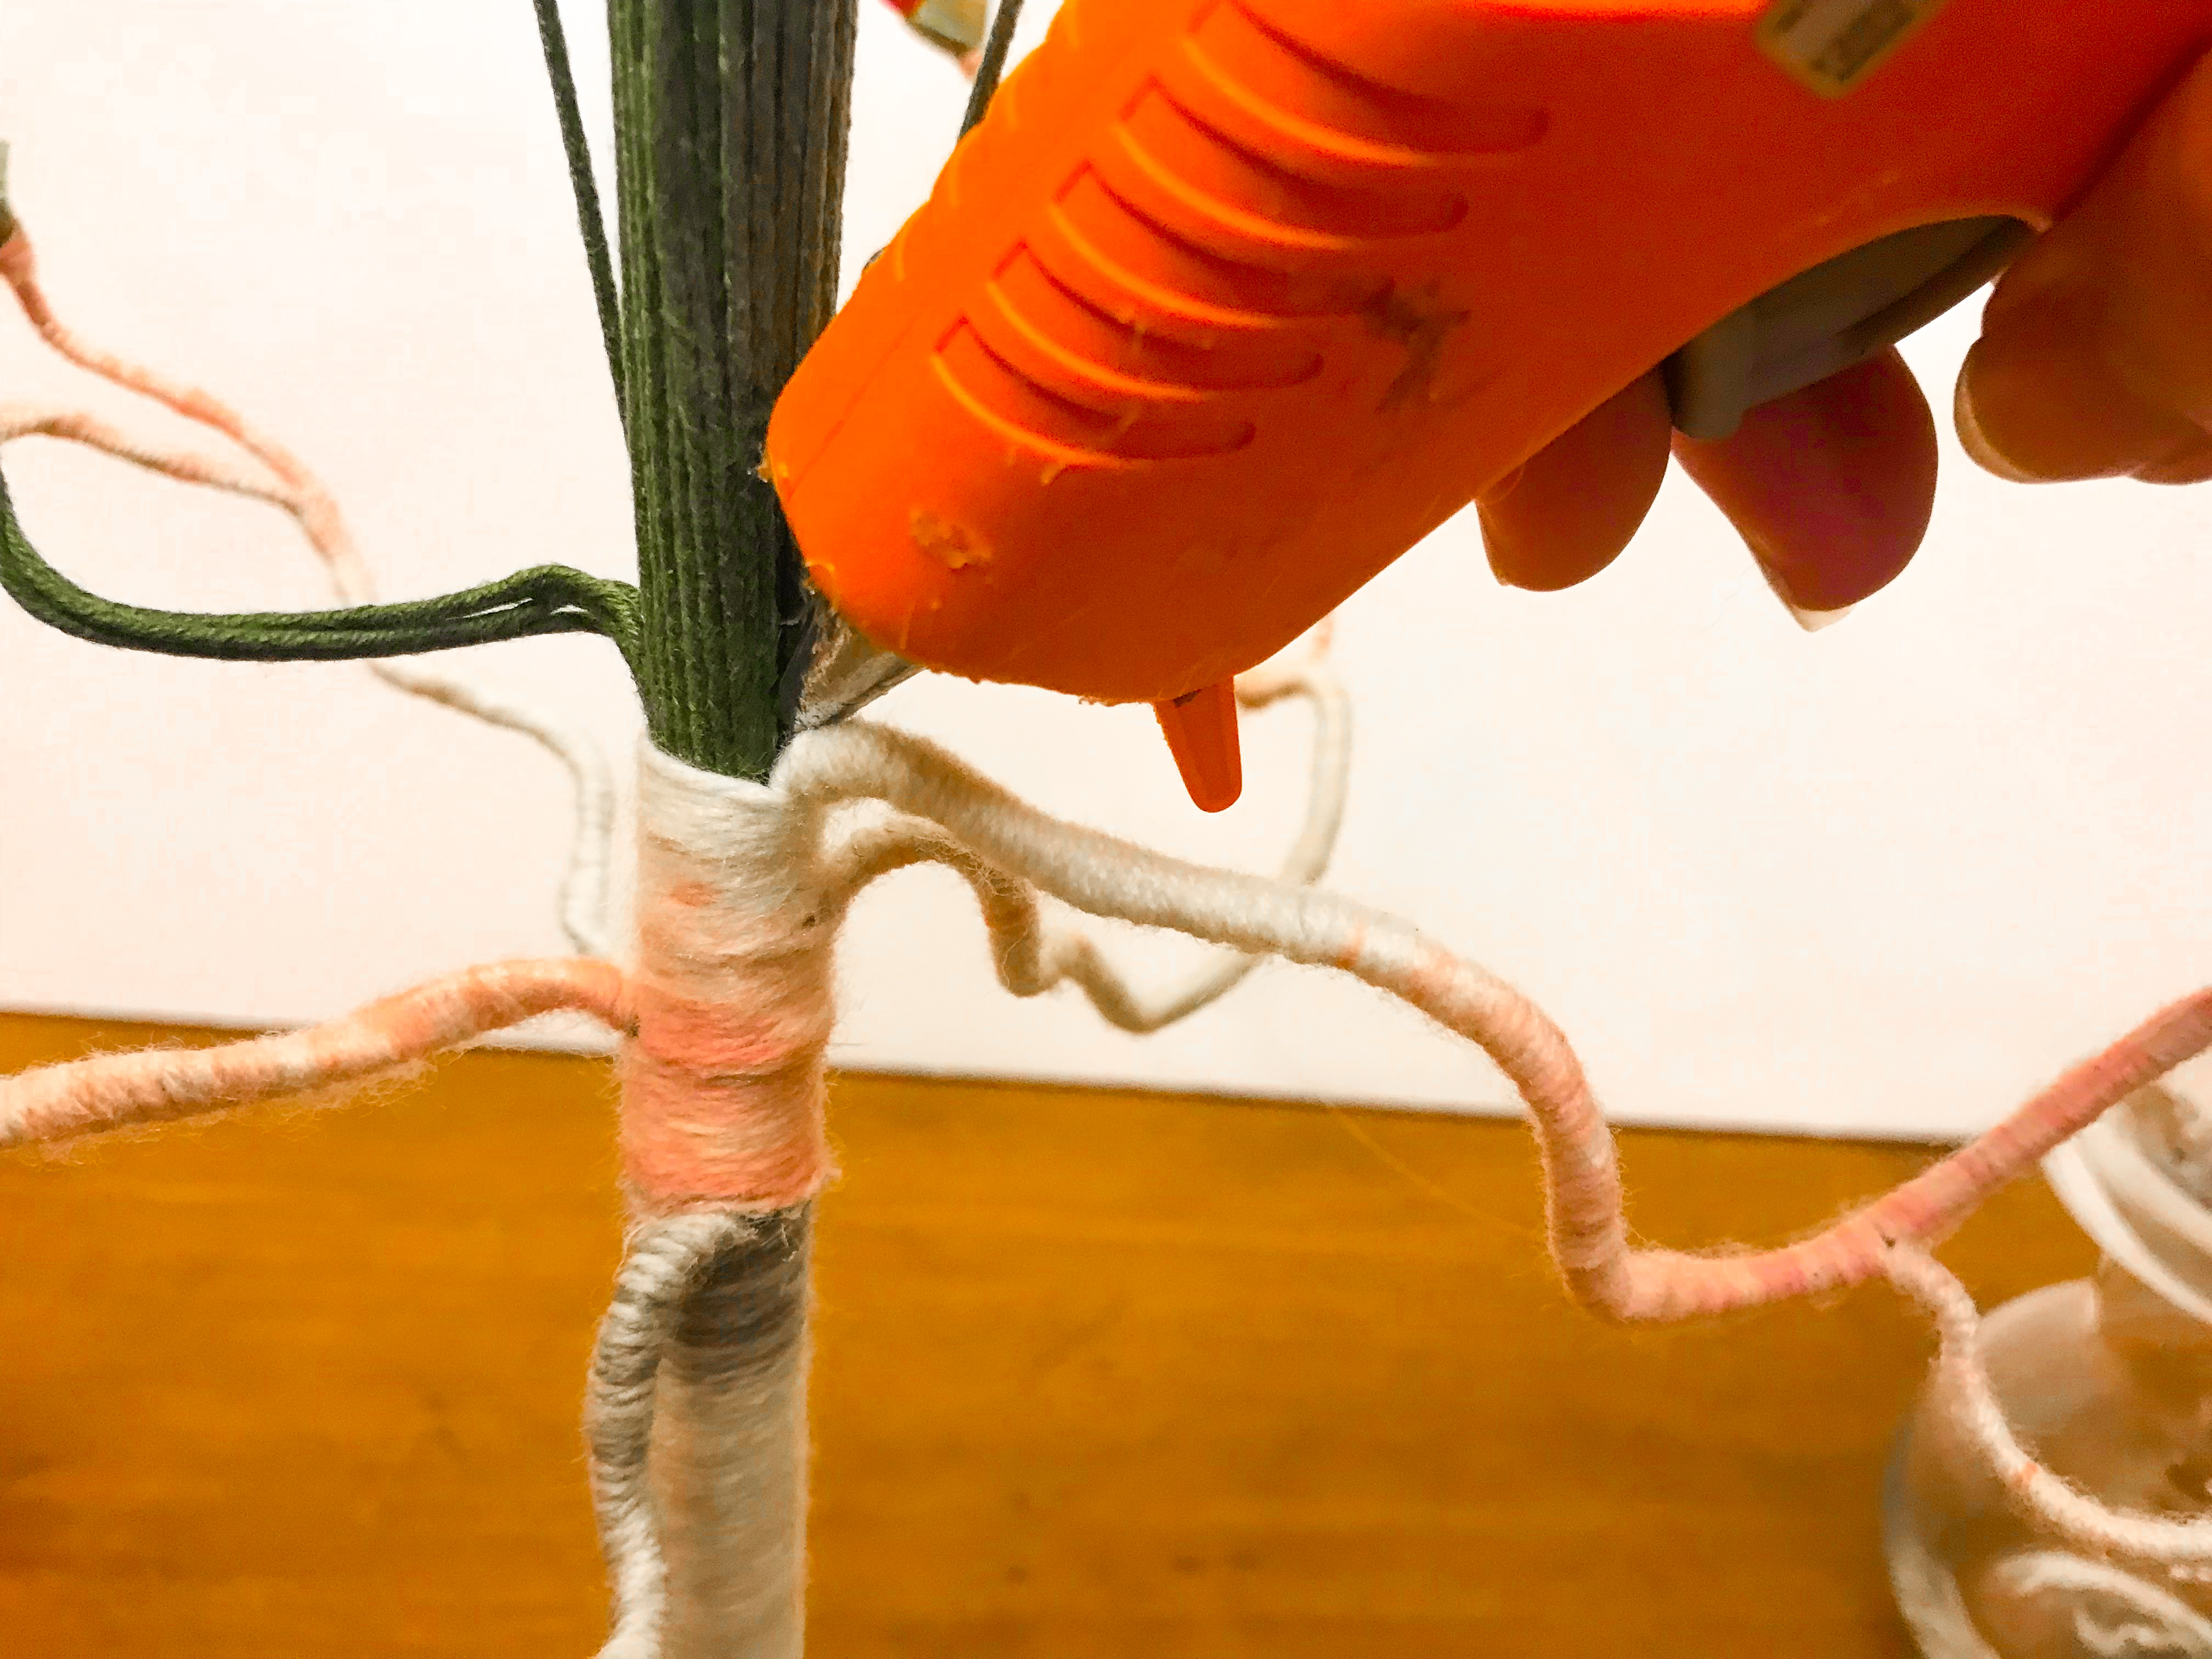
Fill the hole in the base with hot glue.
hint: The Washi tape over the small hole on the bottom will keep the hot glue from spilling through.
Insert the bottom of the tree into the hot glue and hold until dry.
How to Create an Easter Tree Branch
First you are going to bend a group of 3-5 floral stems away from the main “trunk” to form a branch.
hint: determine how many floral stems to make your branches from by considering how heavy your easter ornaments are. 3 can support most lightweight eggs but 5 can support heavier ornaments
Twist the 3-5 branches and then split one off at a time to form branches just like in a real tree.
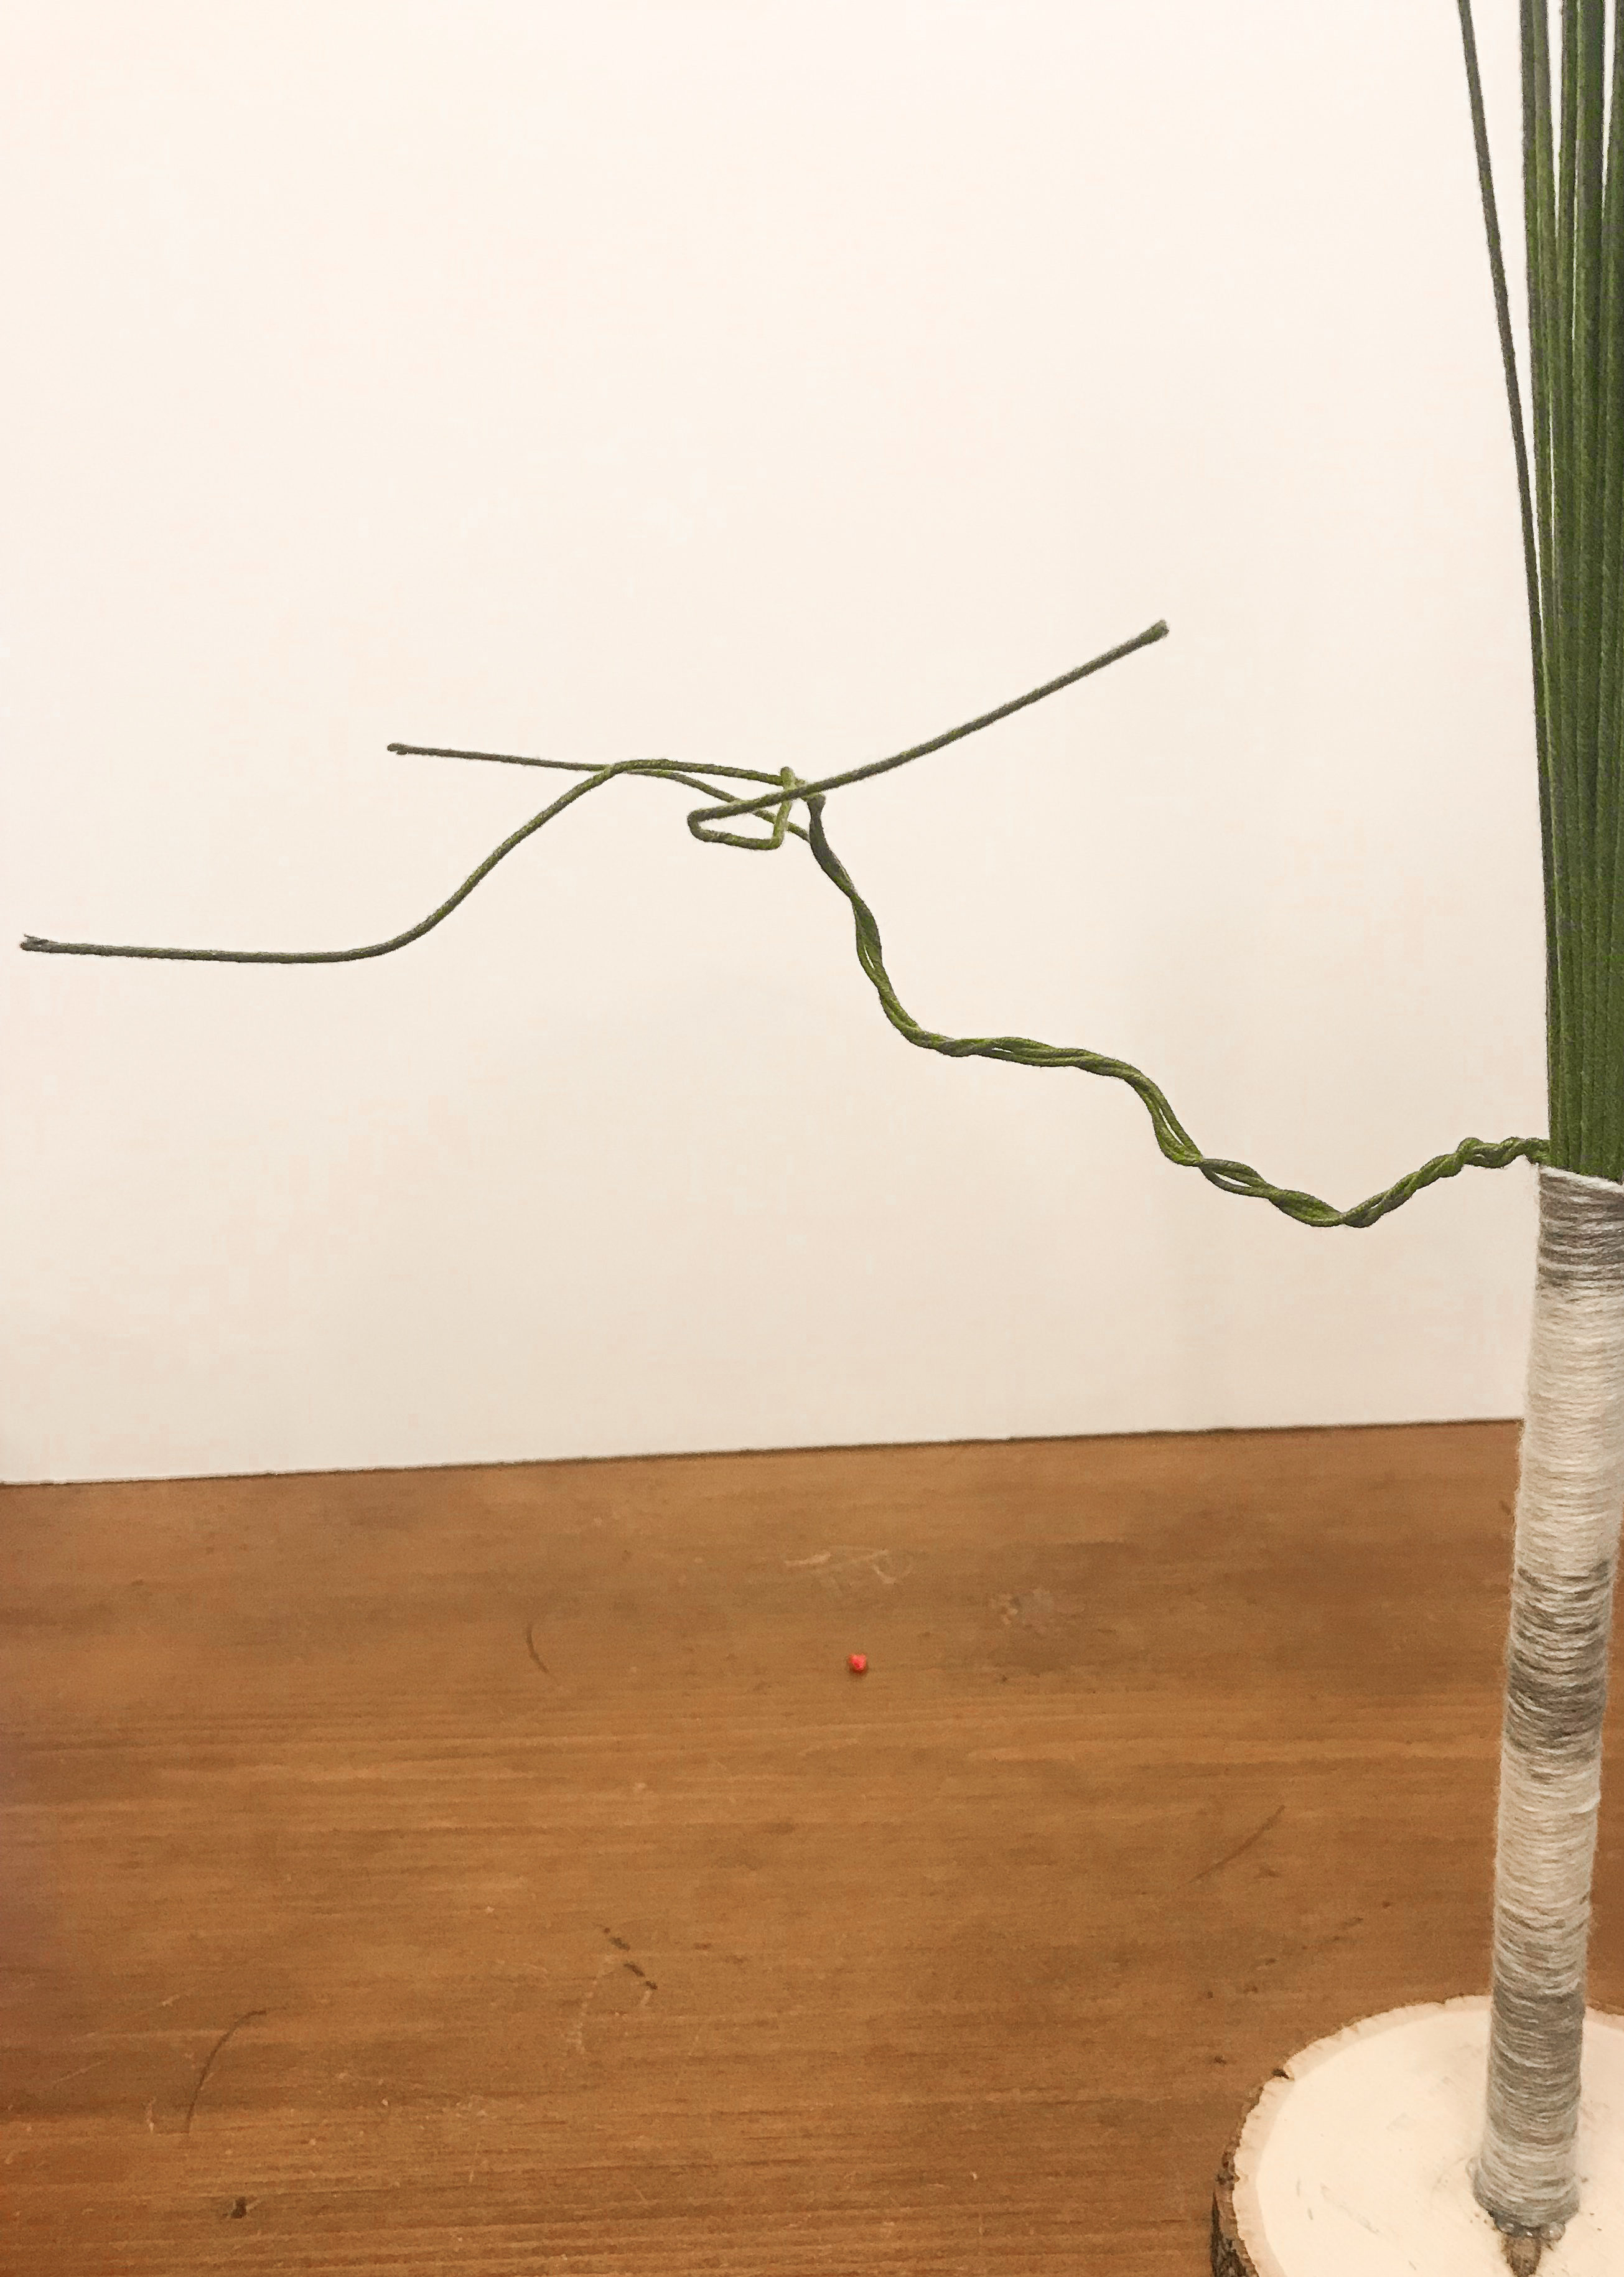
Use the wire cutters to trim the ends of the branches to make them uneven.
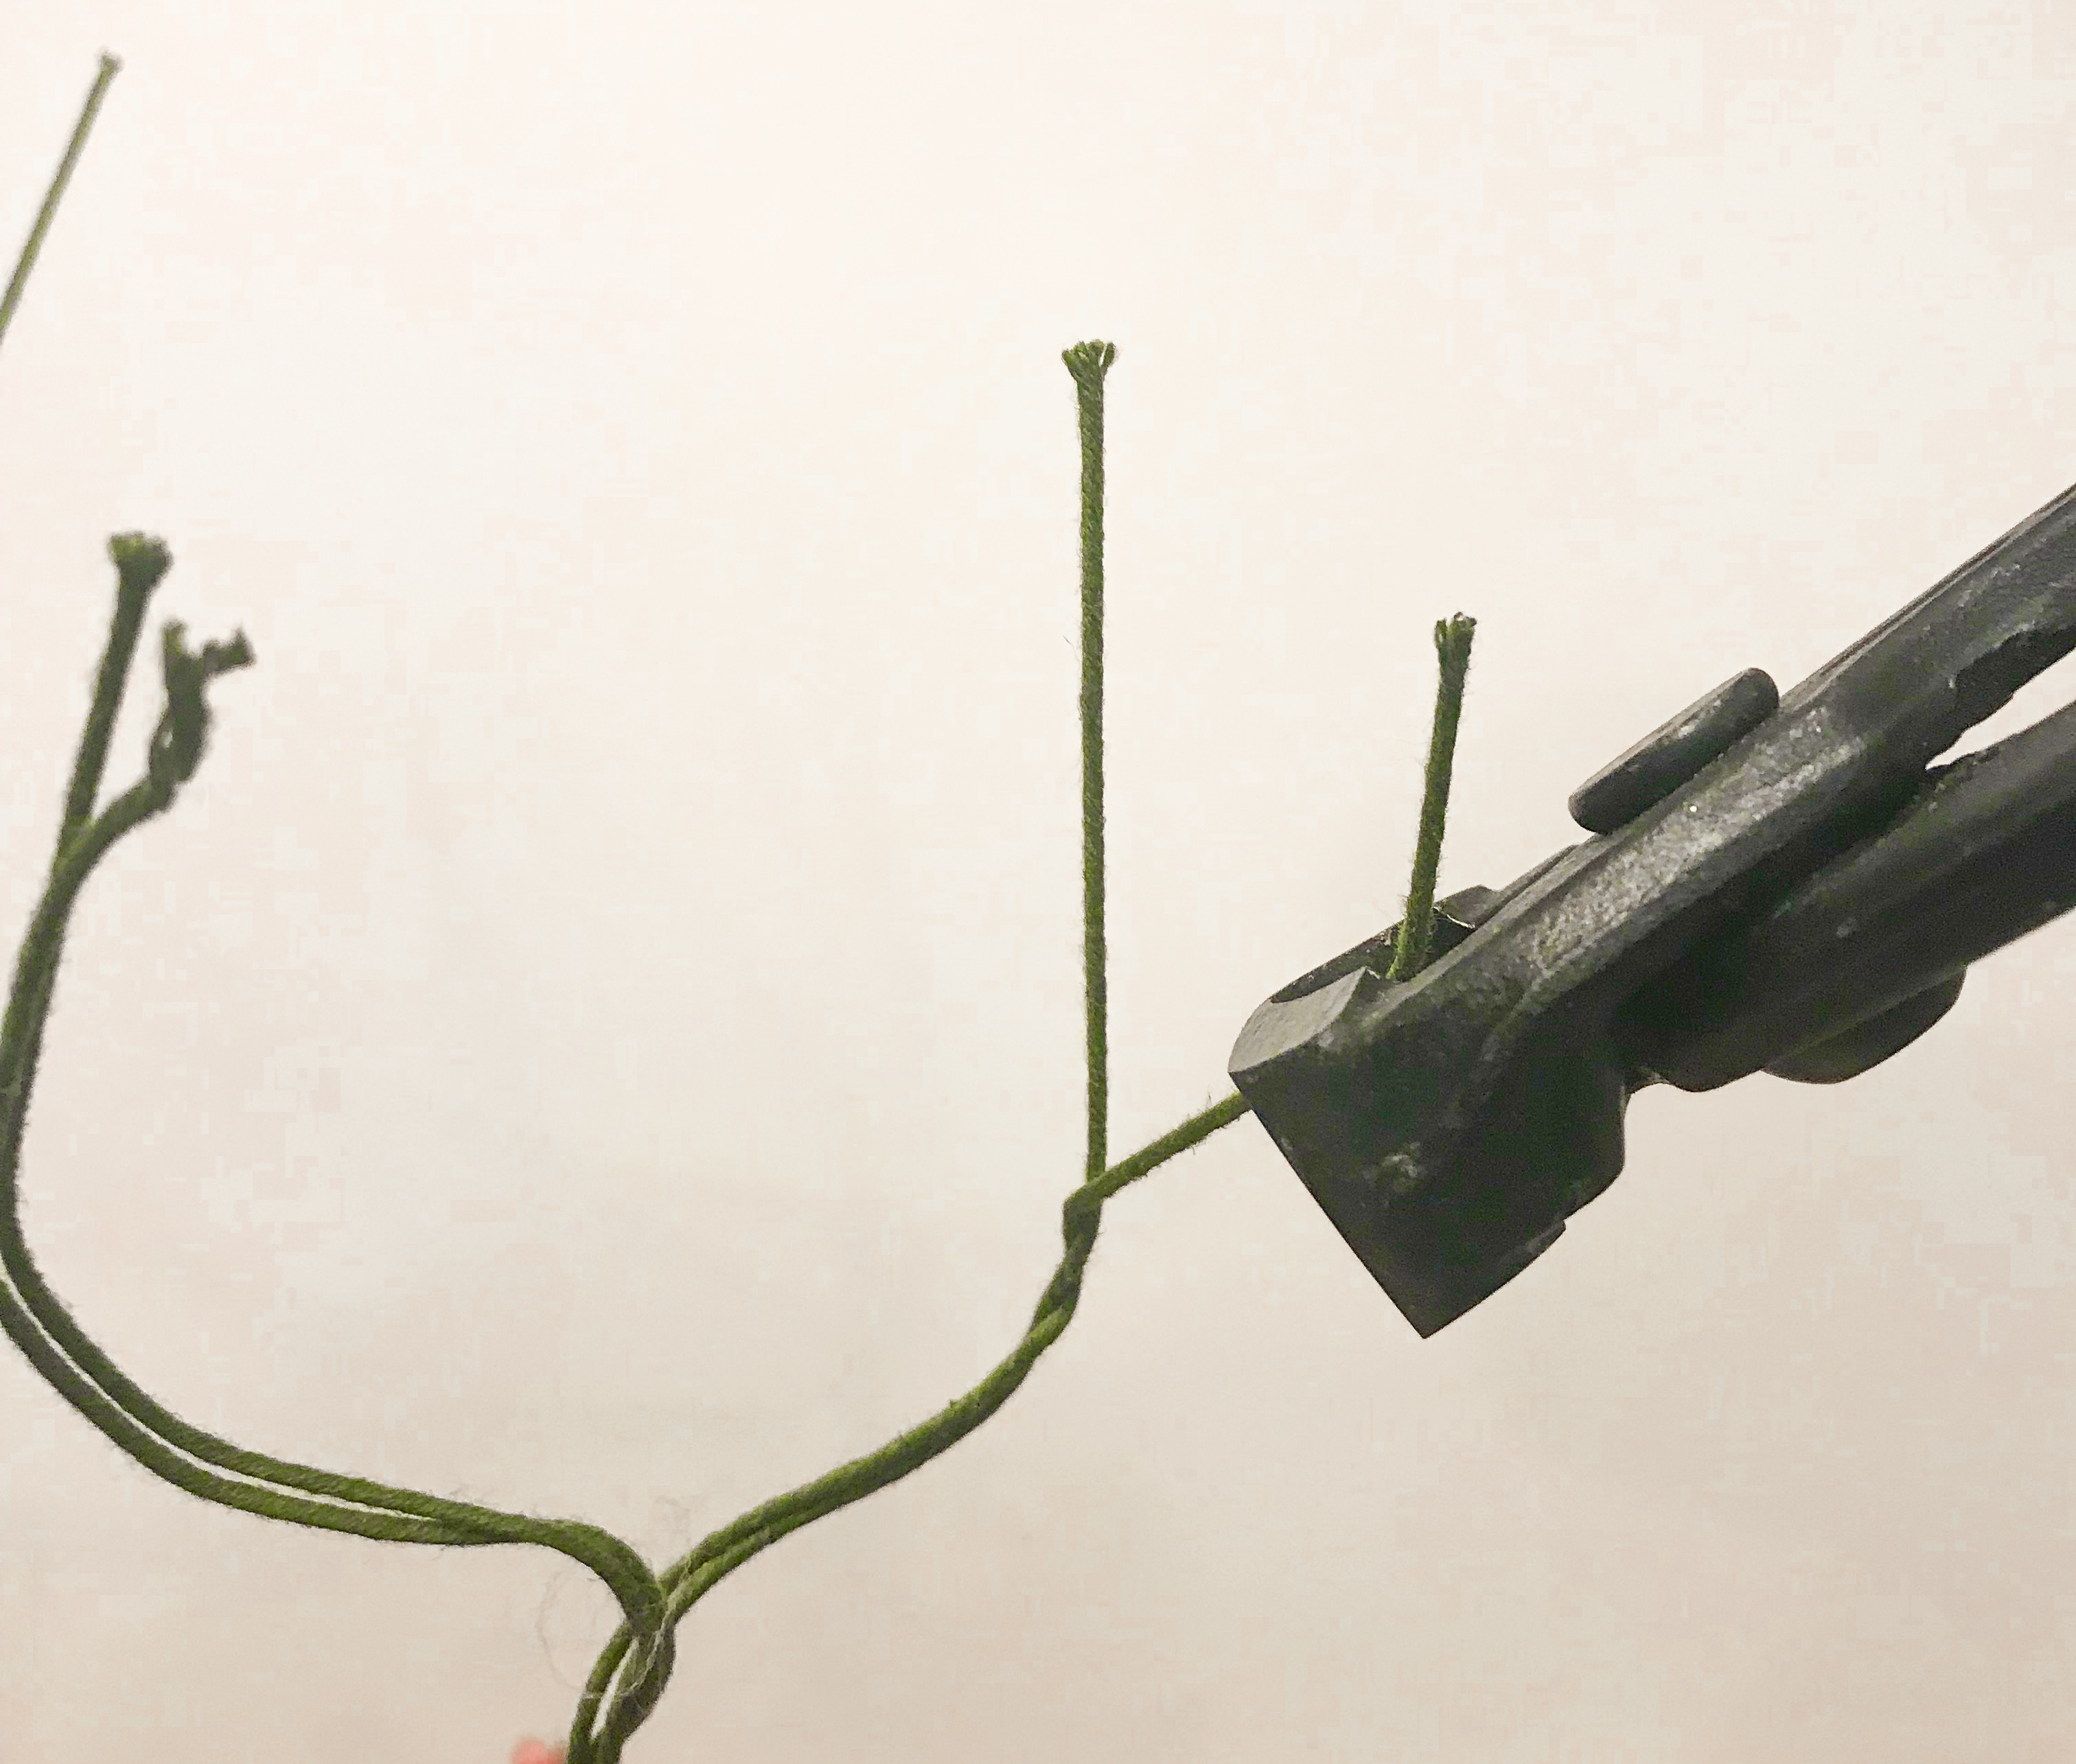
See how the branches emulate real branches?

Add Flowers to the Easter Tree Branch
Obviously you aren’t done creating branches yet BUT I’ve found it’s a lot easier (and safer) to add the flowers at this stage.
hint: The ends of the floral stems can be sharp so adding flowers before wrapping the branch is a must!
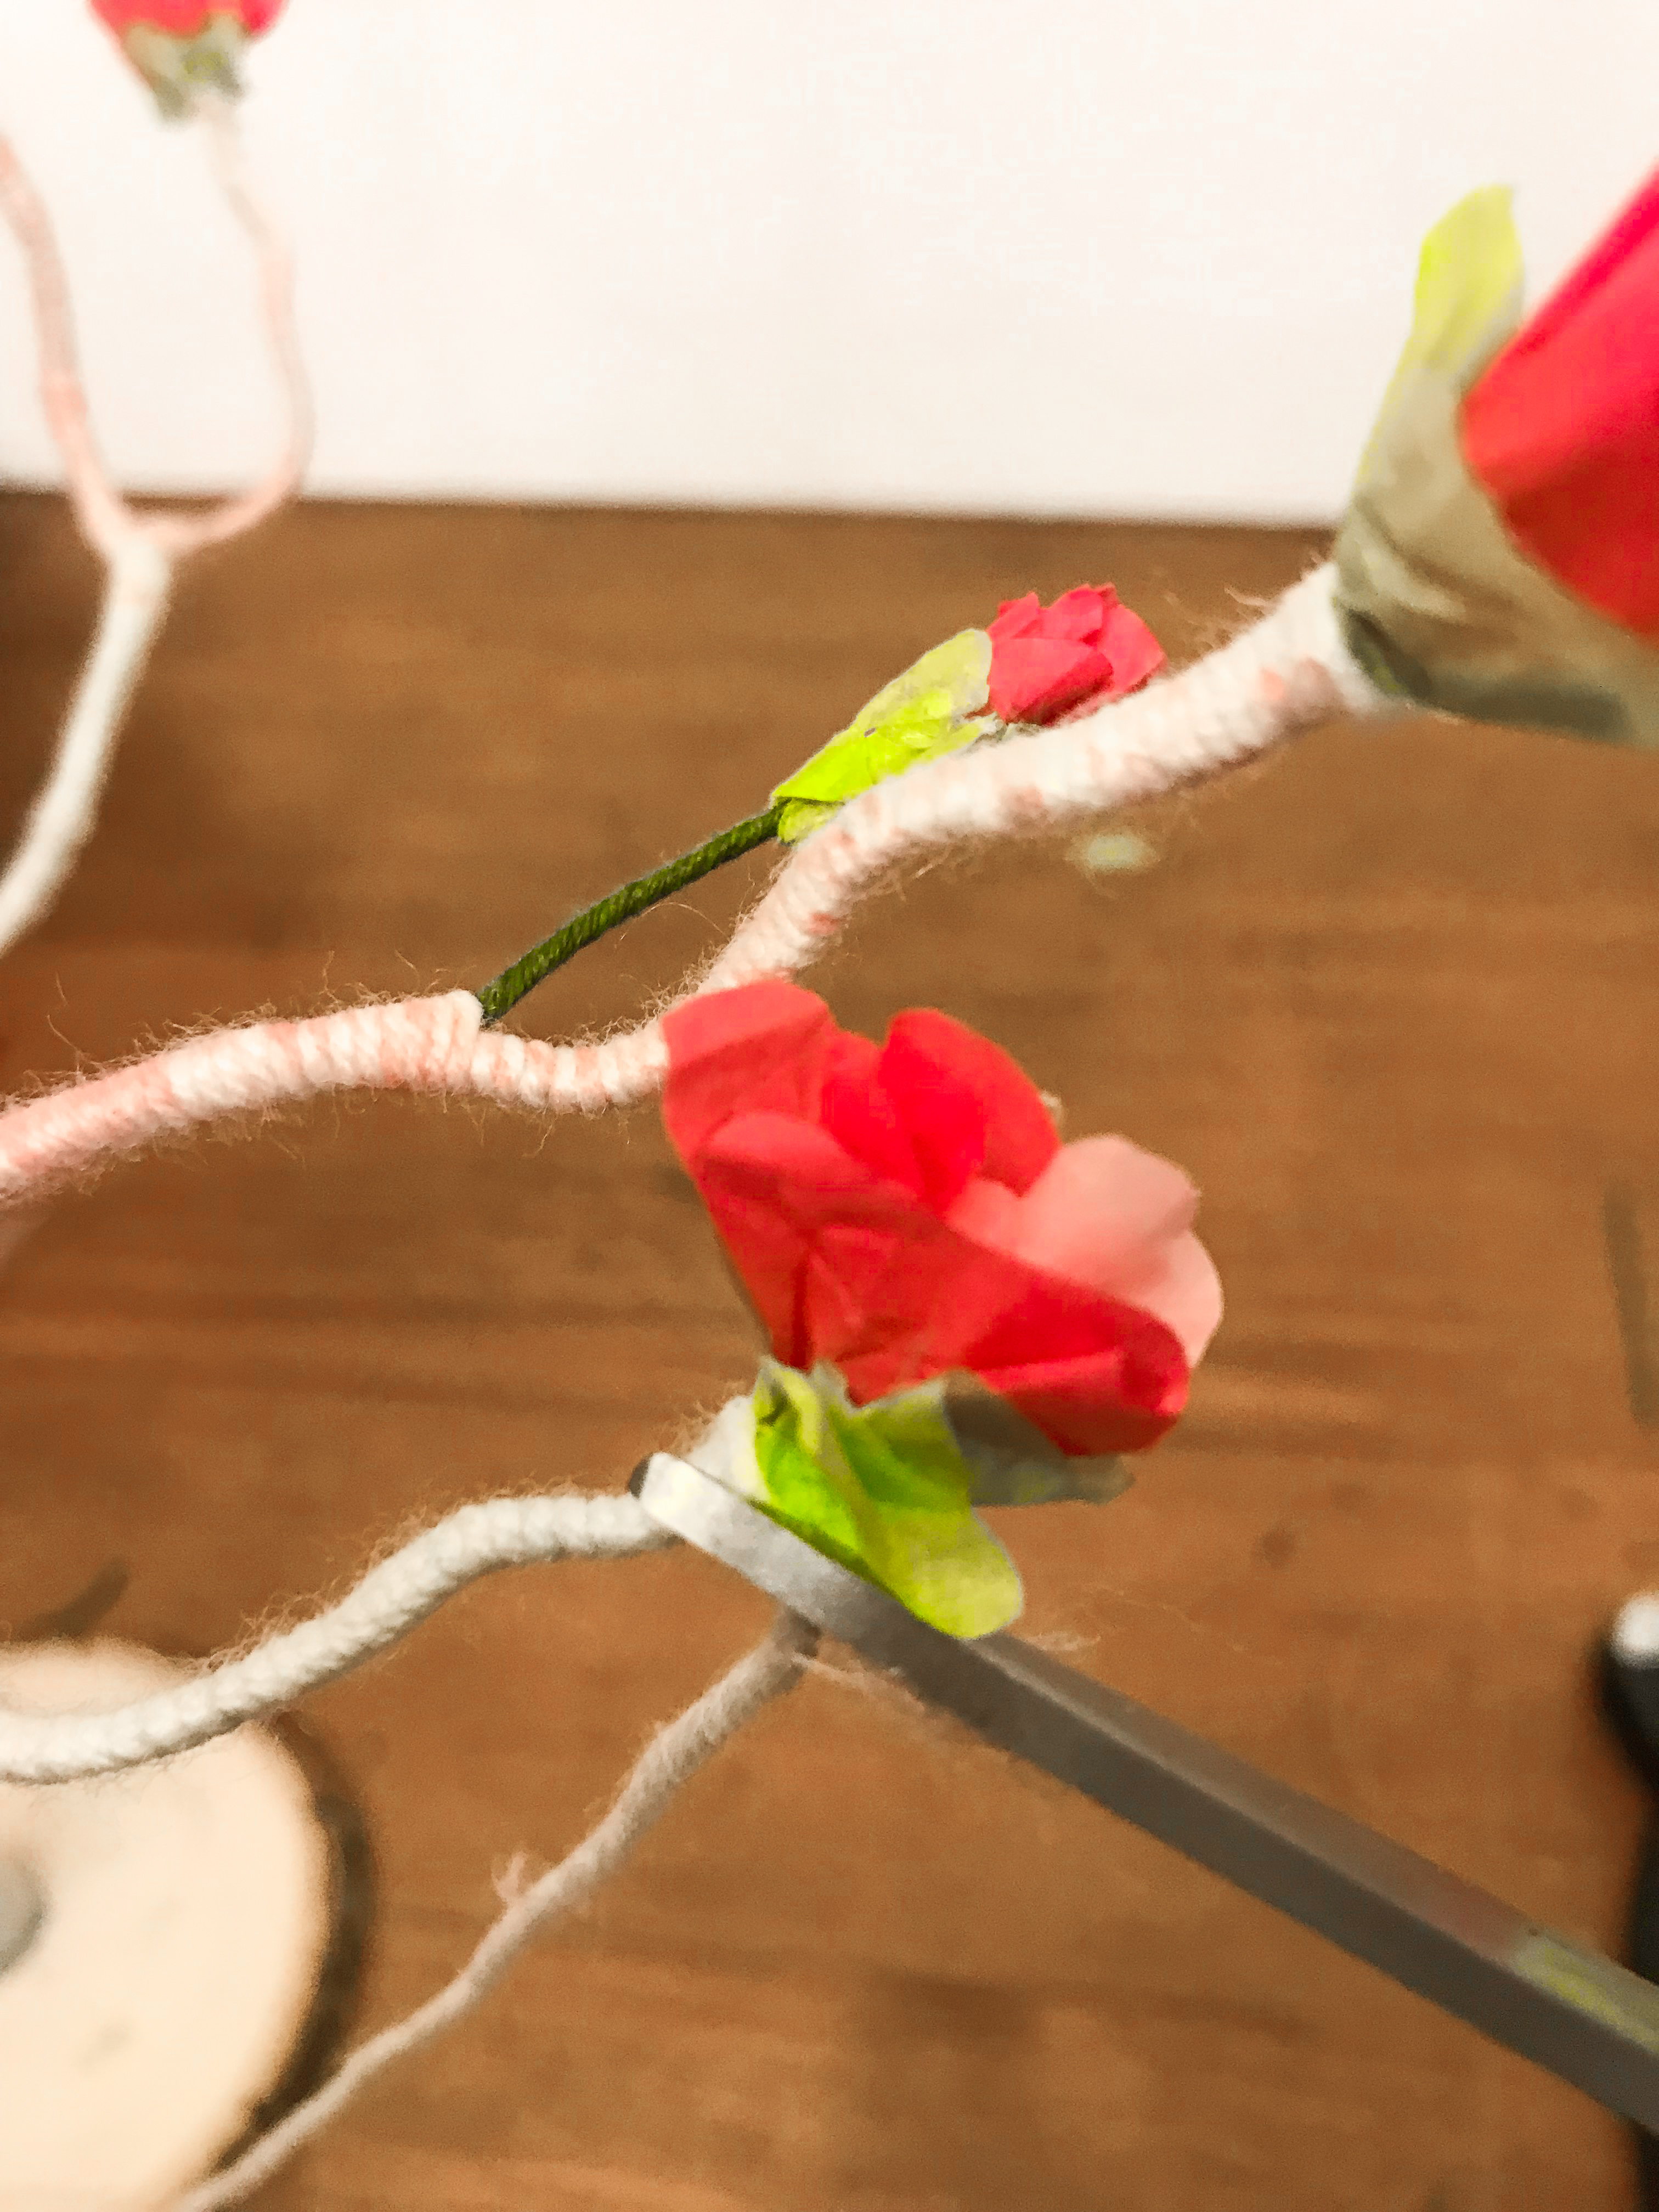
Push a green, hot pink, and either a hot pink or a light pink tissue paper cut out onto a branch.

Add a dab of hot glue onto the end of the floral stem.
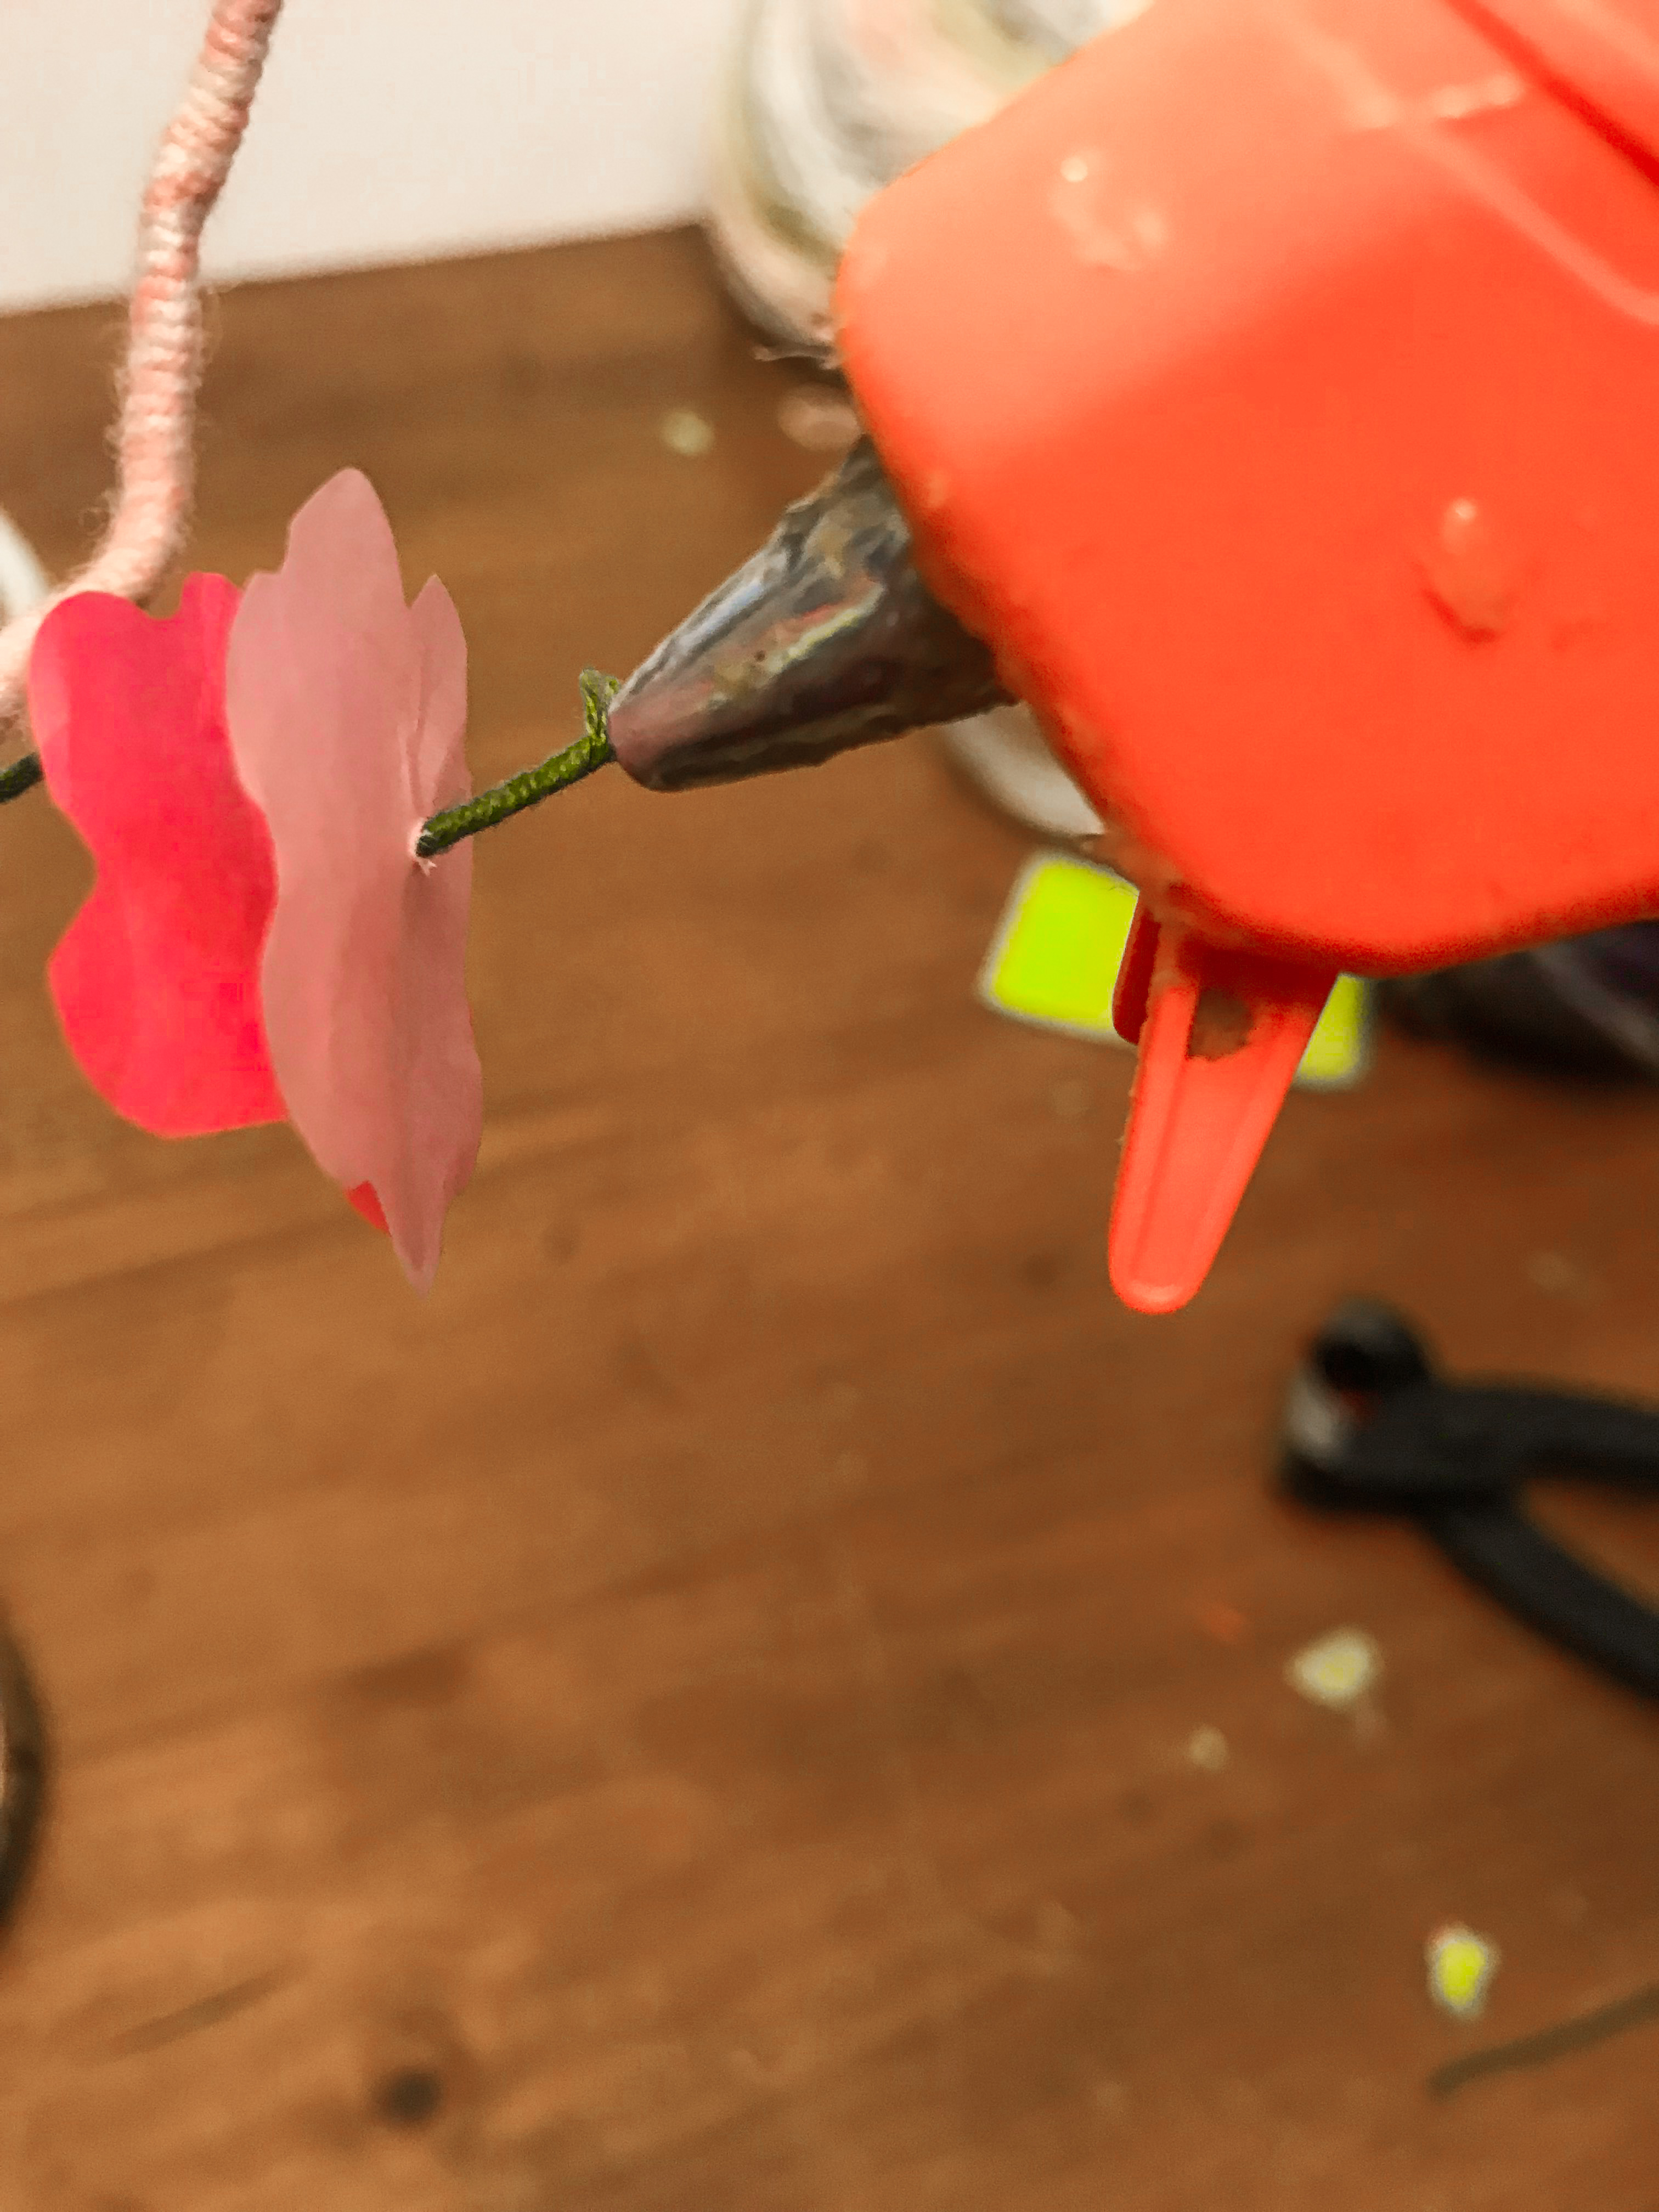
Scrunch/ wrap the first tissue paper flower towards the floral stem and into the hot glue.
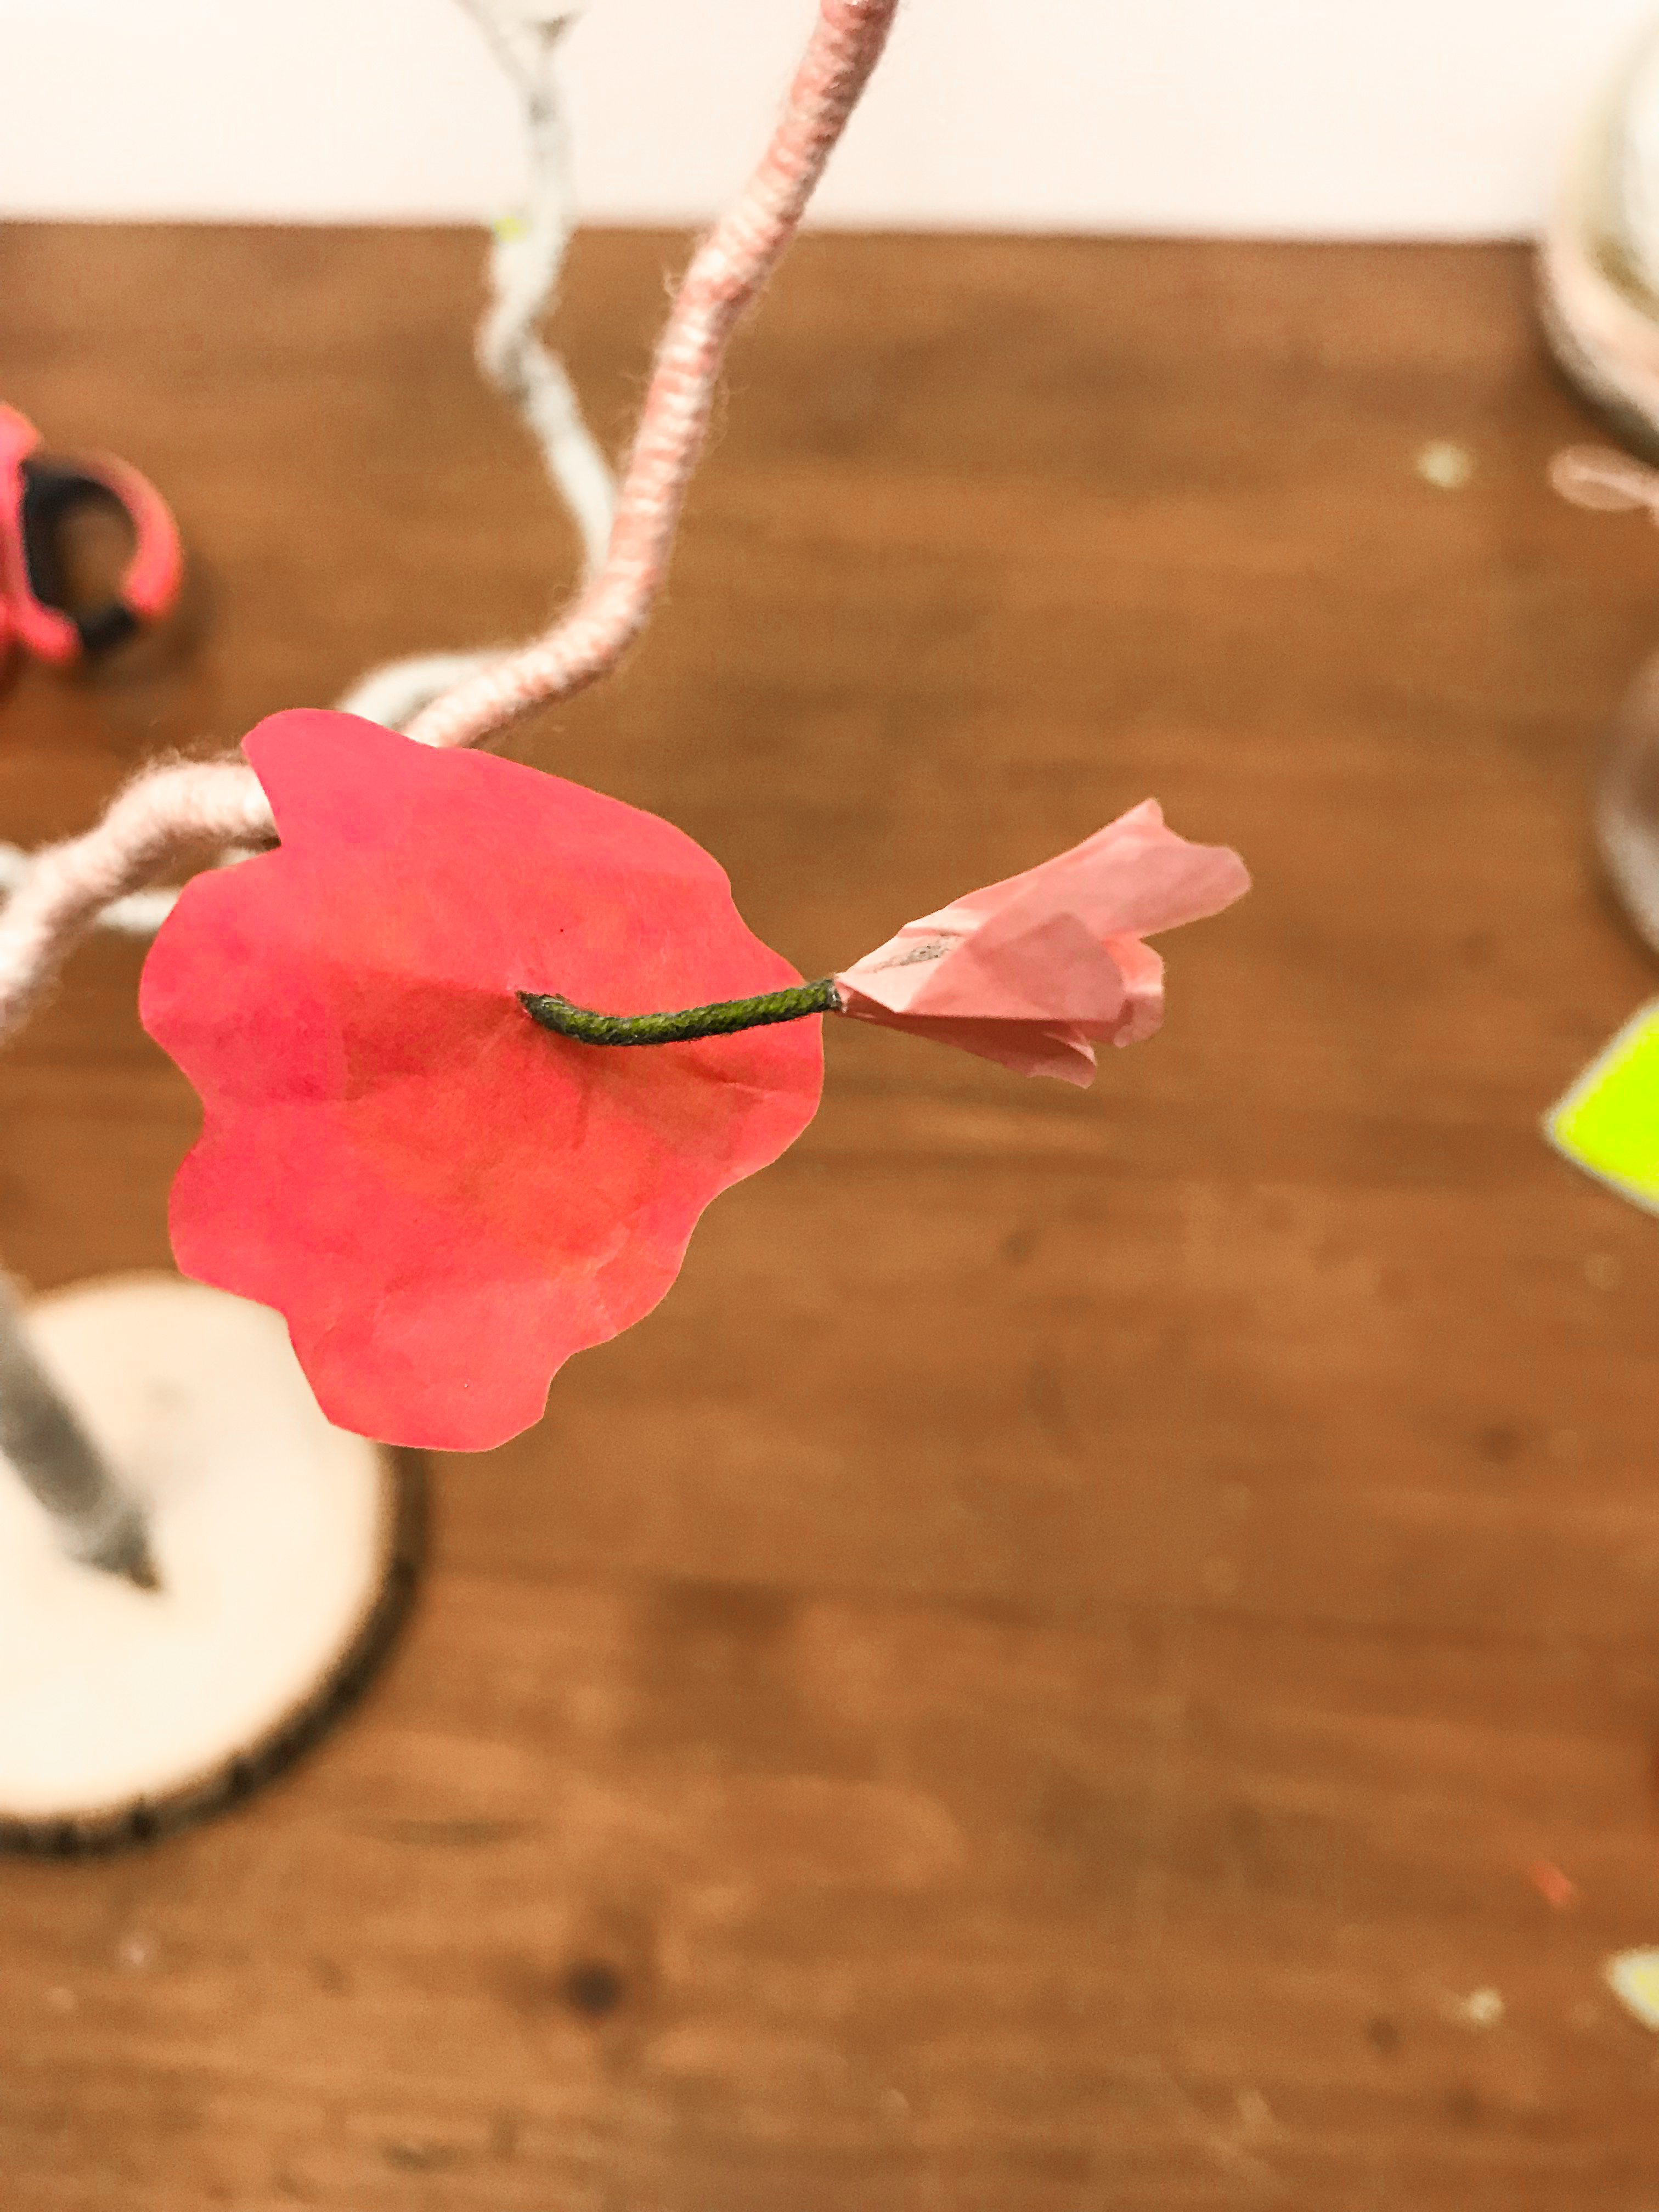
Add another dab of hot glue at the base of the first flower bud and repeat the scrunching / wrapping with the second tissue paper flower.
Add another dab of hot glue and repeat with the green tissue paper cut-out.

Create a tissue paper flower on every end of that branch.
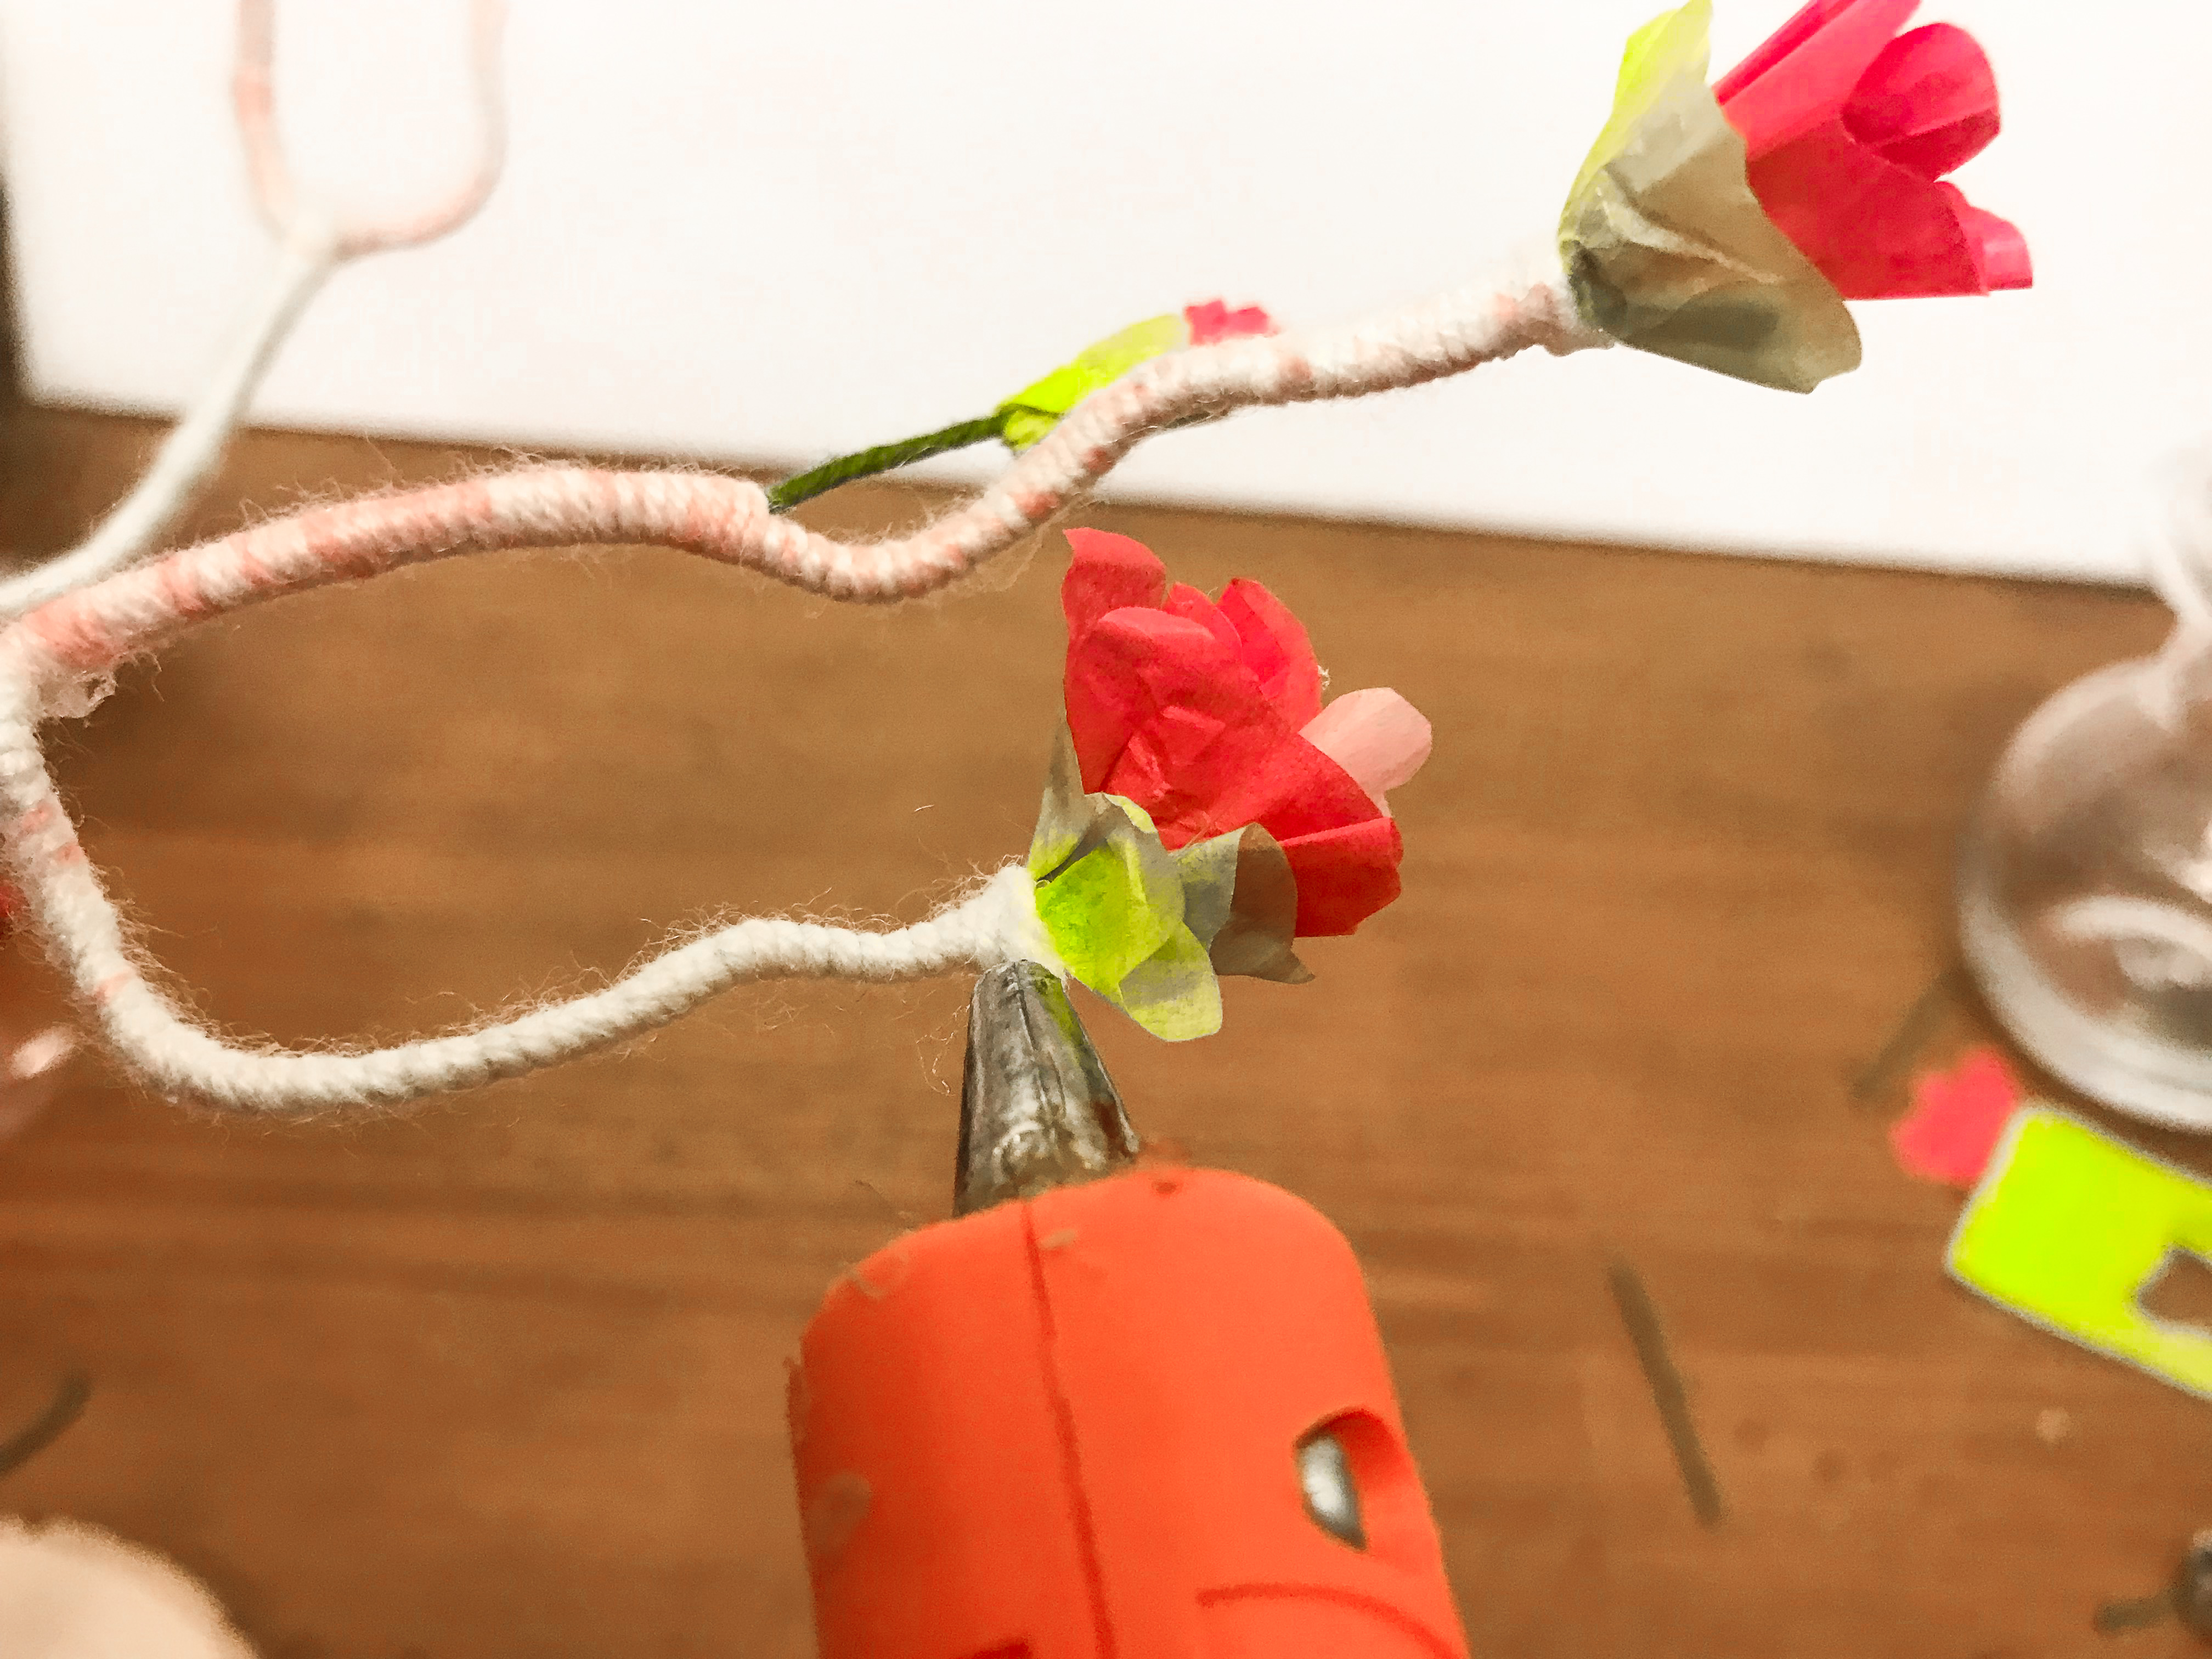
Wrap the Branch
Trim off the yarn tie at the top of the wrapped trunk. (Leave the yarn attached to the skien intact.)
Wrap the string tightly around the branch.
When you come to a joint continue wrapping along the “main” branch.
Continue wrapping until you overlap slightly with the flower, then add a dab of hot glue and cut the yarn
.
Use a small dab of hot glue to smooth down the loose end of the yarn.
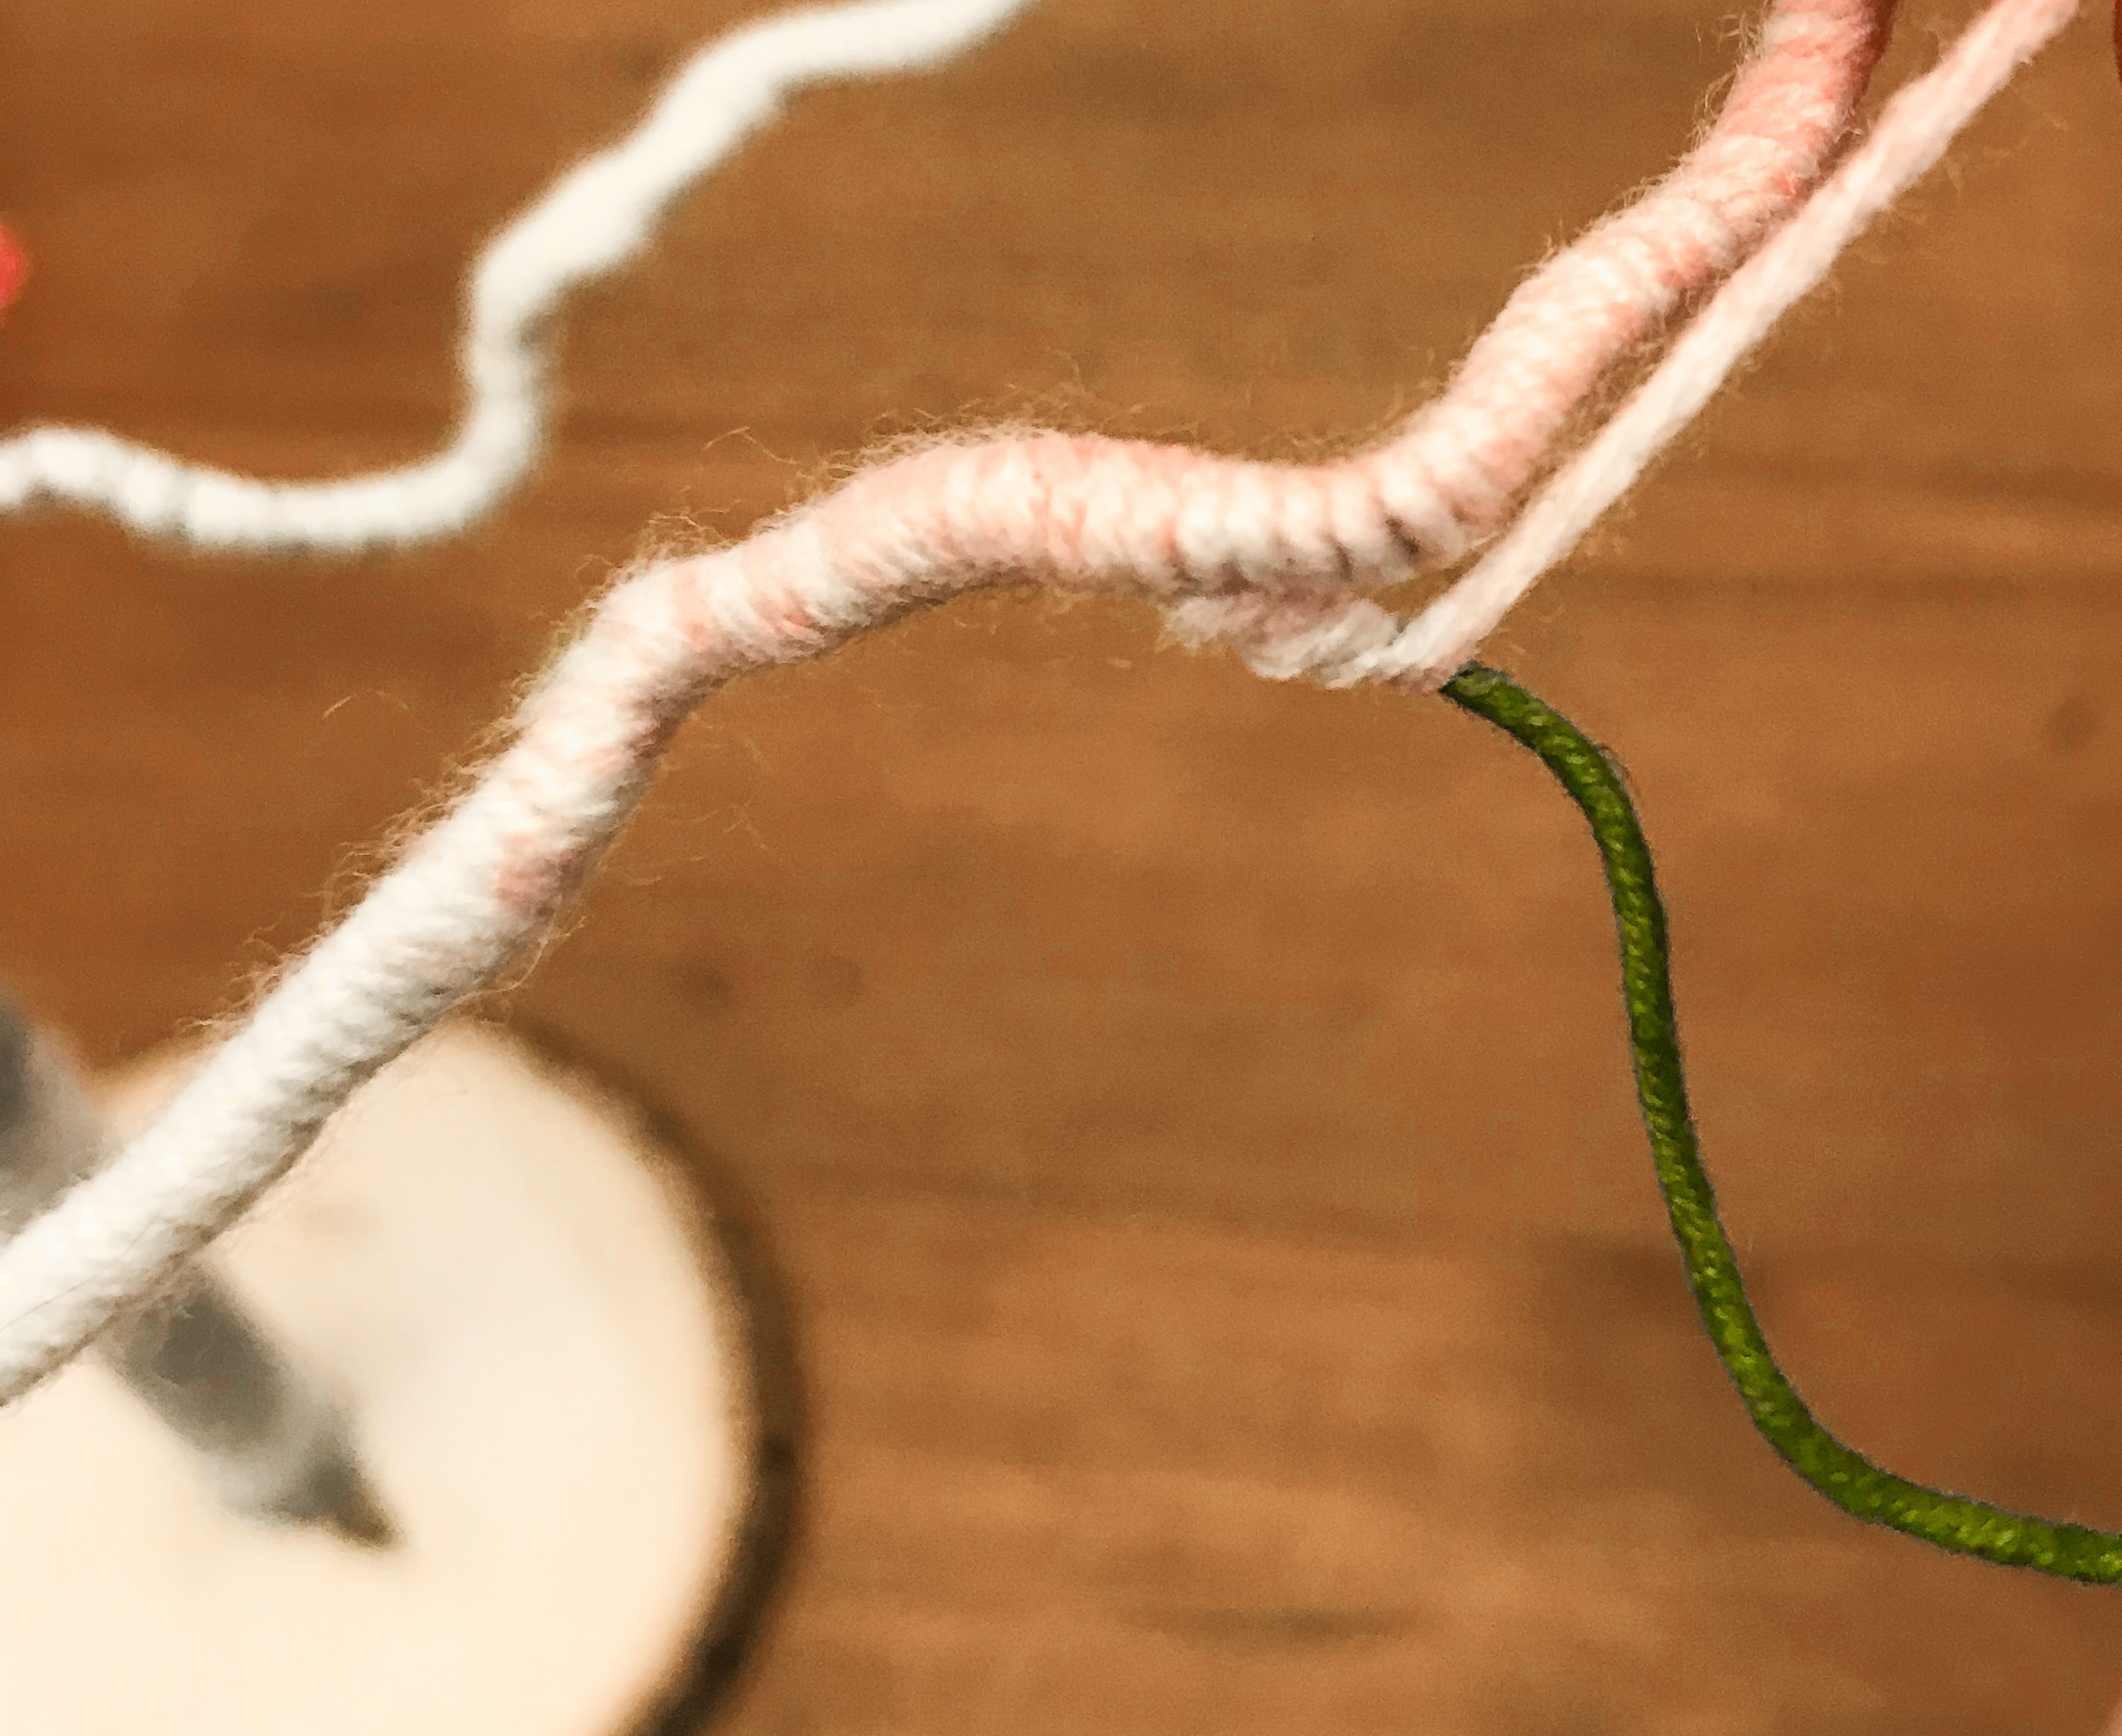
Add a dab of hot glue to the joint where the additional branches split then wrap with yarn until the flower.
Bend, Wrap, Flowers, Repeat!
Bend another 3-5 floral stem branch down, twist, and trim just like you did before.
Add the flowers to the end of the branch.
Bend down the previous already wrapped branch and place a dab of hot glue in the joint.
hint: Bending the other branches all the way down will also help keep them out of the way as you work!
Attach the yarn into the hot glue in the joint wrap the trunk until you reach the next branch then continue wrapping the branch.
Keep going until you’ve finished the entire Easter tree!
Then position the branches however you want and decorate.
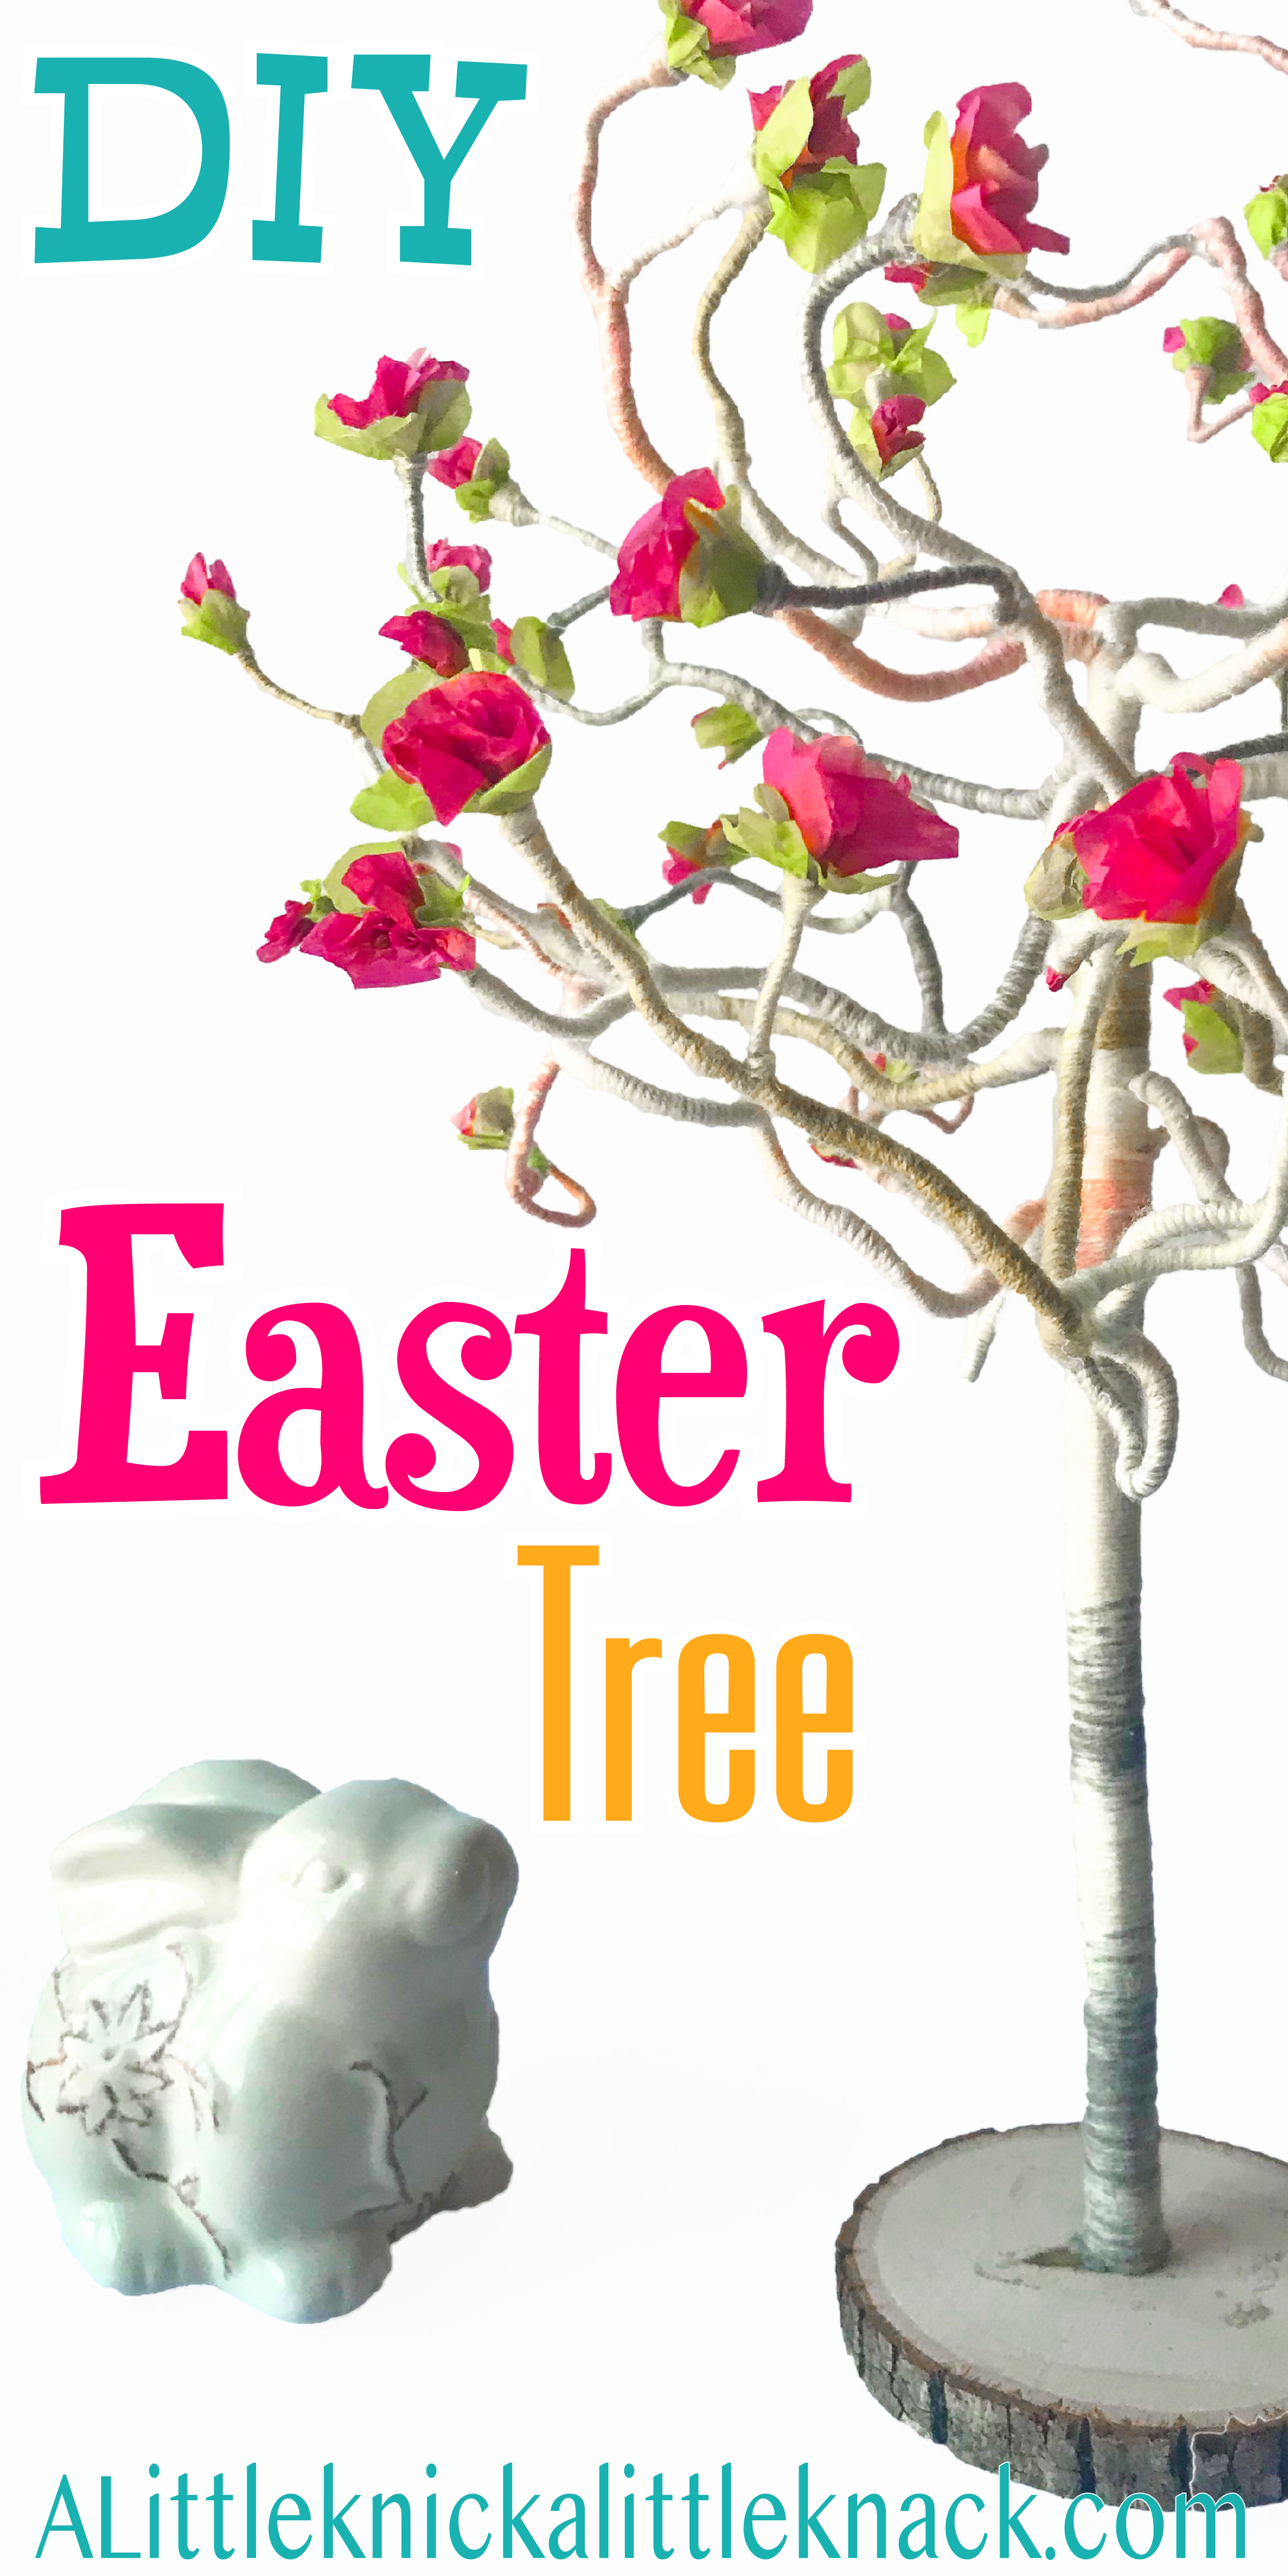
I hope your DIY Easter tree brings many happy memories to your home!
-
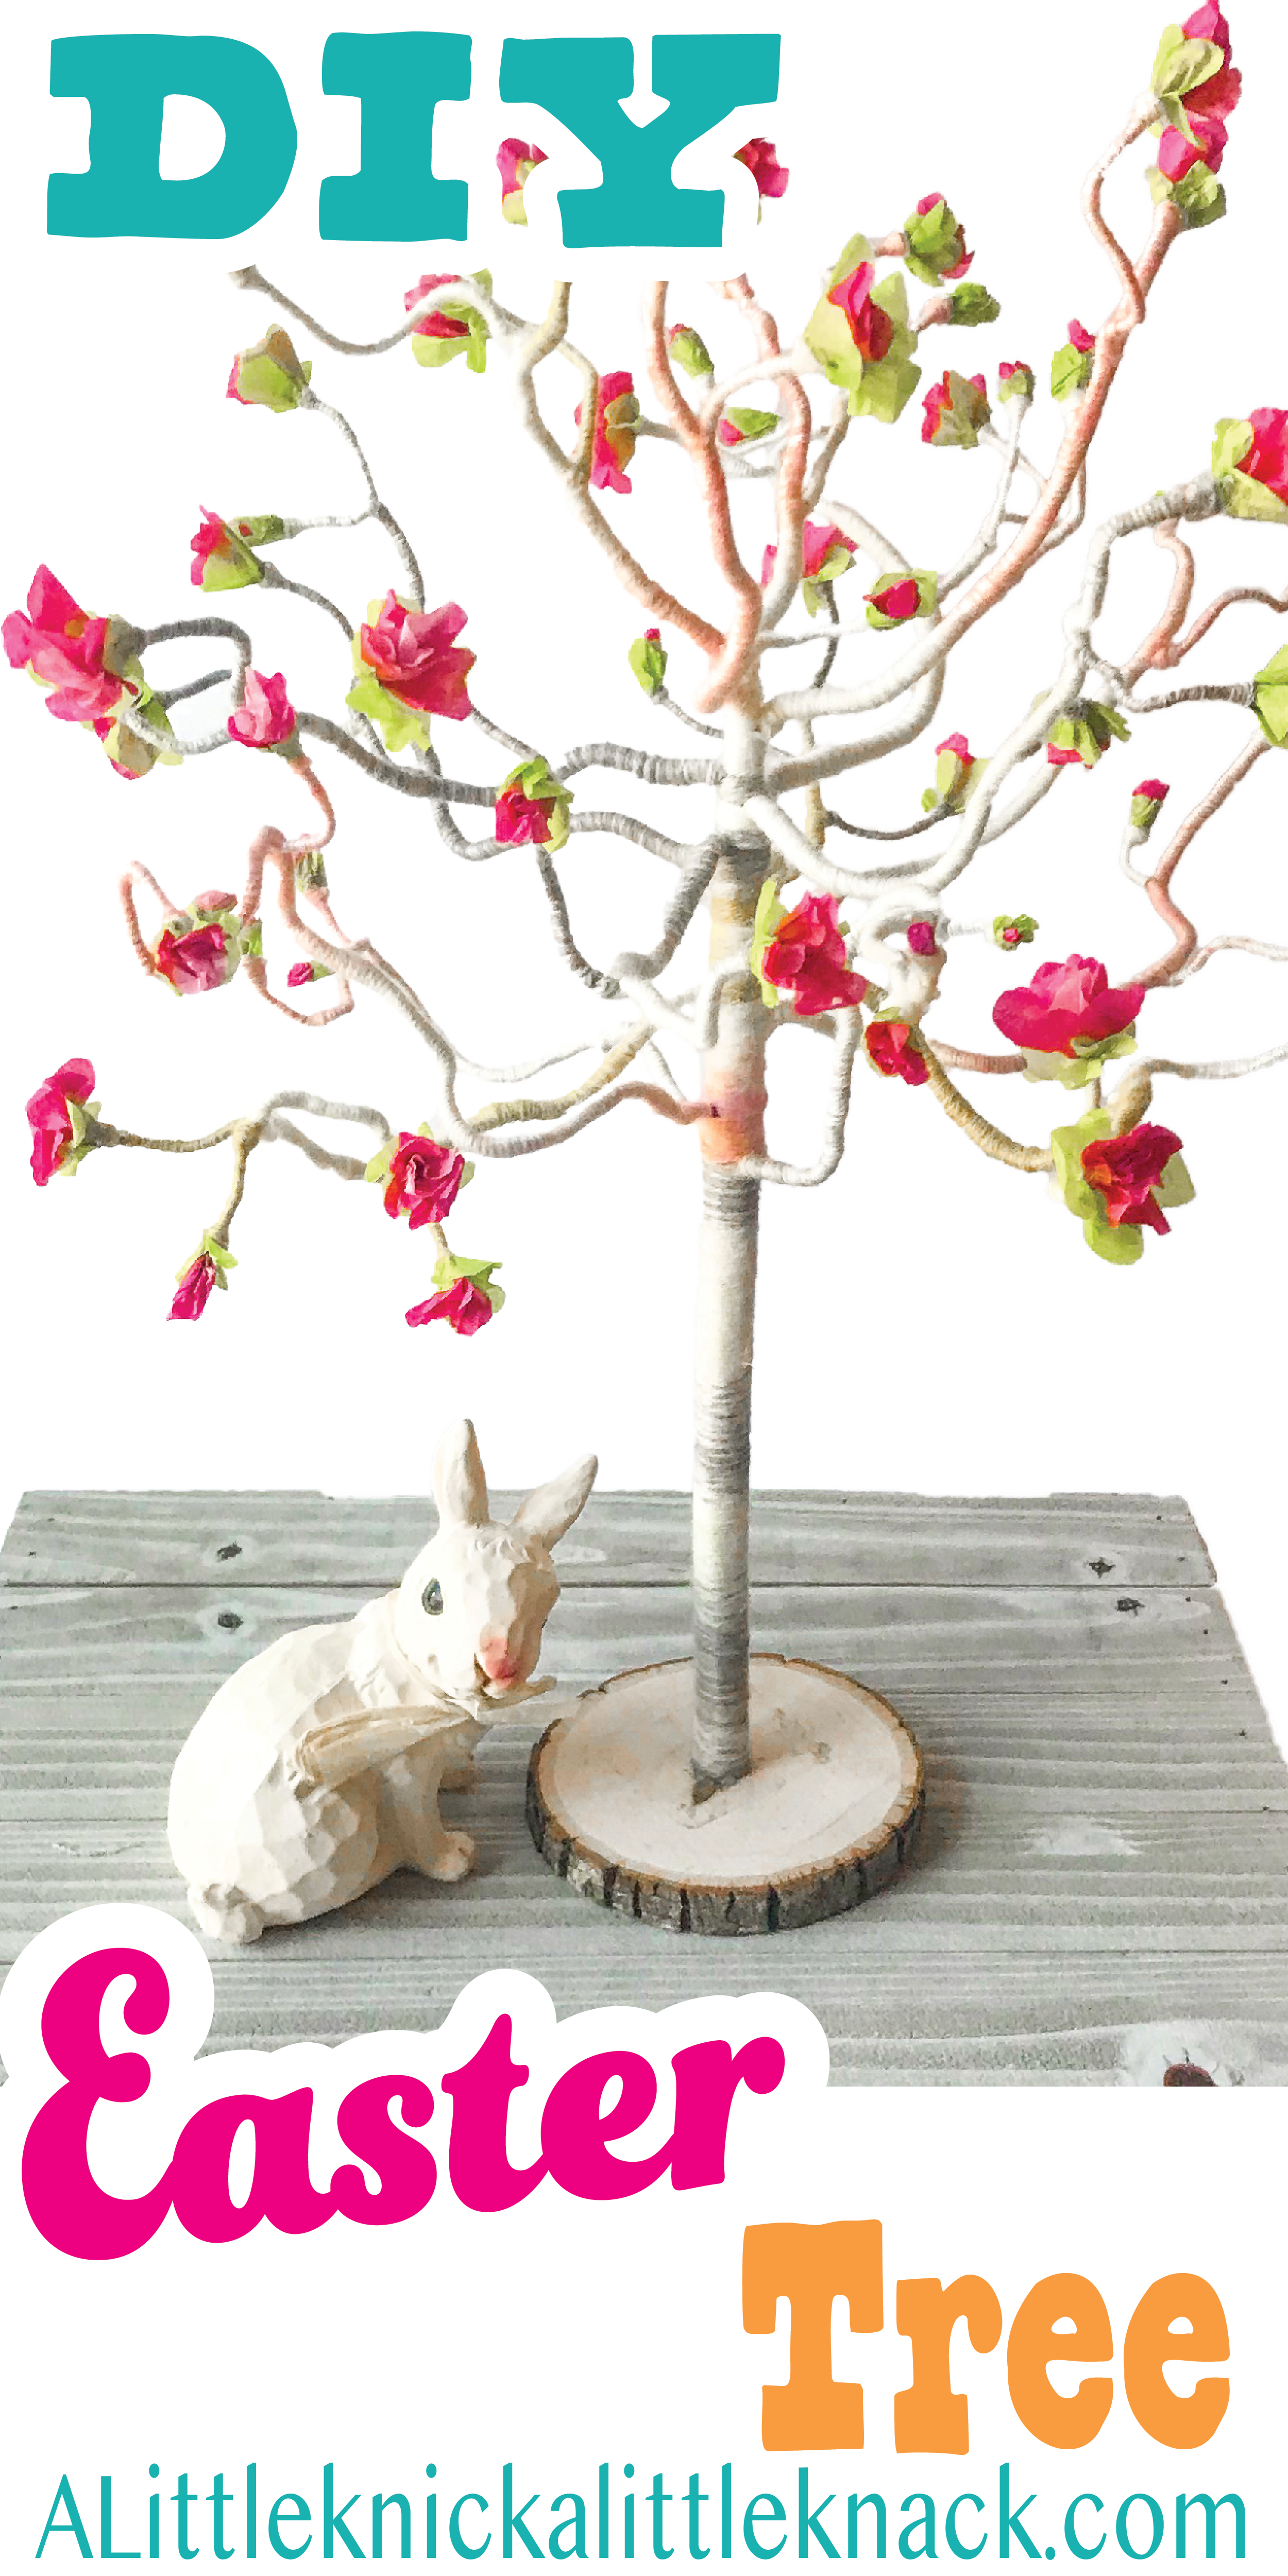
String wrapped Easter Tree with pink flowers next to a ceramic floral bunny with text overlay
Related Posts