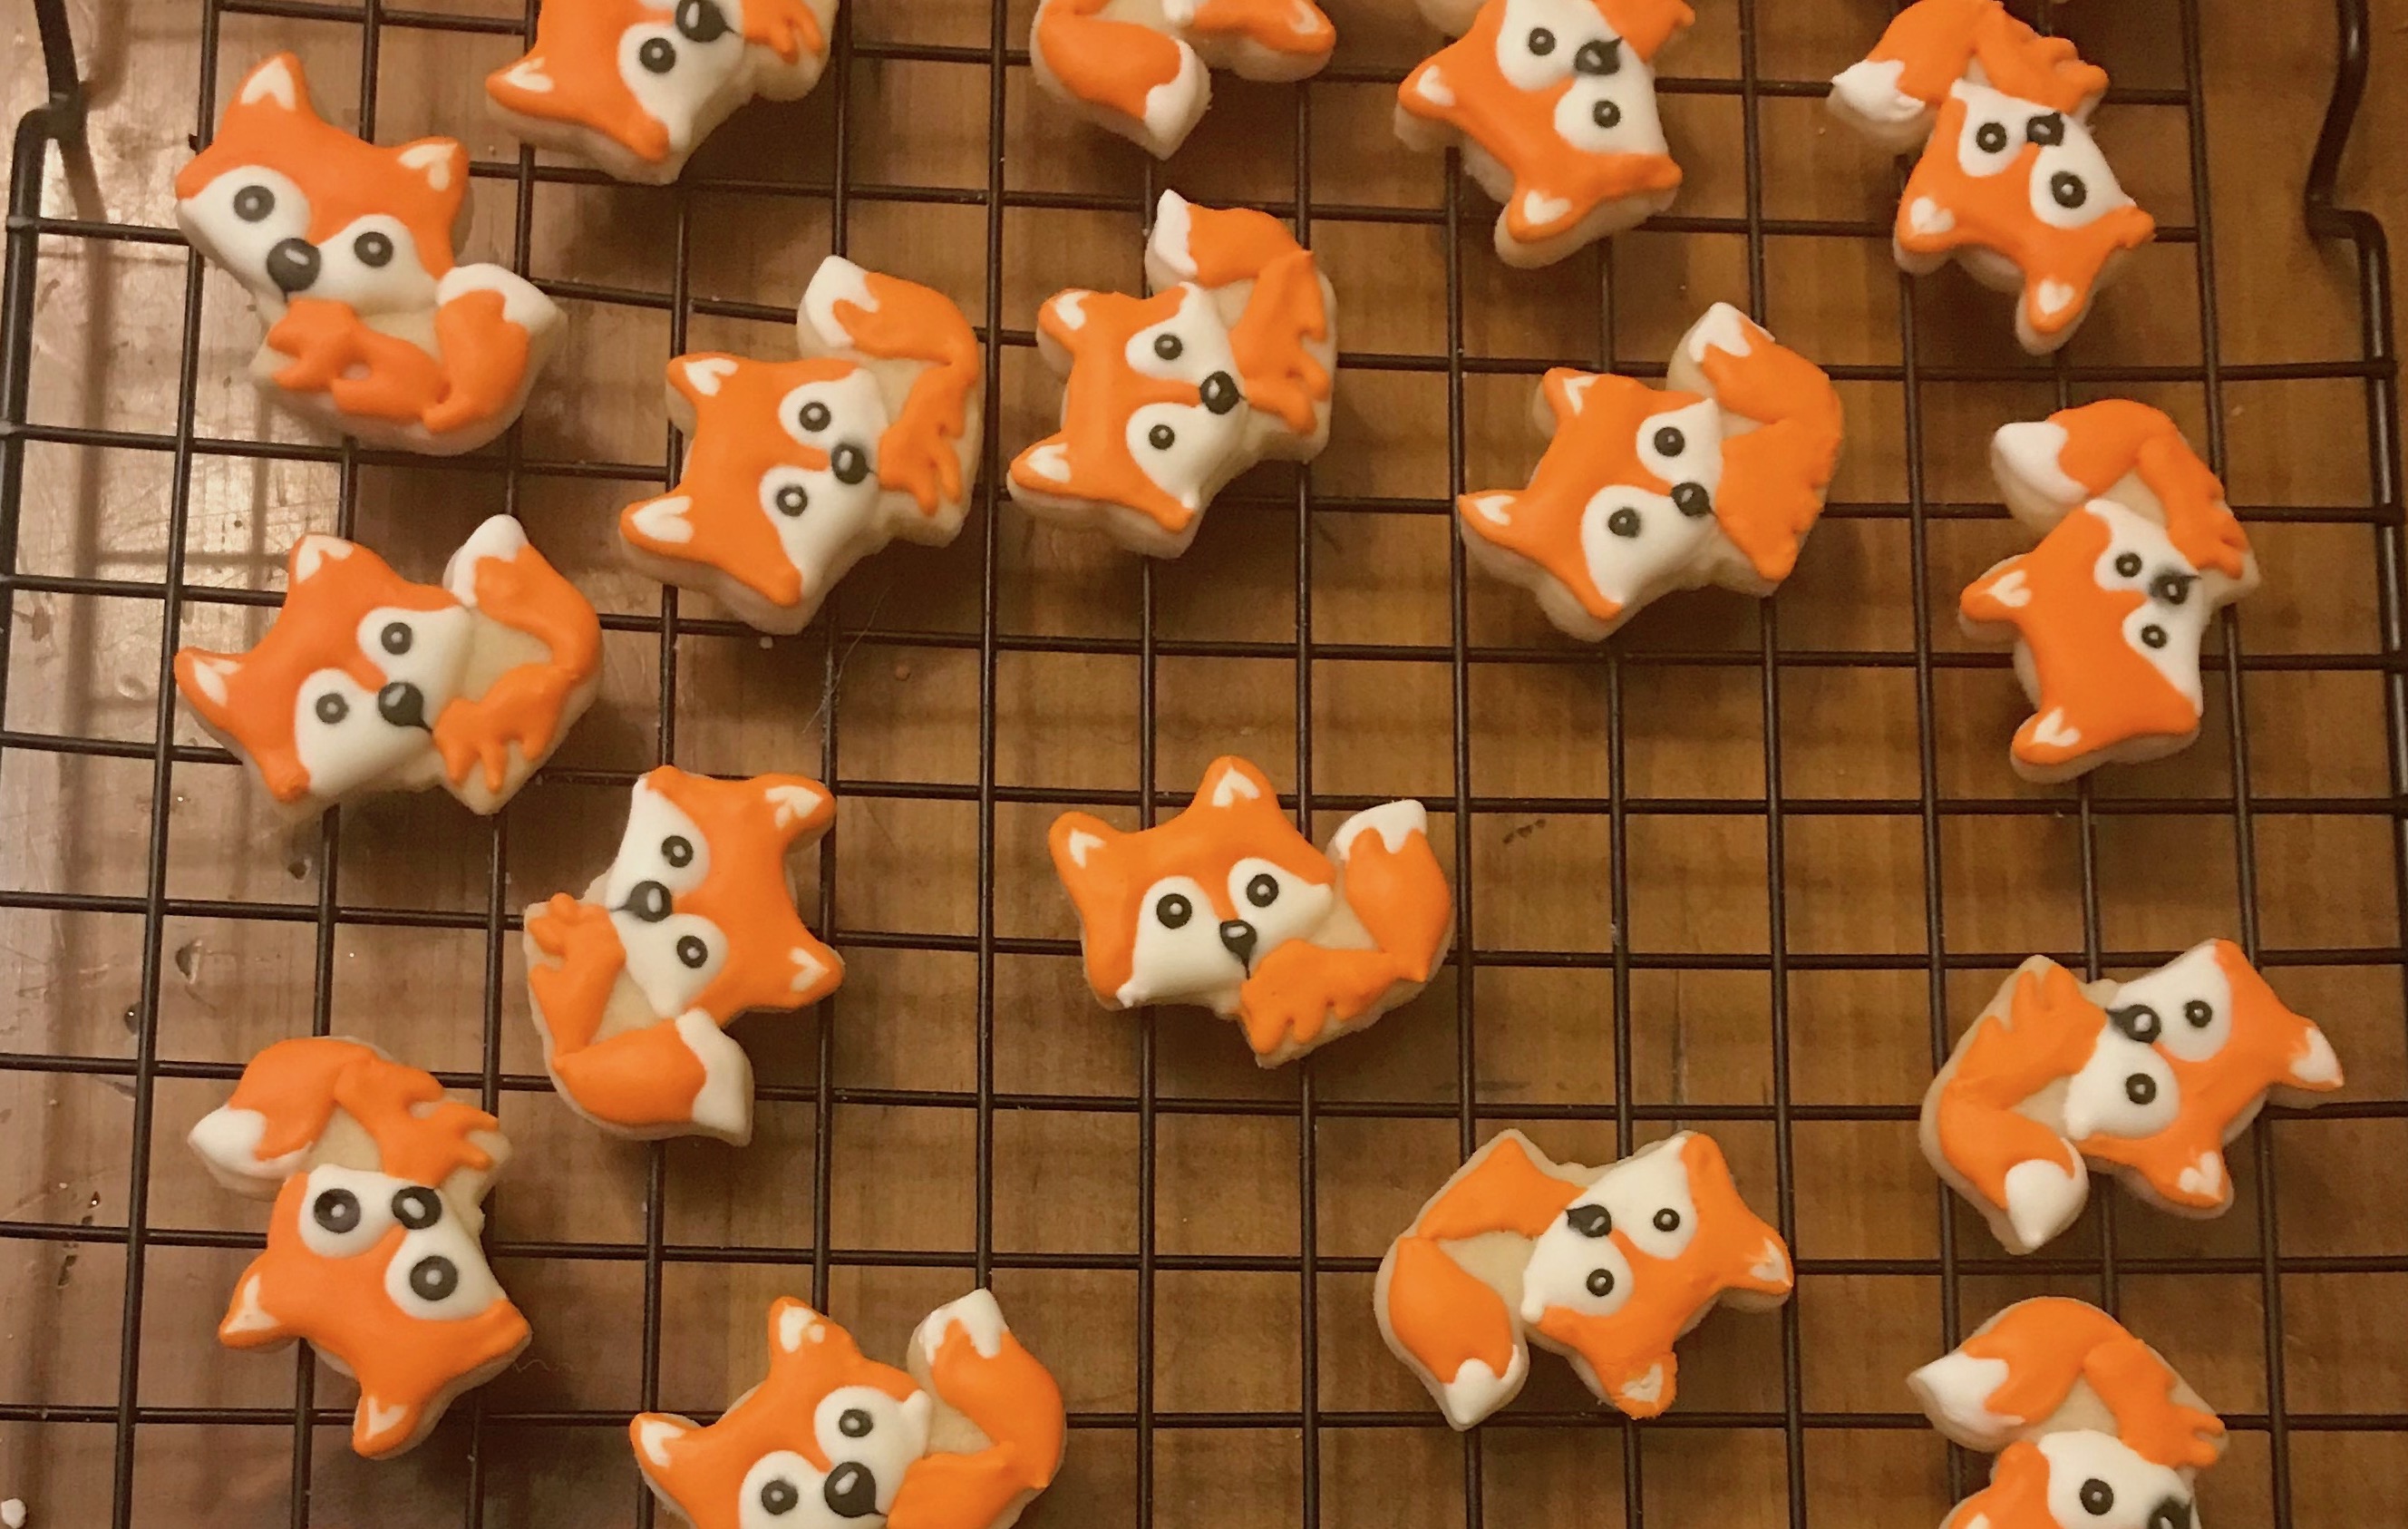
I LOVE decorating cookies with royal icing.
It seems like every holiday or gift season I’m pulling out my meringue powder, which is the cue for my husband to make himself scarce with the kids.
I won’t lie, it does take time to learn how to make the different components just right (and I promise I’ll share with you my recipes and tips soon), but few things in my life allow me to get lost in my little creative mind than a plain ole’ sugar cookie.
I used my favorite sugar cookie recipe and my delicious fool proof royal icing, but if you are short on time you can hack it and ask your local store baker if they will sell you a tub of their premixed royal icing in piping consistency.
*This post may contain affiliate links which may allow us to receive a small commission (at no additional cost to you) for purchases you make after clicking on product links on our posts , to view our full affiliate disclosure click here.
But rest assured we fully believe in every product we endorse.
Time: 2 hours (not including baking the cookies) for about 2-3 dozen (depending on your speed)
Materials:
-
-
- Sugar Cookie Dough
- Rolling Pin Guides (They really will make your life easier)
- Rolling Pin
- Royal Icing (start with a piping consistency)
- Gel Food Coloring
- Plastic Squeeze Plastic Bottles
- Piping bags
- #2 piping tips
- Saran wrap
- Spray Bottle
- Cooling Racks (if you have them)
- Flower or Snowflake Cookie Cutters
-
Make The Dough & Cut Out Cookies
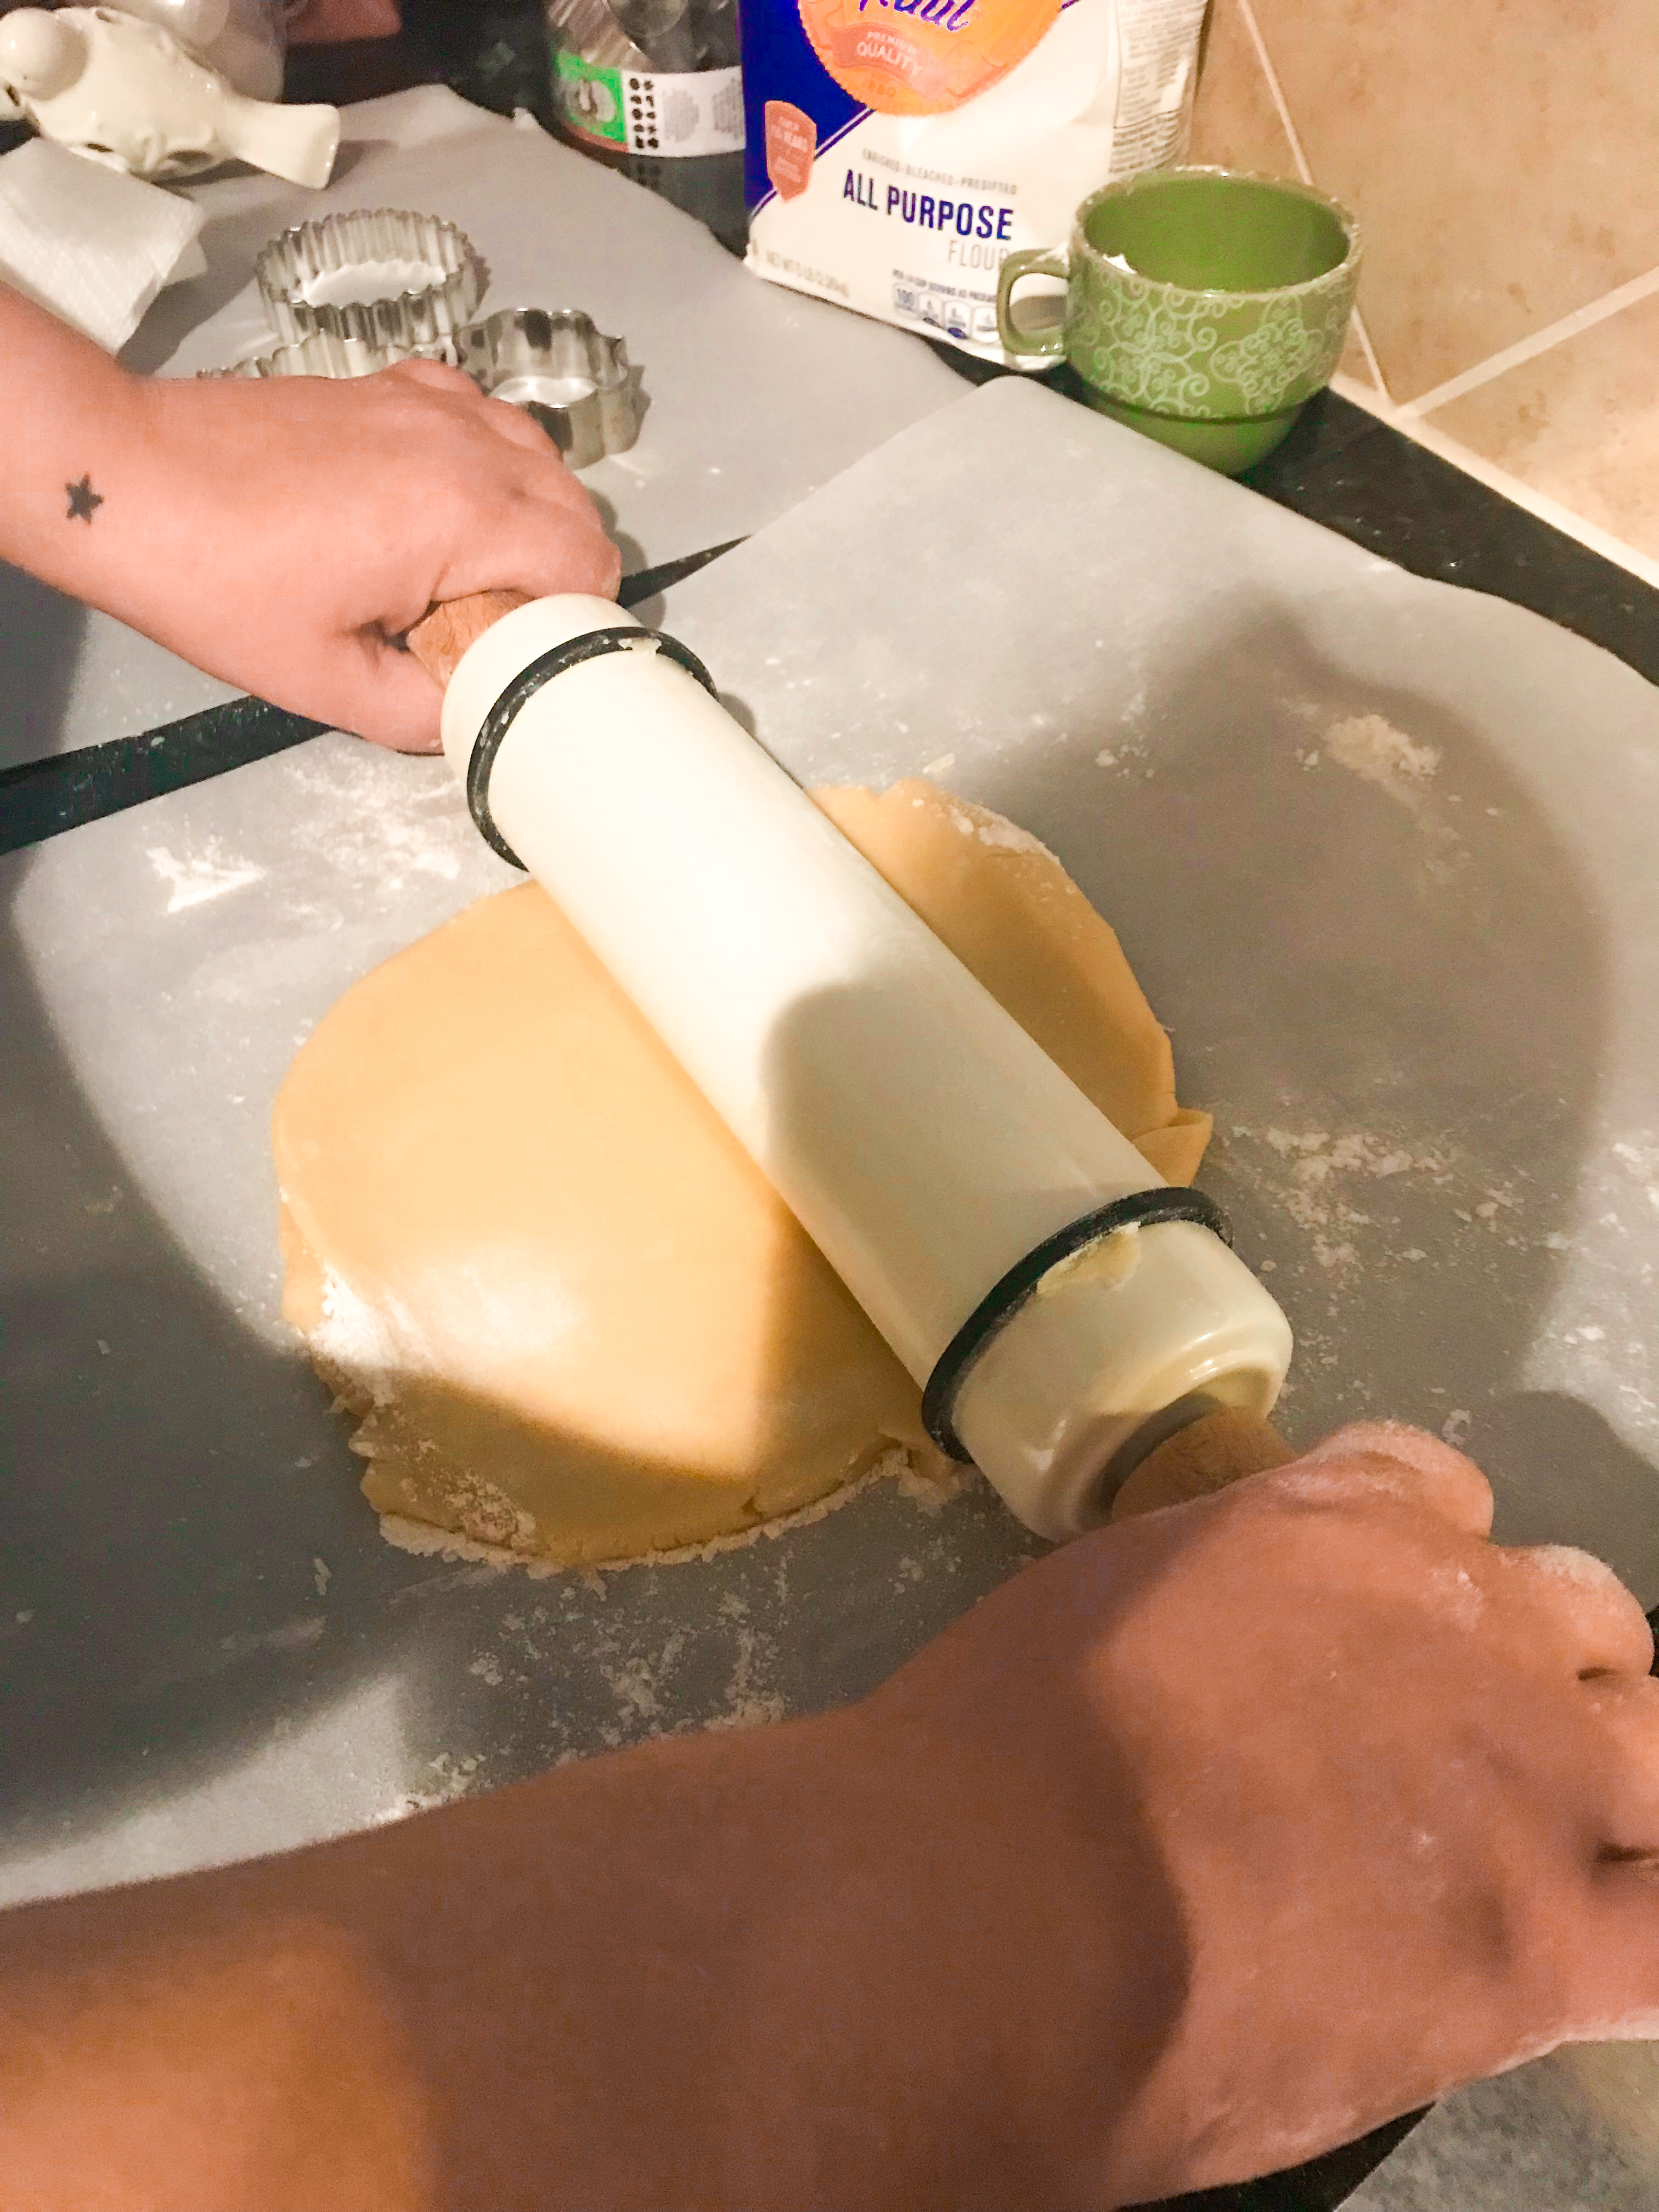
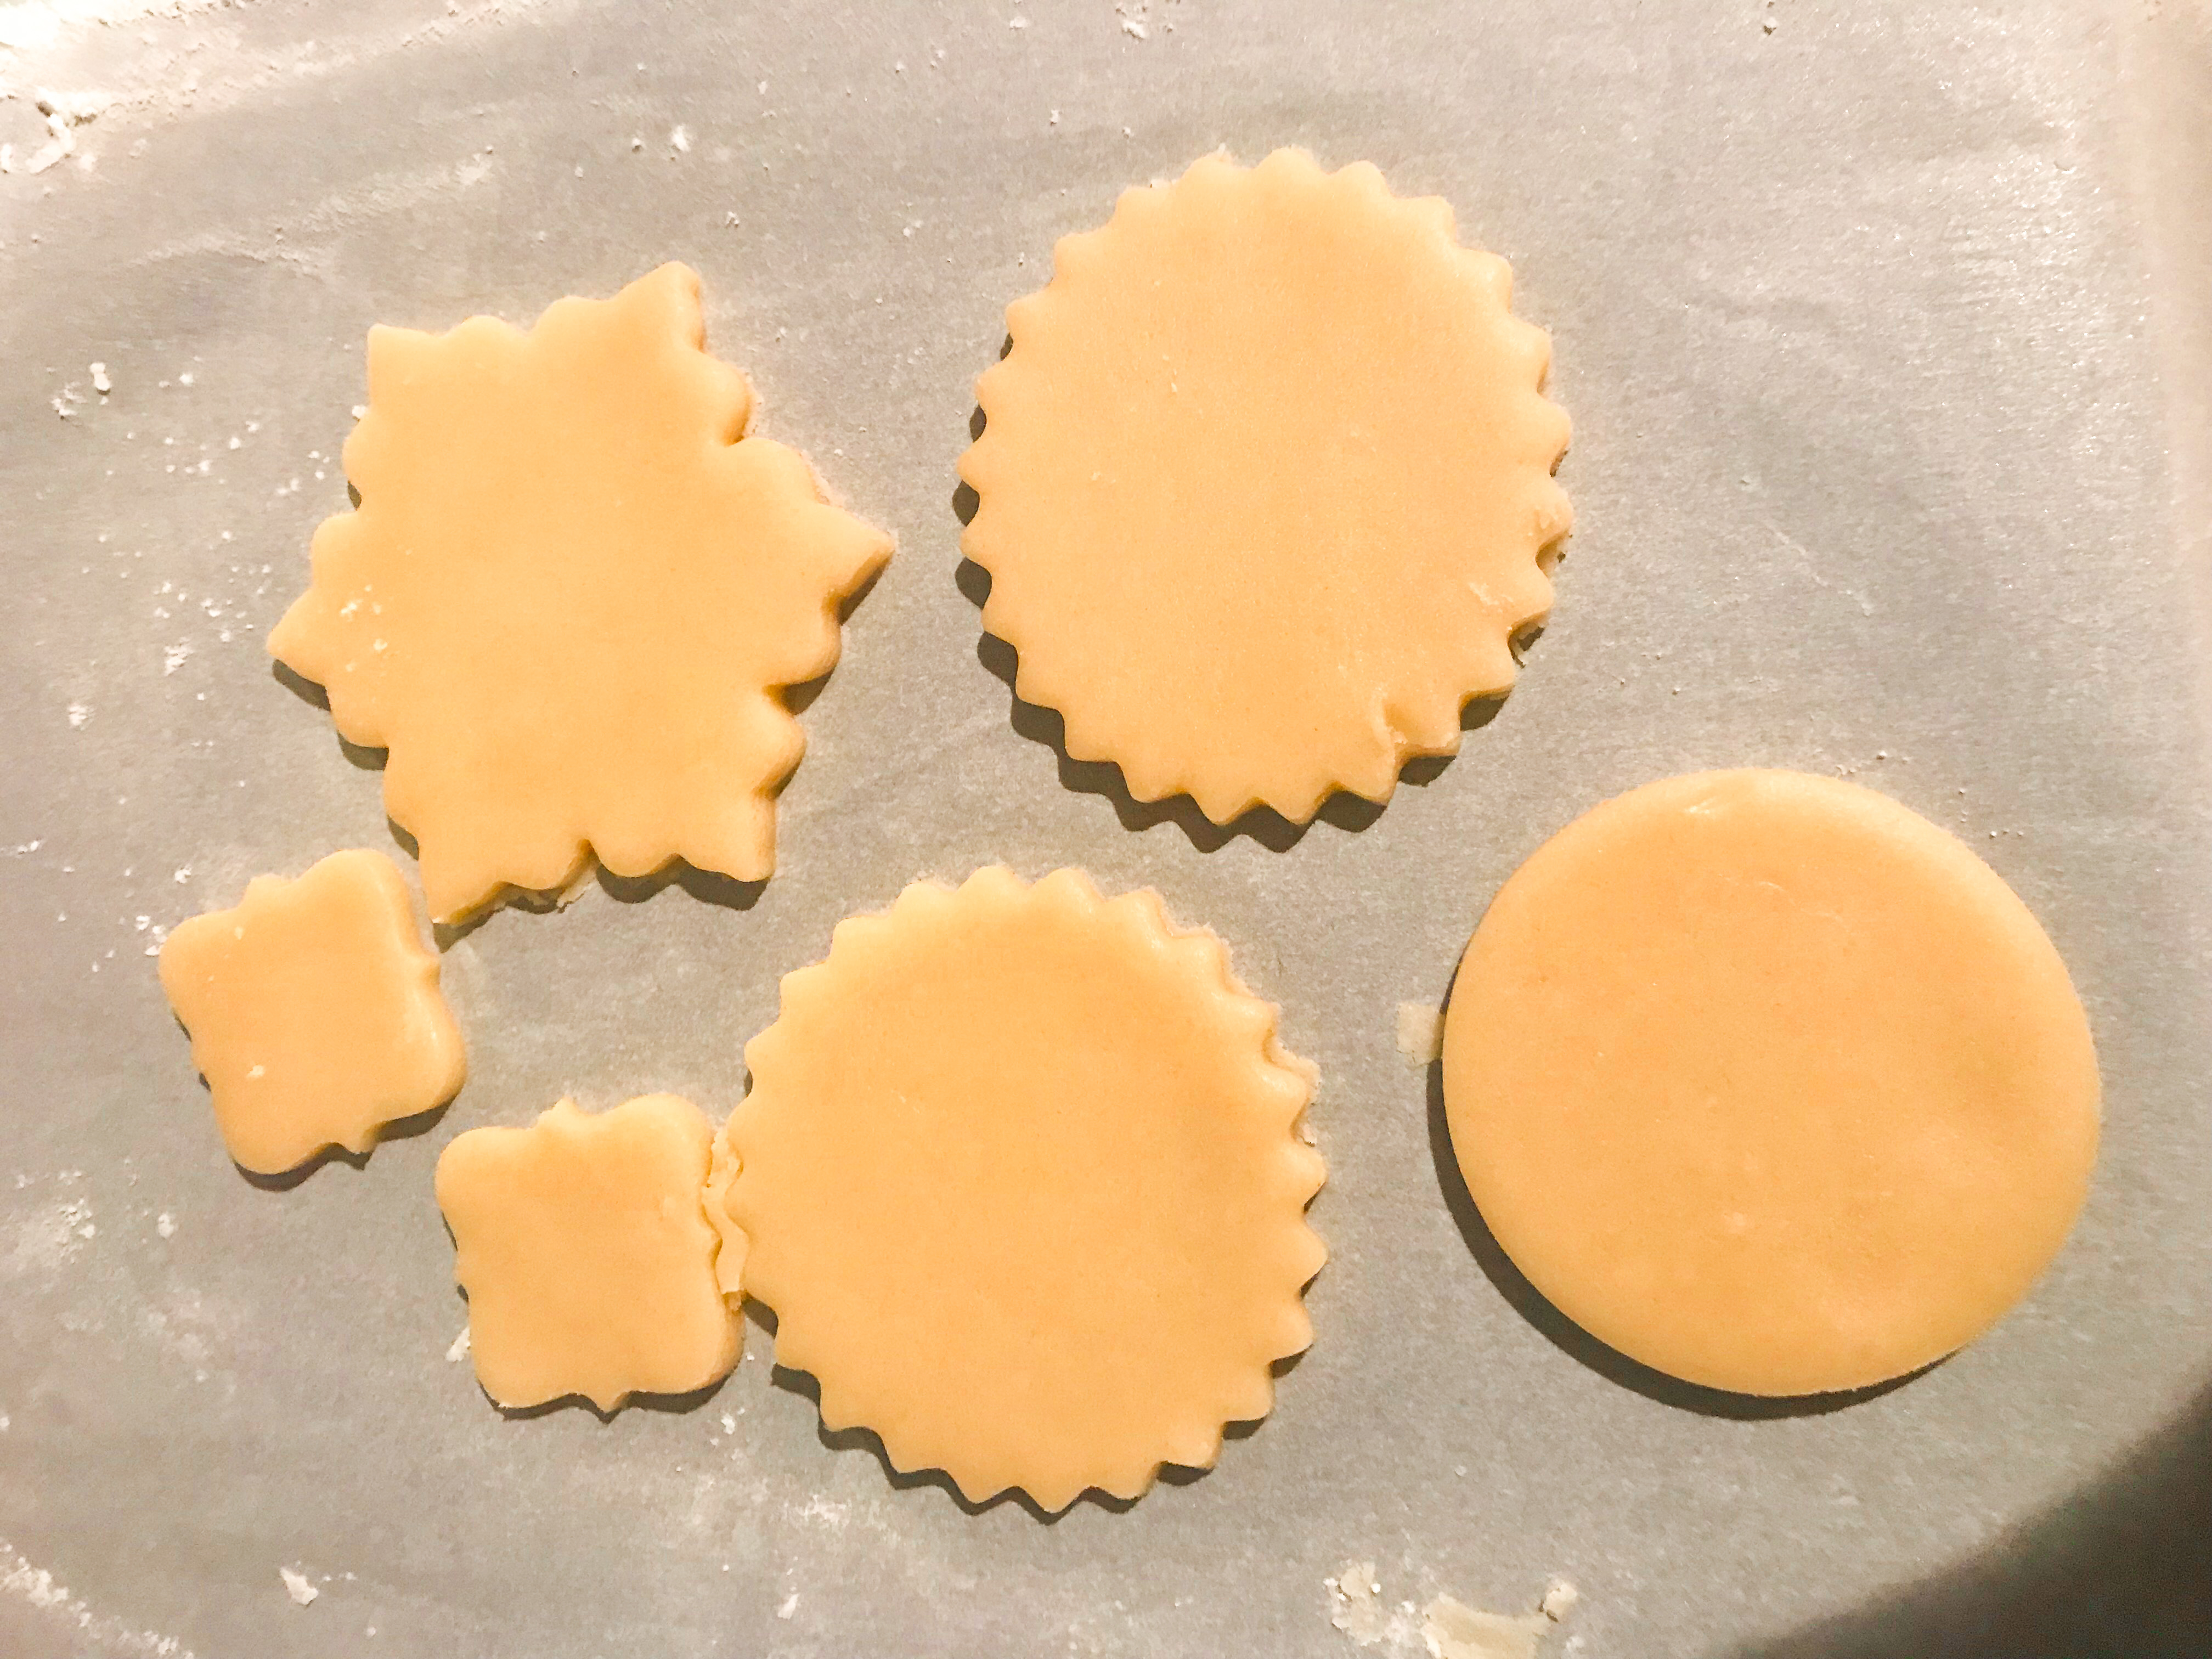
One of the biggest issues I have had in my cookie-making endeavors is getting my cookie dough to roll evenly.
I swear this is a major factor in whether your shapes hold up and if your icing flows correctly. One day I saw fondant guides at my local craft store and decided to give them a try, I pulled them onto my rolling pin (with a little help from my husband) and was AMAZED at how much simpler they made rolling out the dough.
There were no more hills or valleys, just a flat surface PERFECT for cutting out my cookies.
Since then I’ve discovered they make actual Rolling Pin Guides which don’t require the same arm-power as the fondant ones did!
After browsing through my cookie cutter collection I realized I only had ONE flower cookie cutter, but I did have a ton of snowflakes.
Really the shapes are extremely similar, so I went ahead and used snowflake cookie cutters to cut out the majority of my flower cookies along with a few scalloped round ones.
If you are anything like me, using cookie cutters can be frustrating!
I HAVE to have perfect edges!
My perfect- edge trick is that I roll the dough out on parchment paper, cut them out on parchment paper, peel away the excess dough, and move the whole sheet of parchment paper onto my cookie sheet preserving my perfect cut-outs and also saving A LOT of clean up time.
Prepare The Royal Icing
Pop them in the oven and, if you are making your own royal icing, I recommend getting started on that while they bake.
Once the cookies are done per the recipe, pull them out and transfer them to cooling racks (if you have them) to prevent burning.
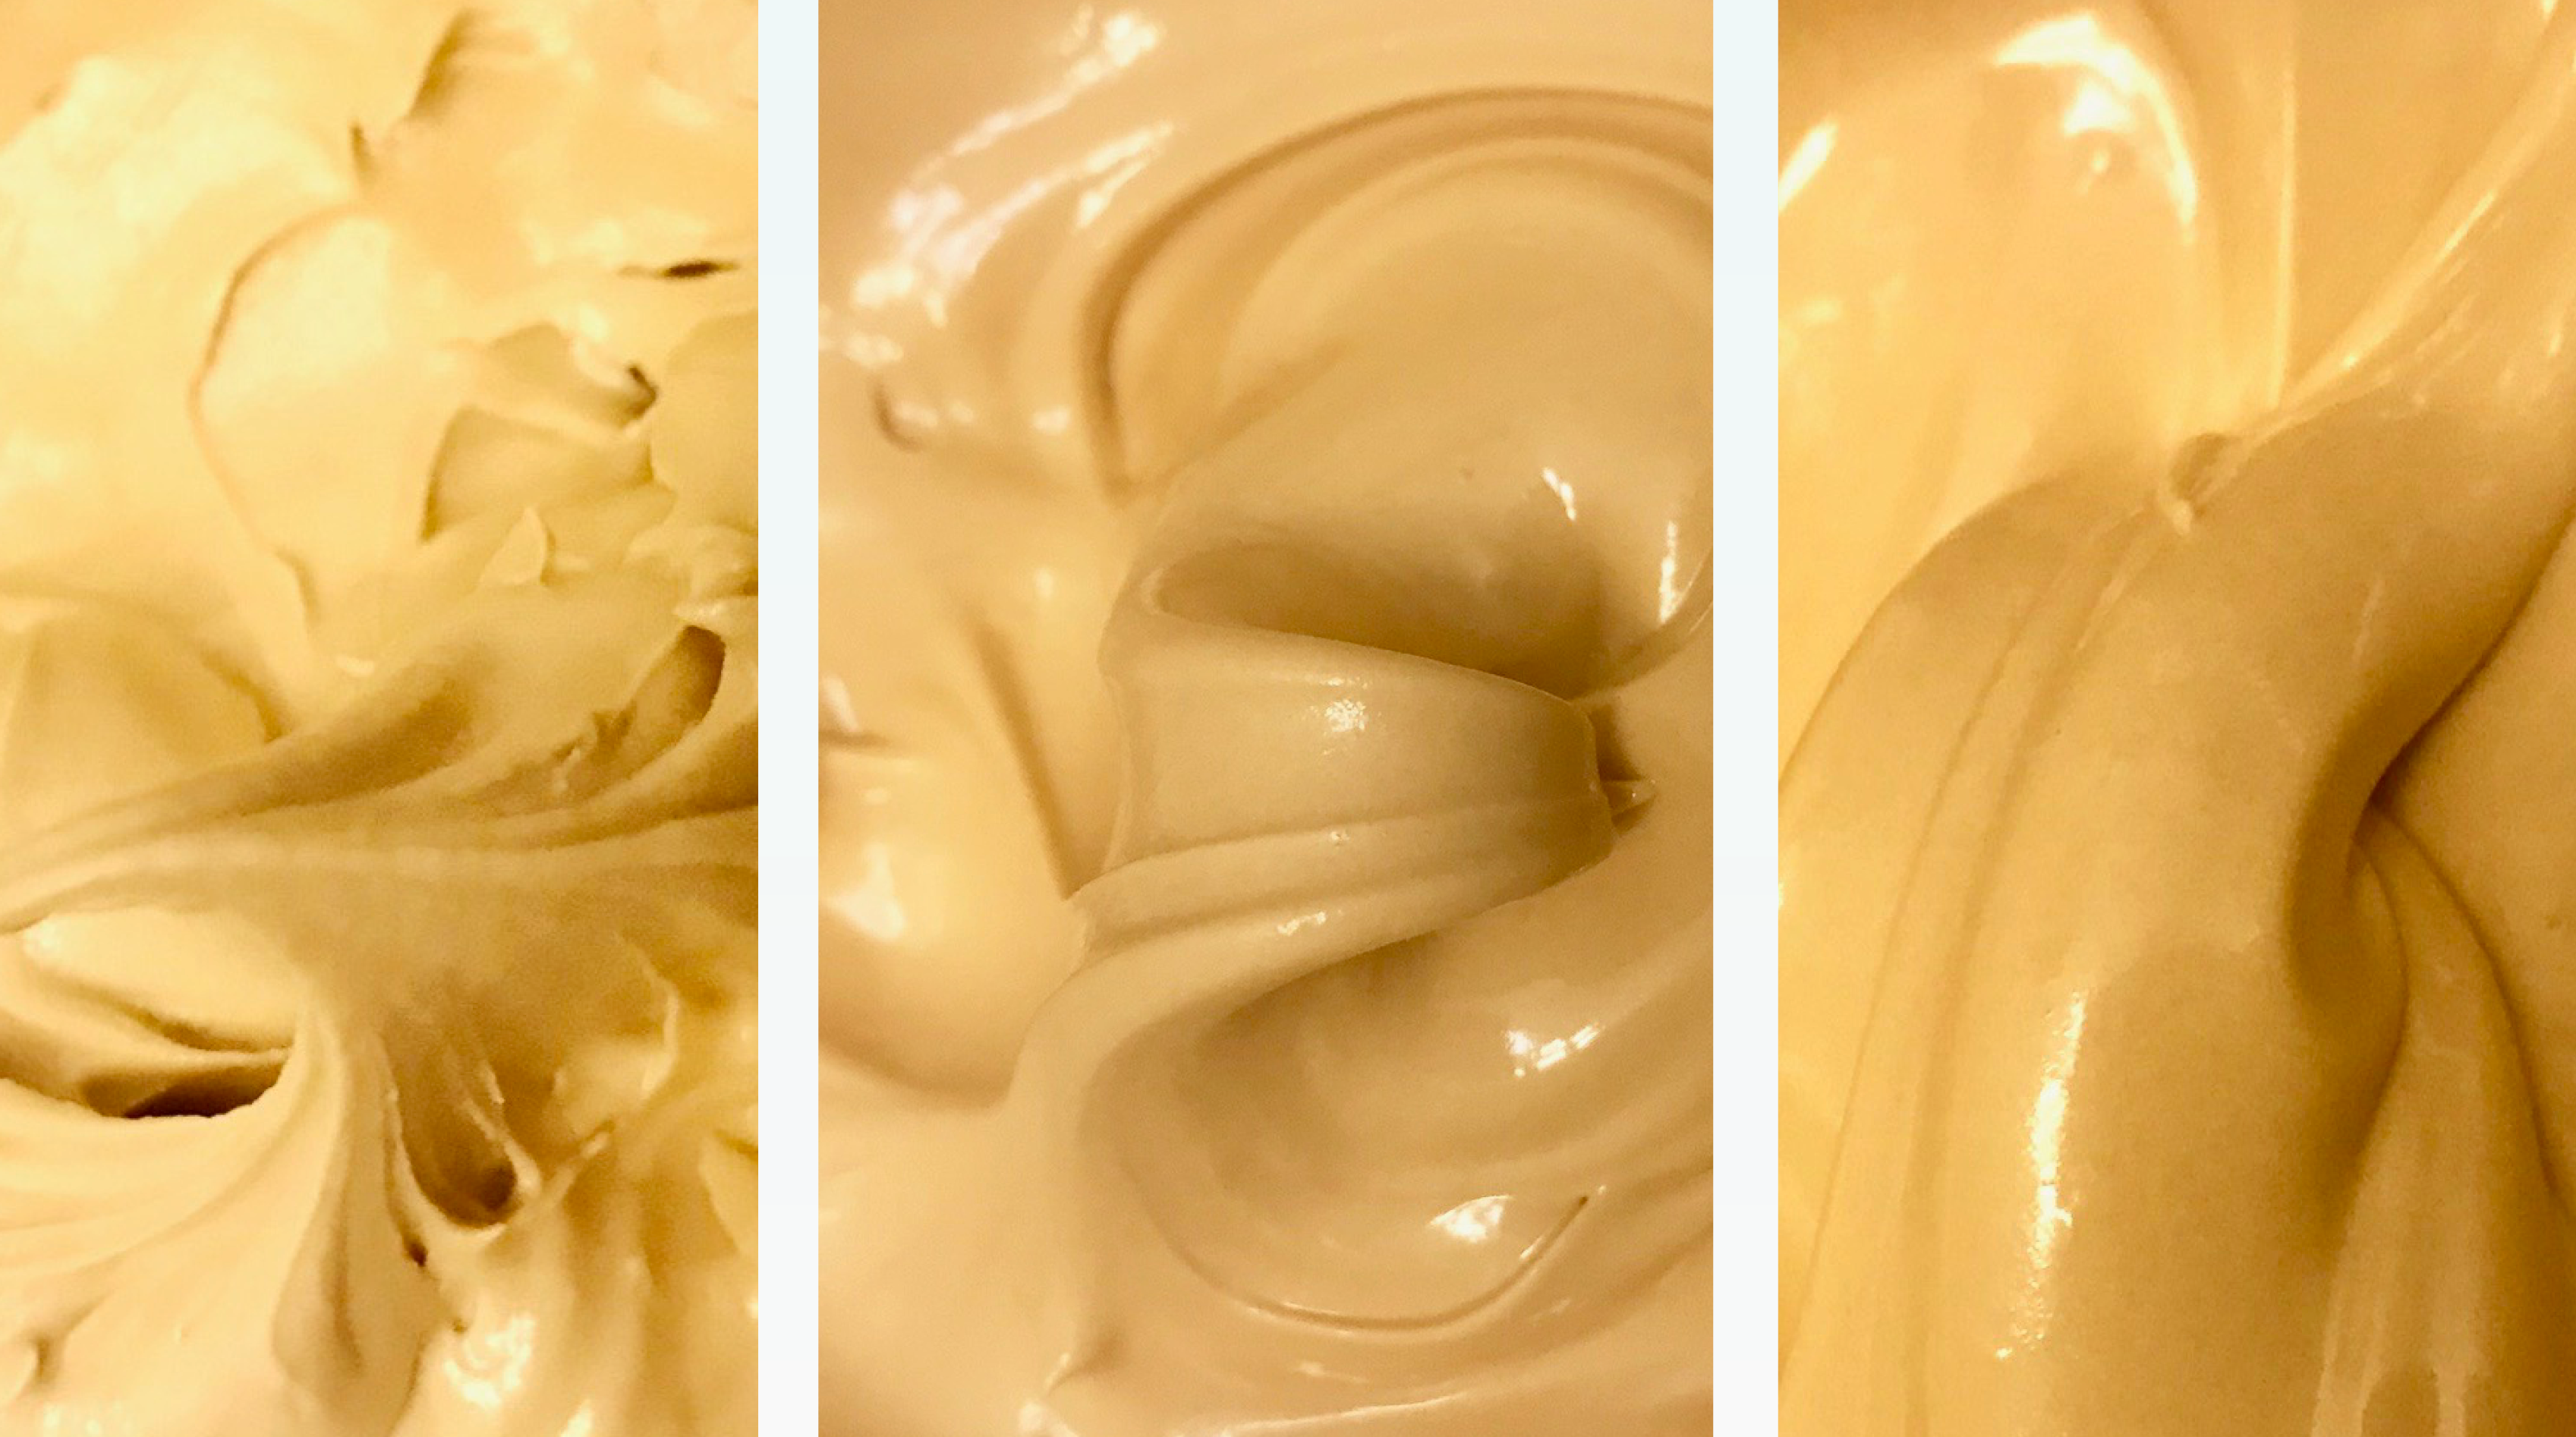
While the cookies cool you can go ahead and start mixing your colors into your icing.
I do this by dividing my thick piping consistency icing into several bowls with about 2 cups of icing a piece. I normally set aside a bit extra of plain white in case I accidentally add too much color. I then add my color using a knife (if the color is in a tub) or in drops (if it’s in a bottle).
Hint: I read somewhere a long time ago to use toothpicks to add color. I’m sure this (somehow) worked for the author, but for me it was a nightmare and took FOREVER. So maybe don’t use toothpicks, it really does take a fair amount of food color to get a vibrant shade.
Once you have the shade you want glop a few tablespoons onto some saran wrap, twist the ends. Thread the end of the twisted saran wrap through the piping tip connector of a piping bag. Clip the excess saran wrap and secure your #2 piping tip.
Hint: To keep your piping tip from clogging place a wet paper towel in a cup/ bowl and have the piping tip rest on it.
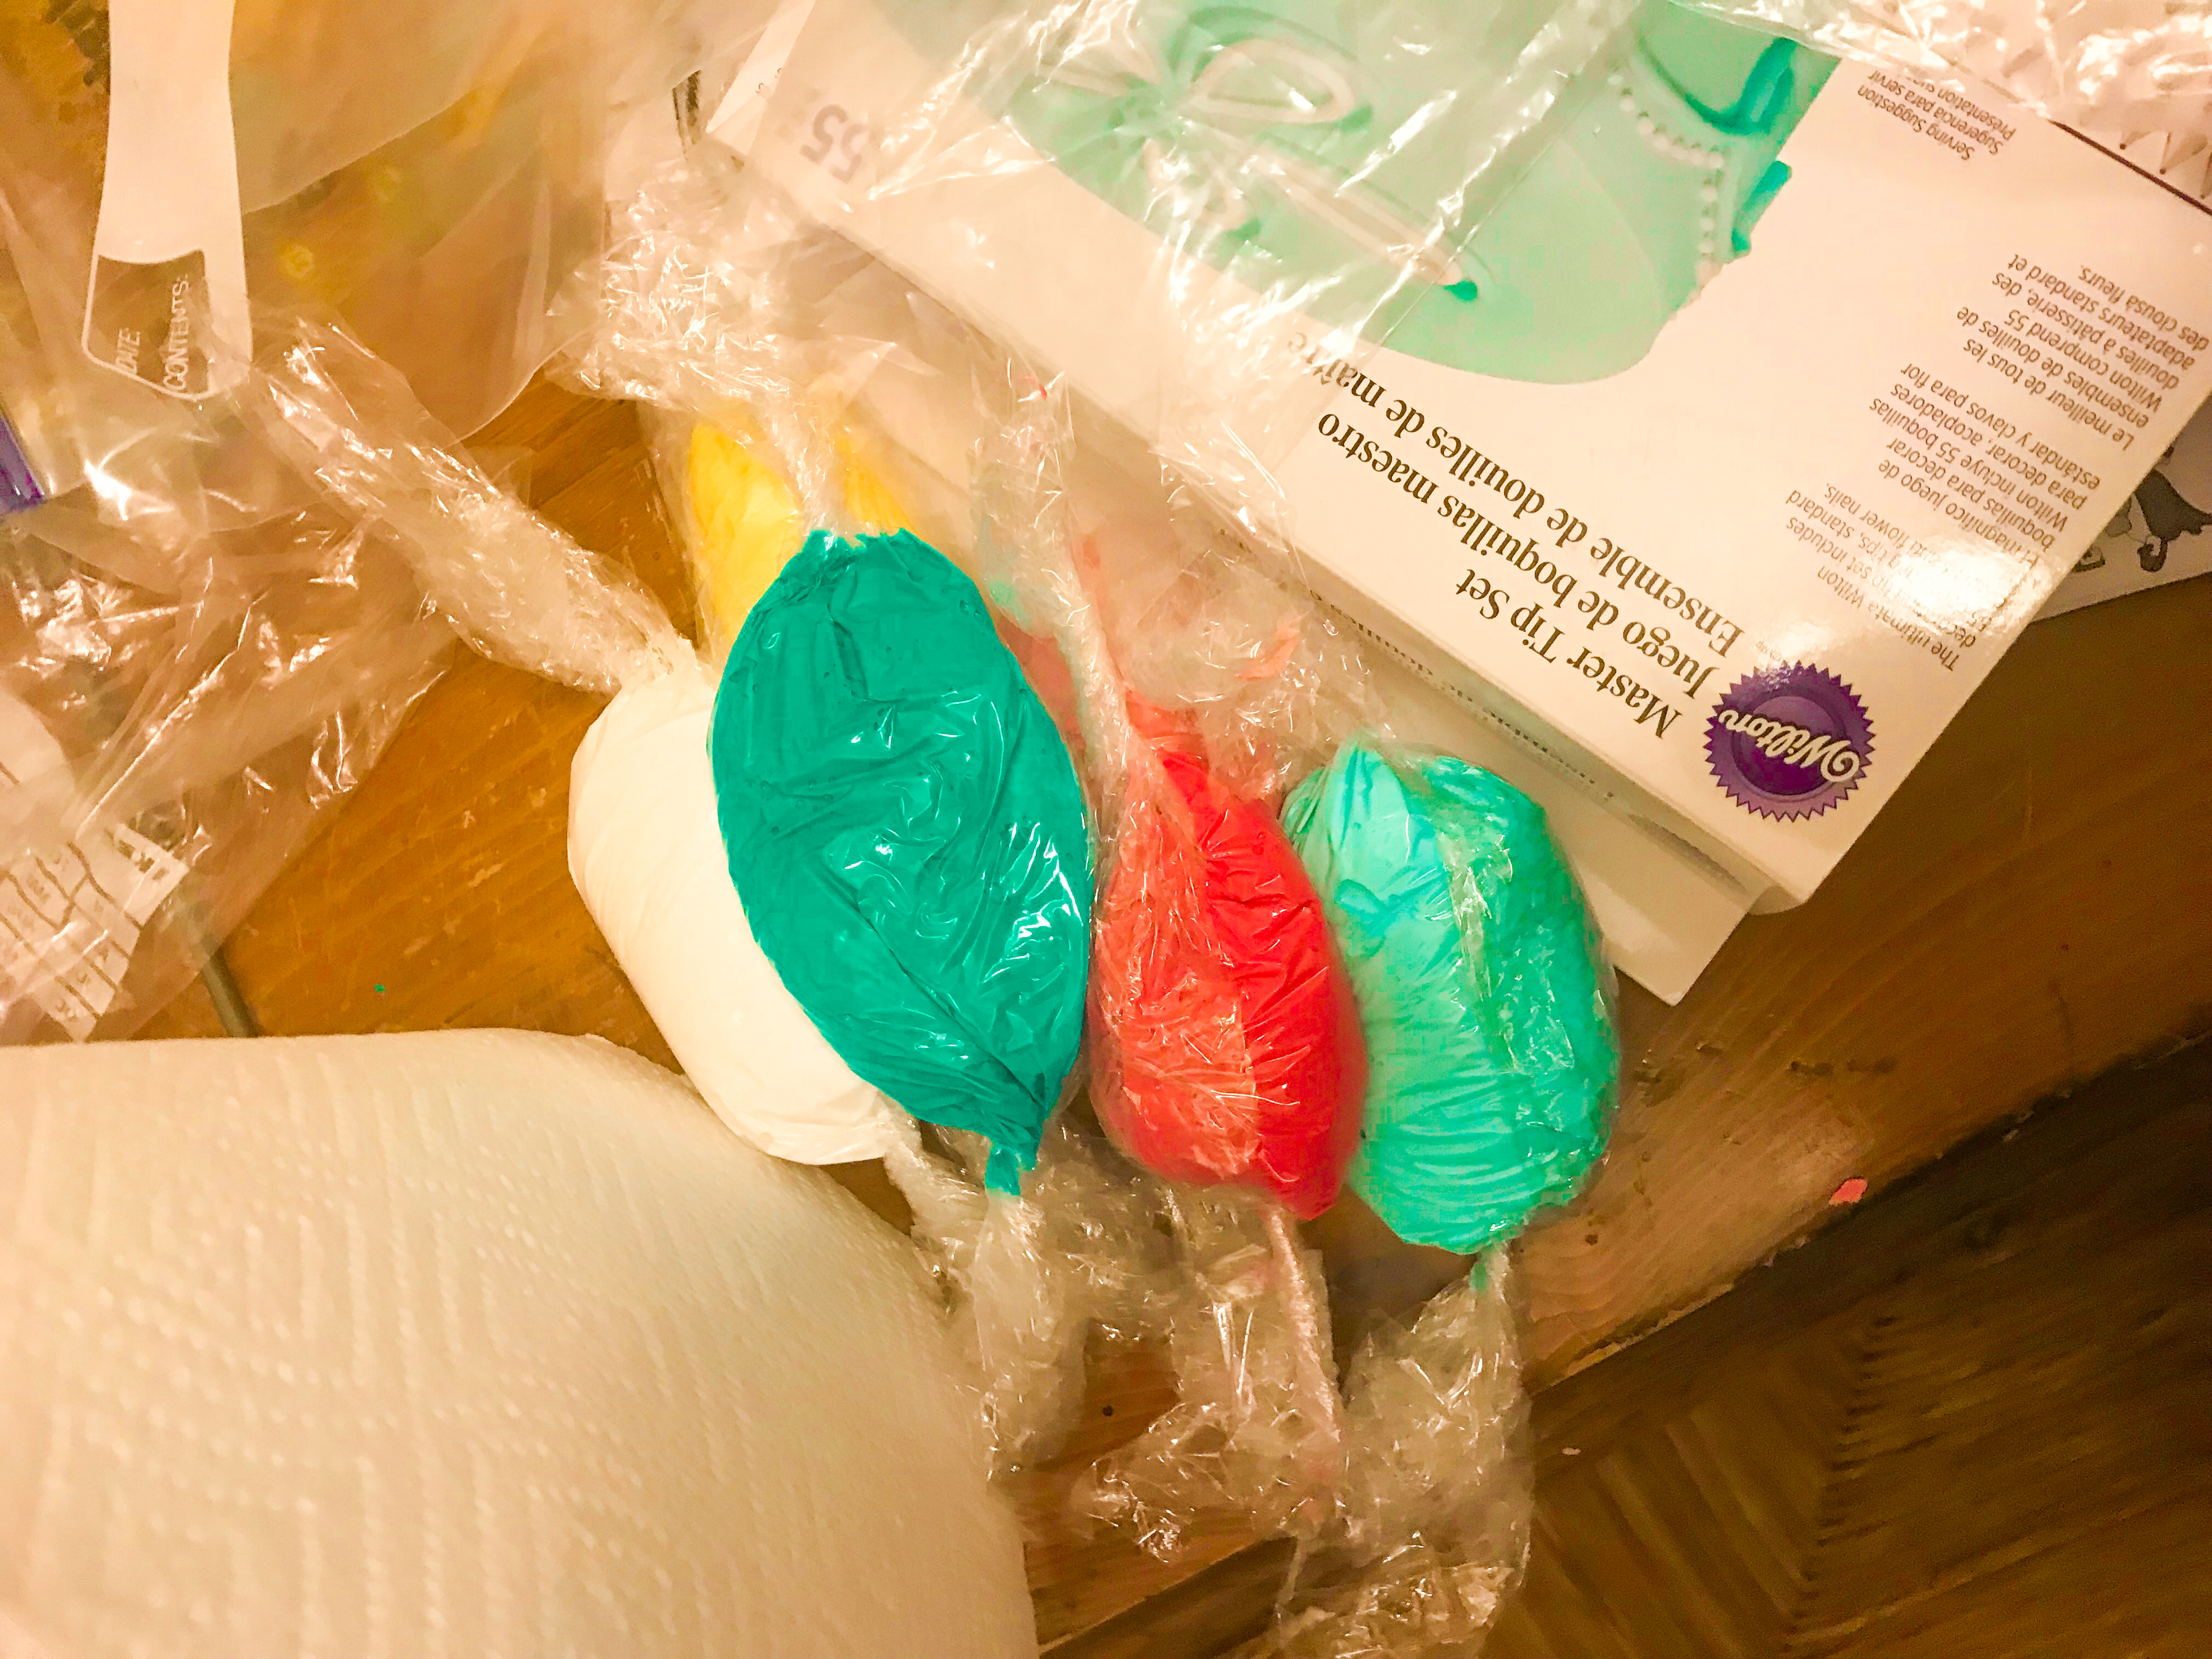
Then, using a spray bottle, water the rest of the colored icing down to flood consistency (think honey, but if you need a visual head over to my preparing royal icing post for all the details you could ask for!). Pour this into a squeeze bottle.
Repeat for each desired color.
Now the hard stuff is out of the way!!!!!
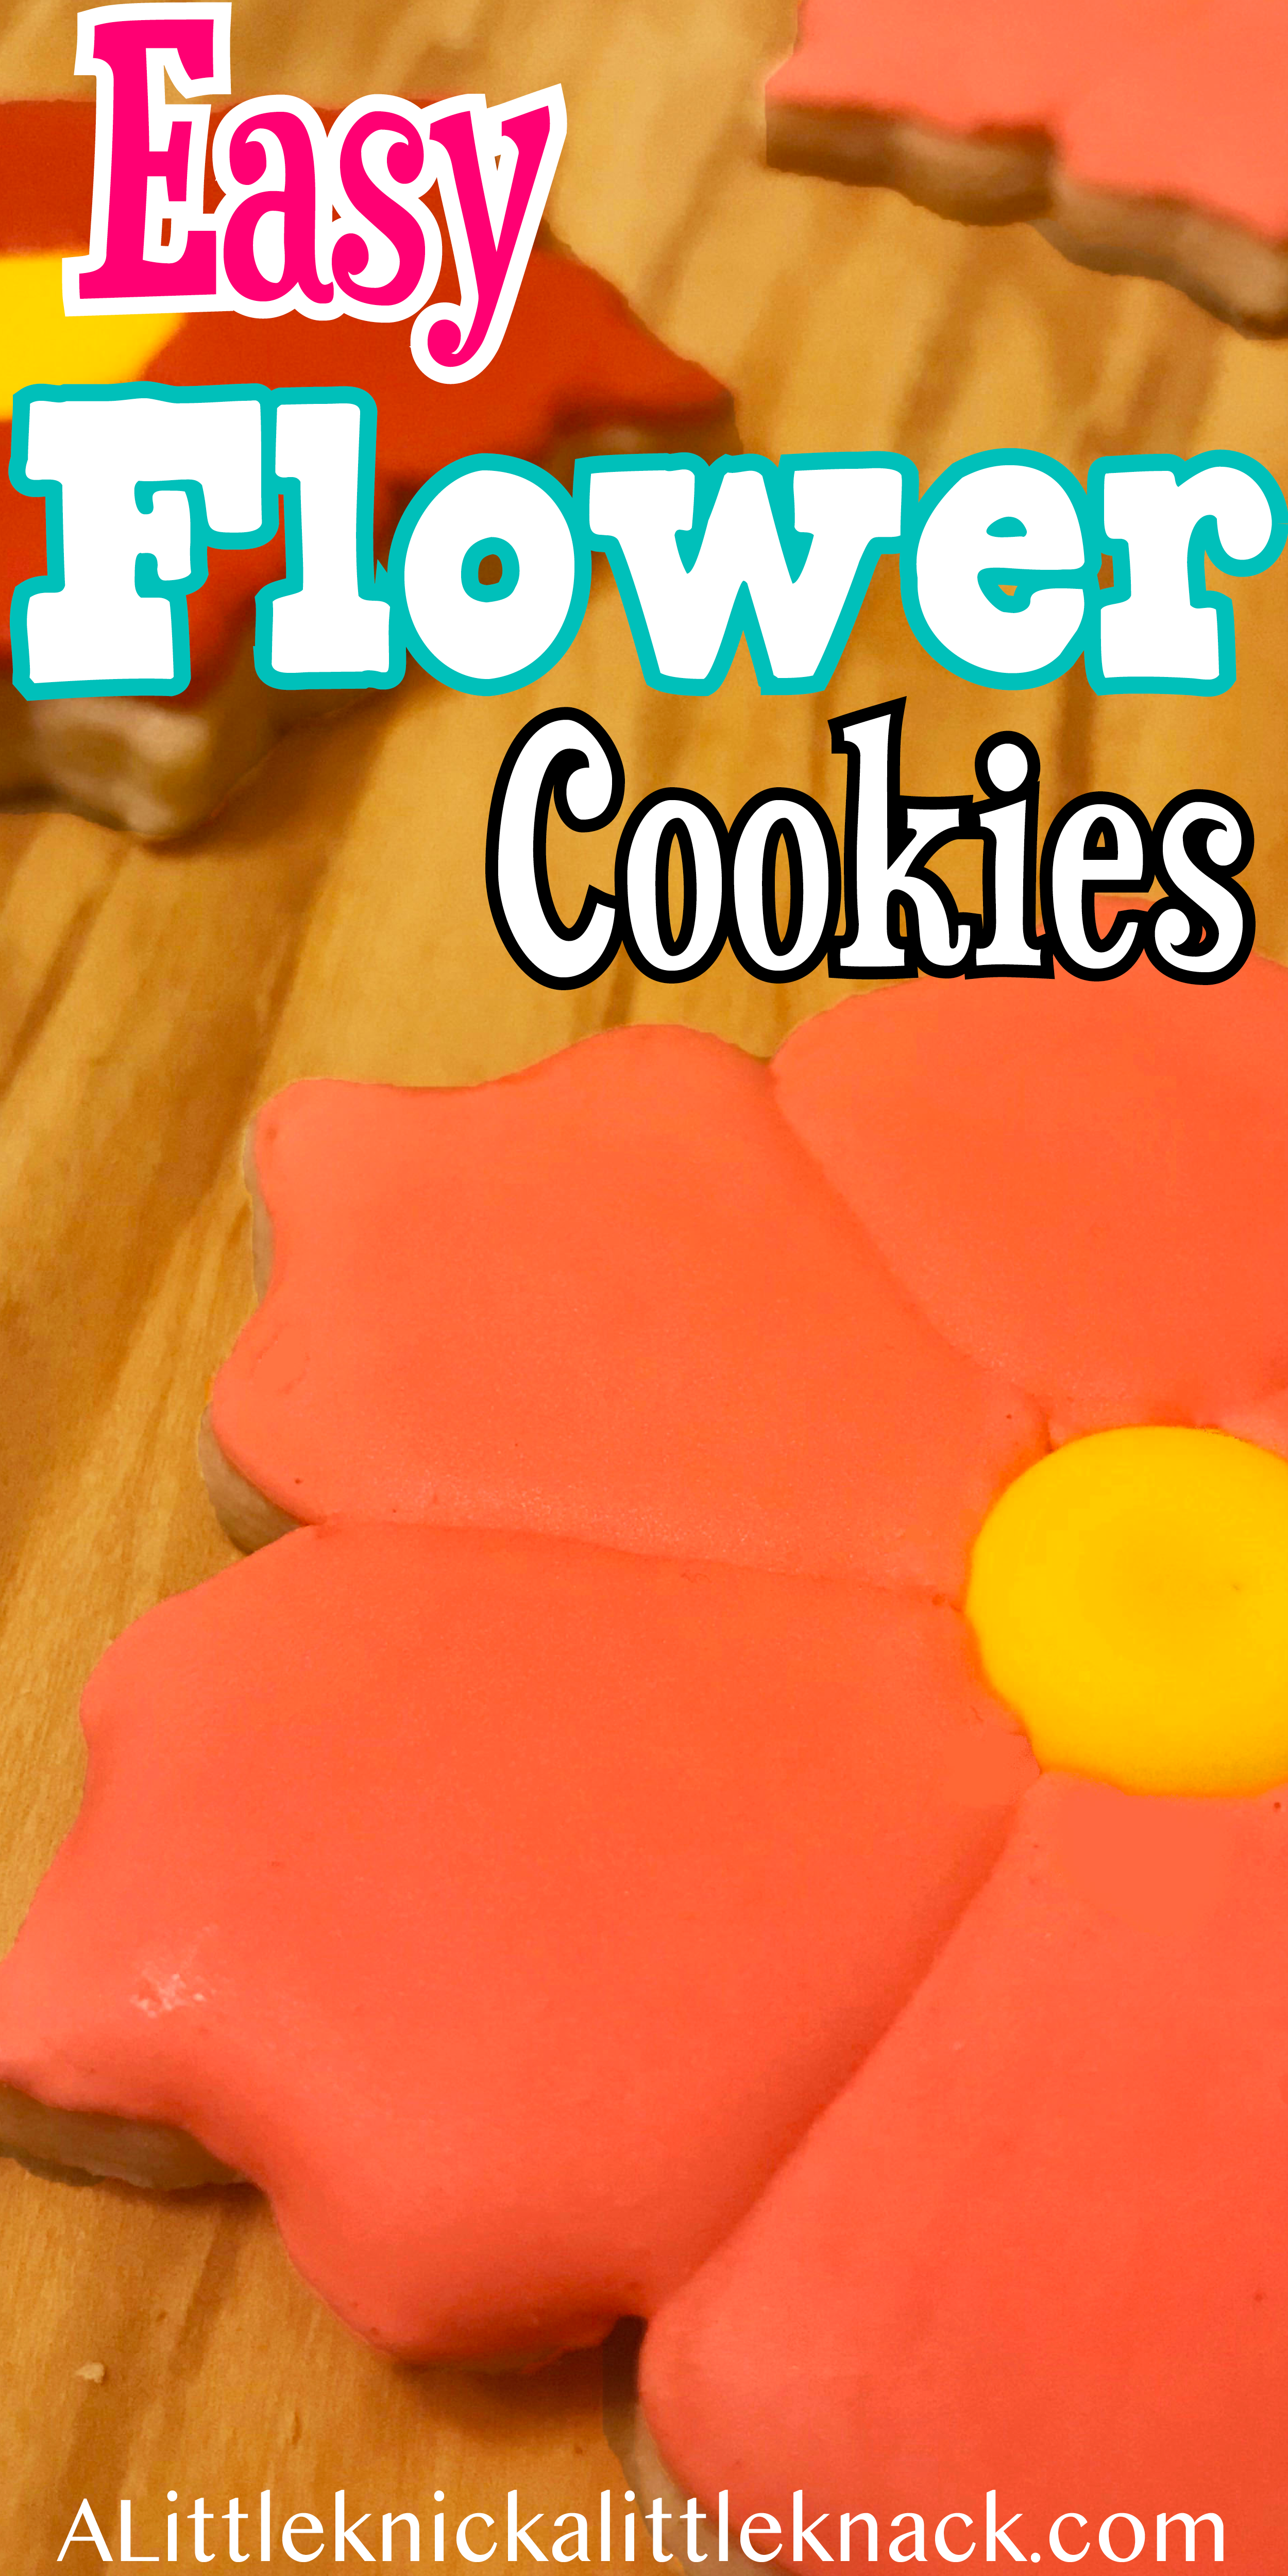
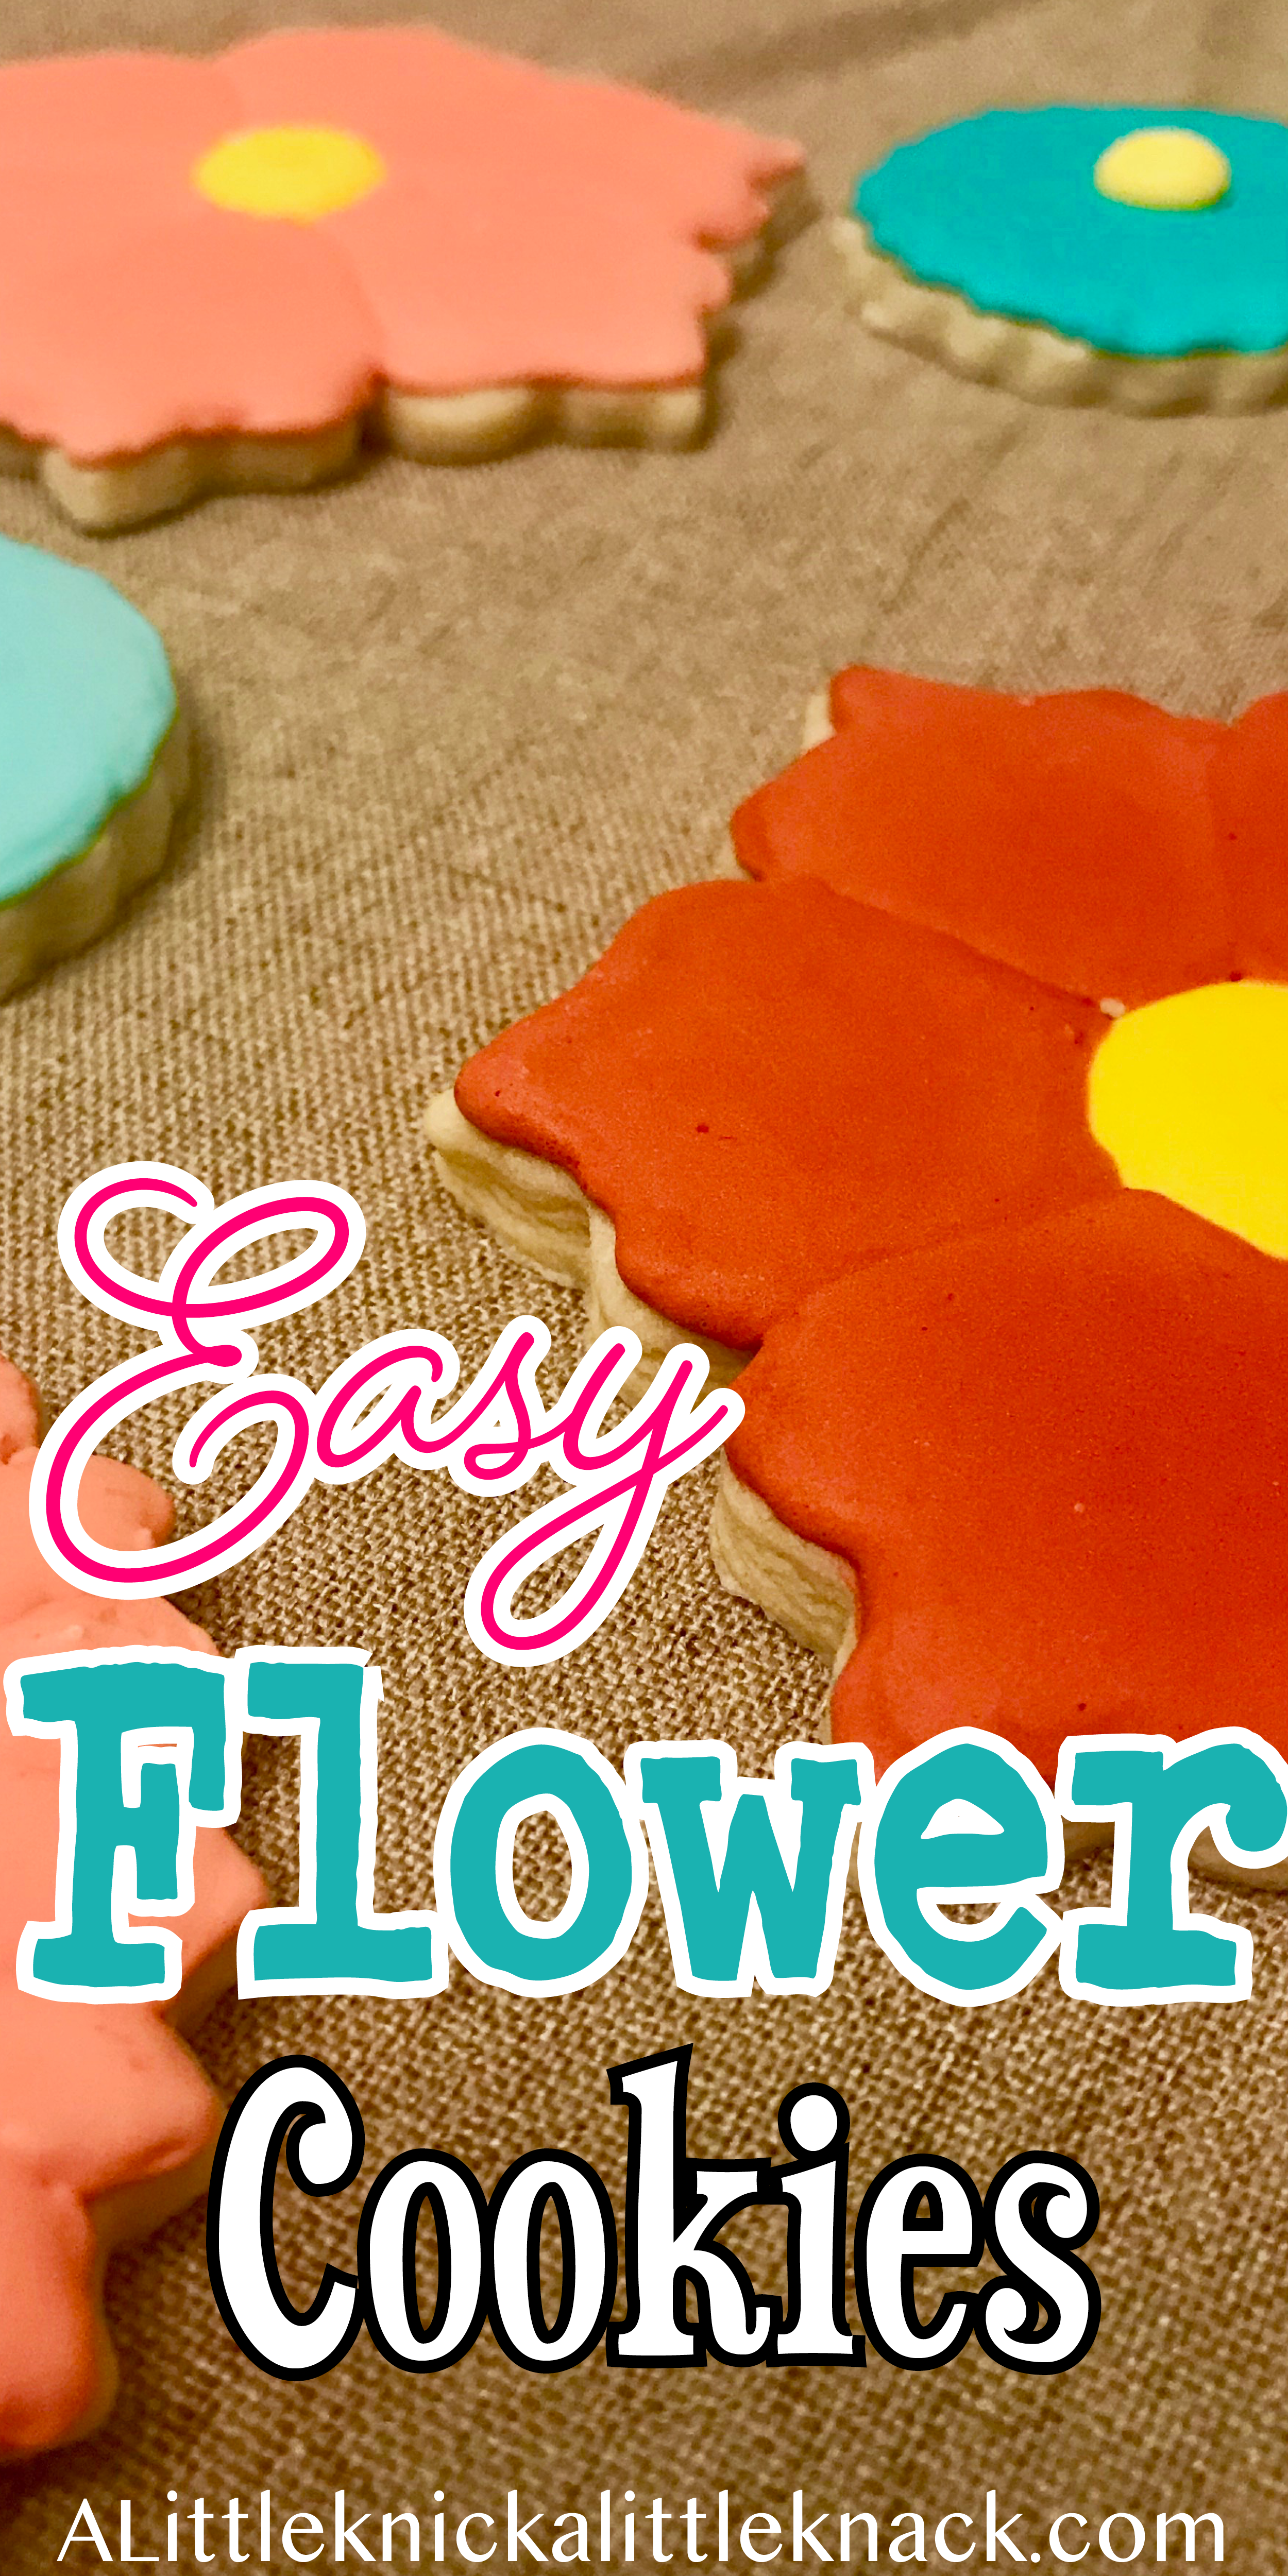
Decorating the Flower Cookies
I promise this is the fun and easy part.
Pipe a yellow circle and flood with yellow icing for the center. Do this for each flower cookie.
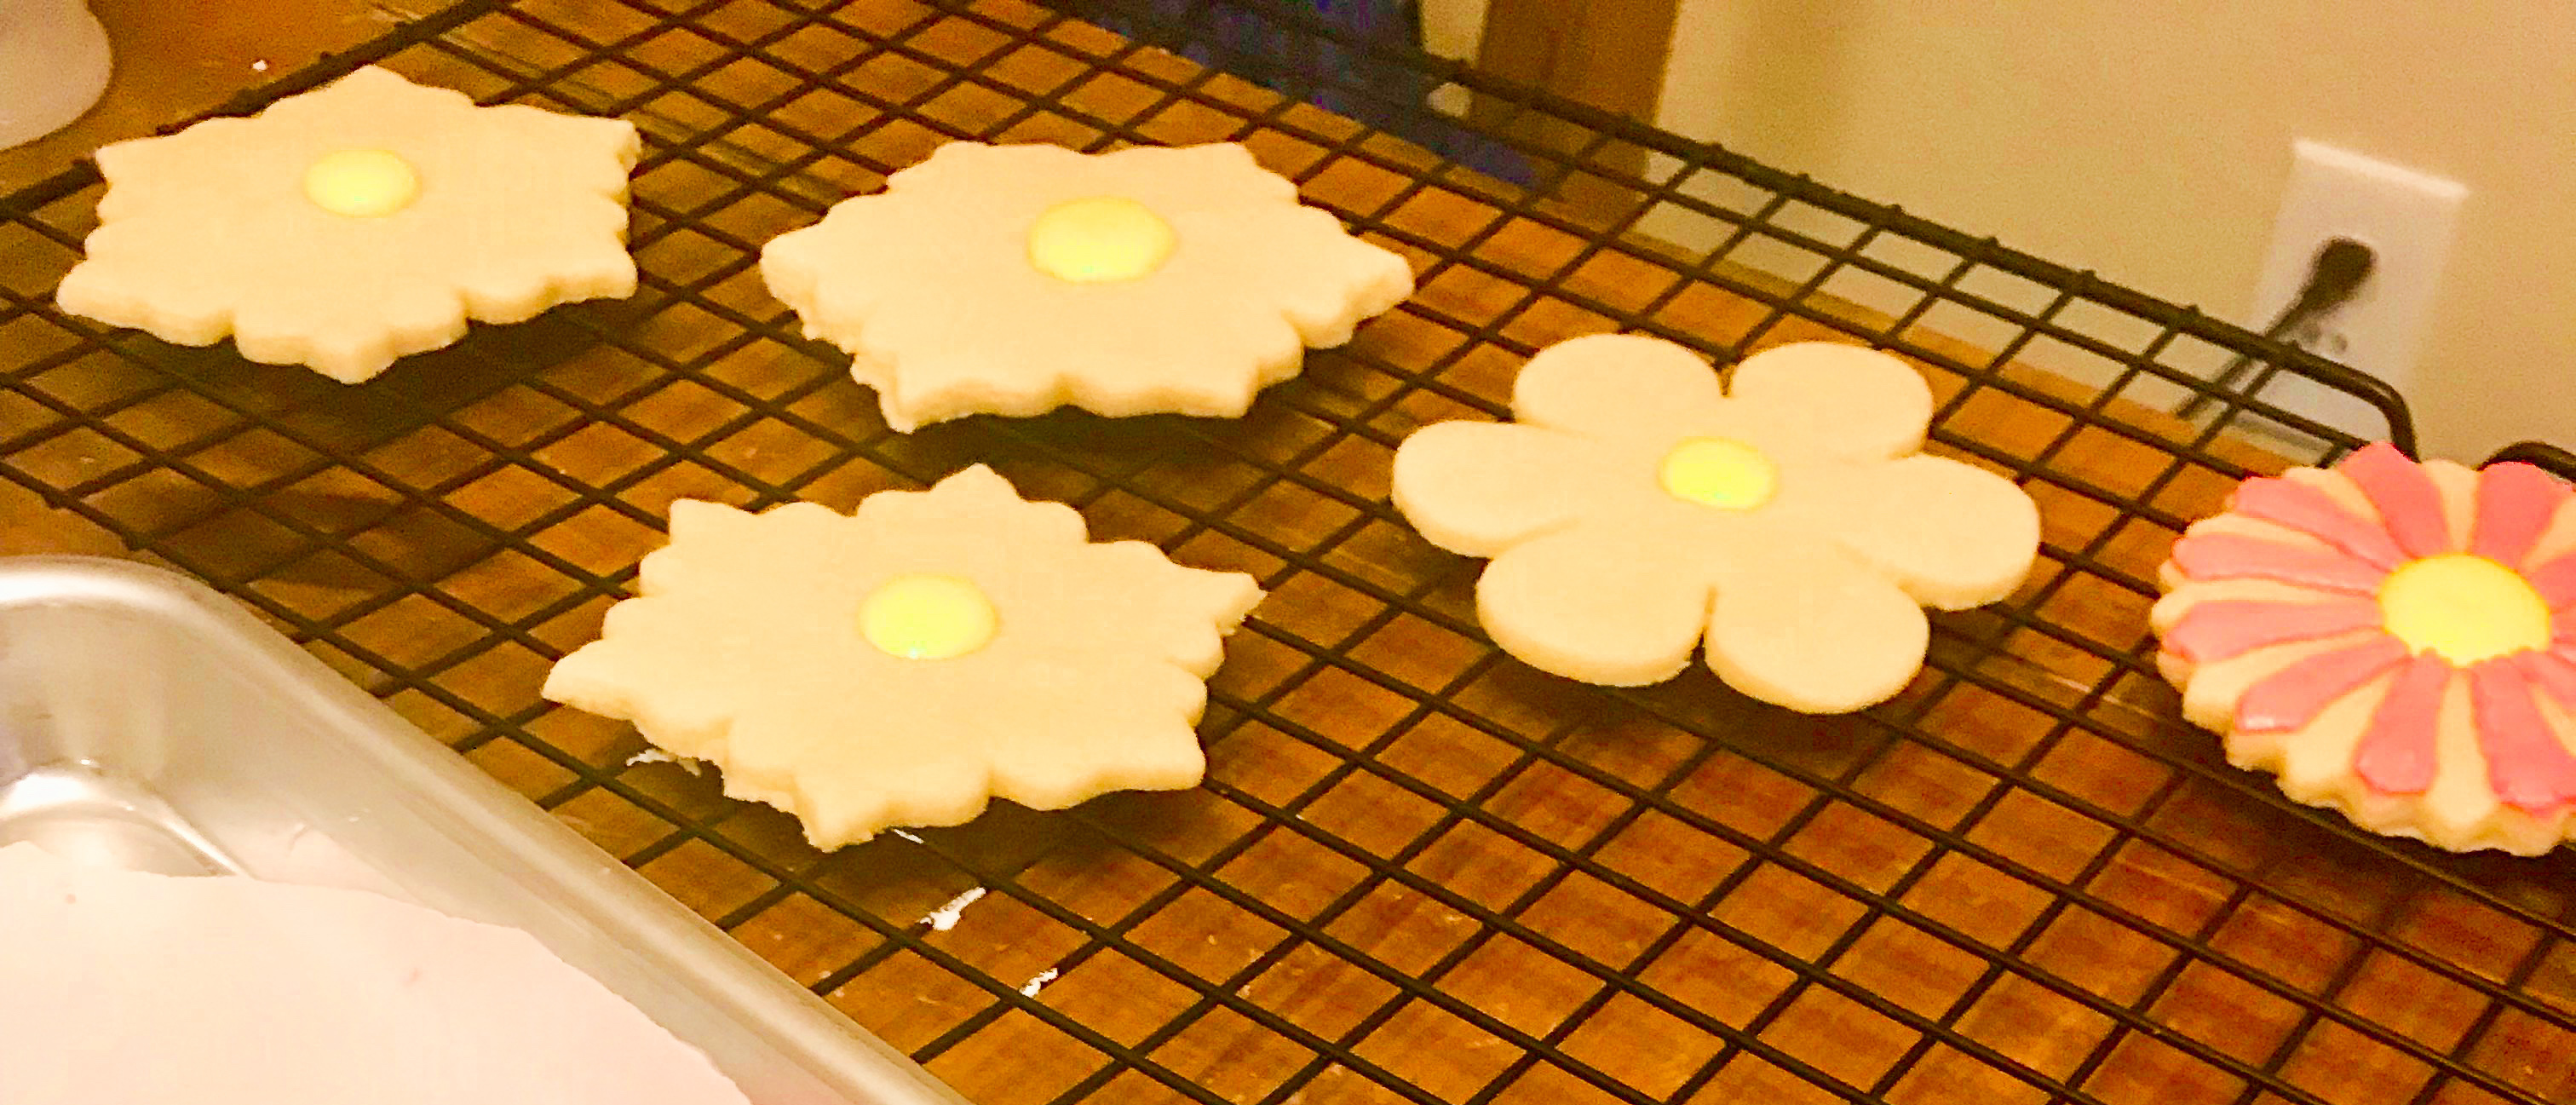
Now here is where the magic happens!
Outline every other petal with piping icing and then fill with flood icing.
Then move onto another cookie to let it harden a bit.
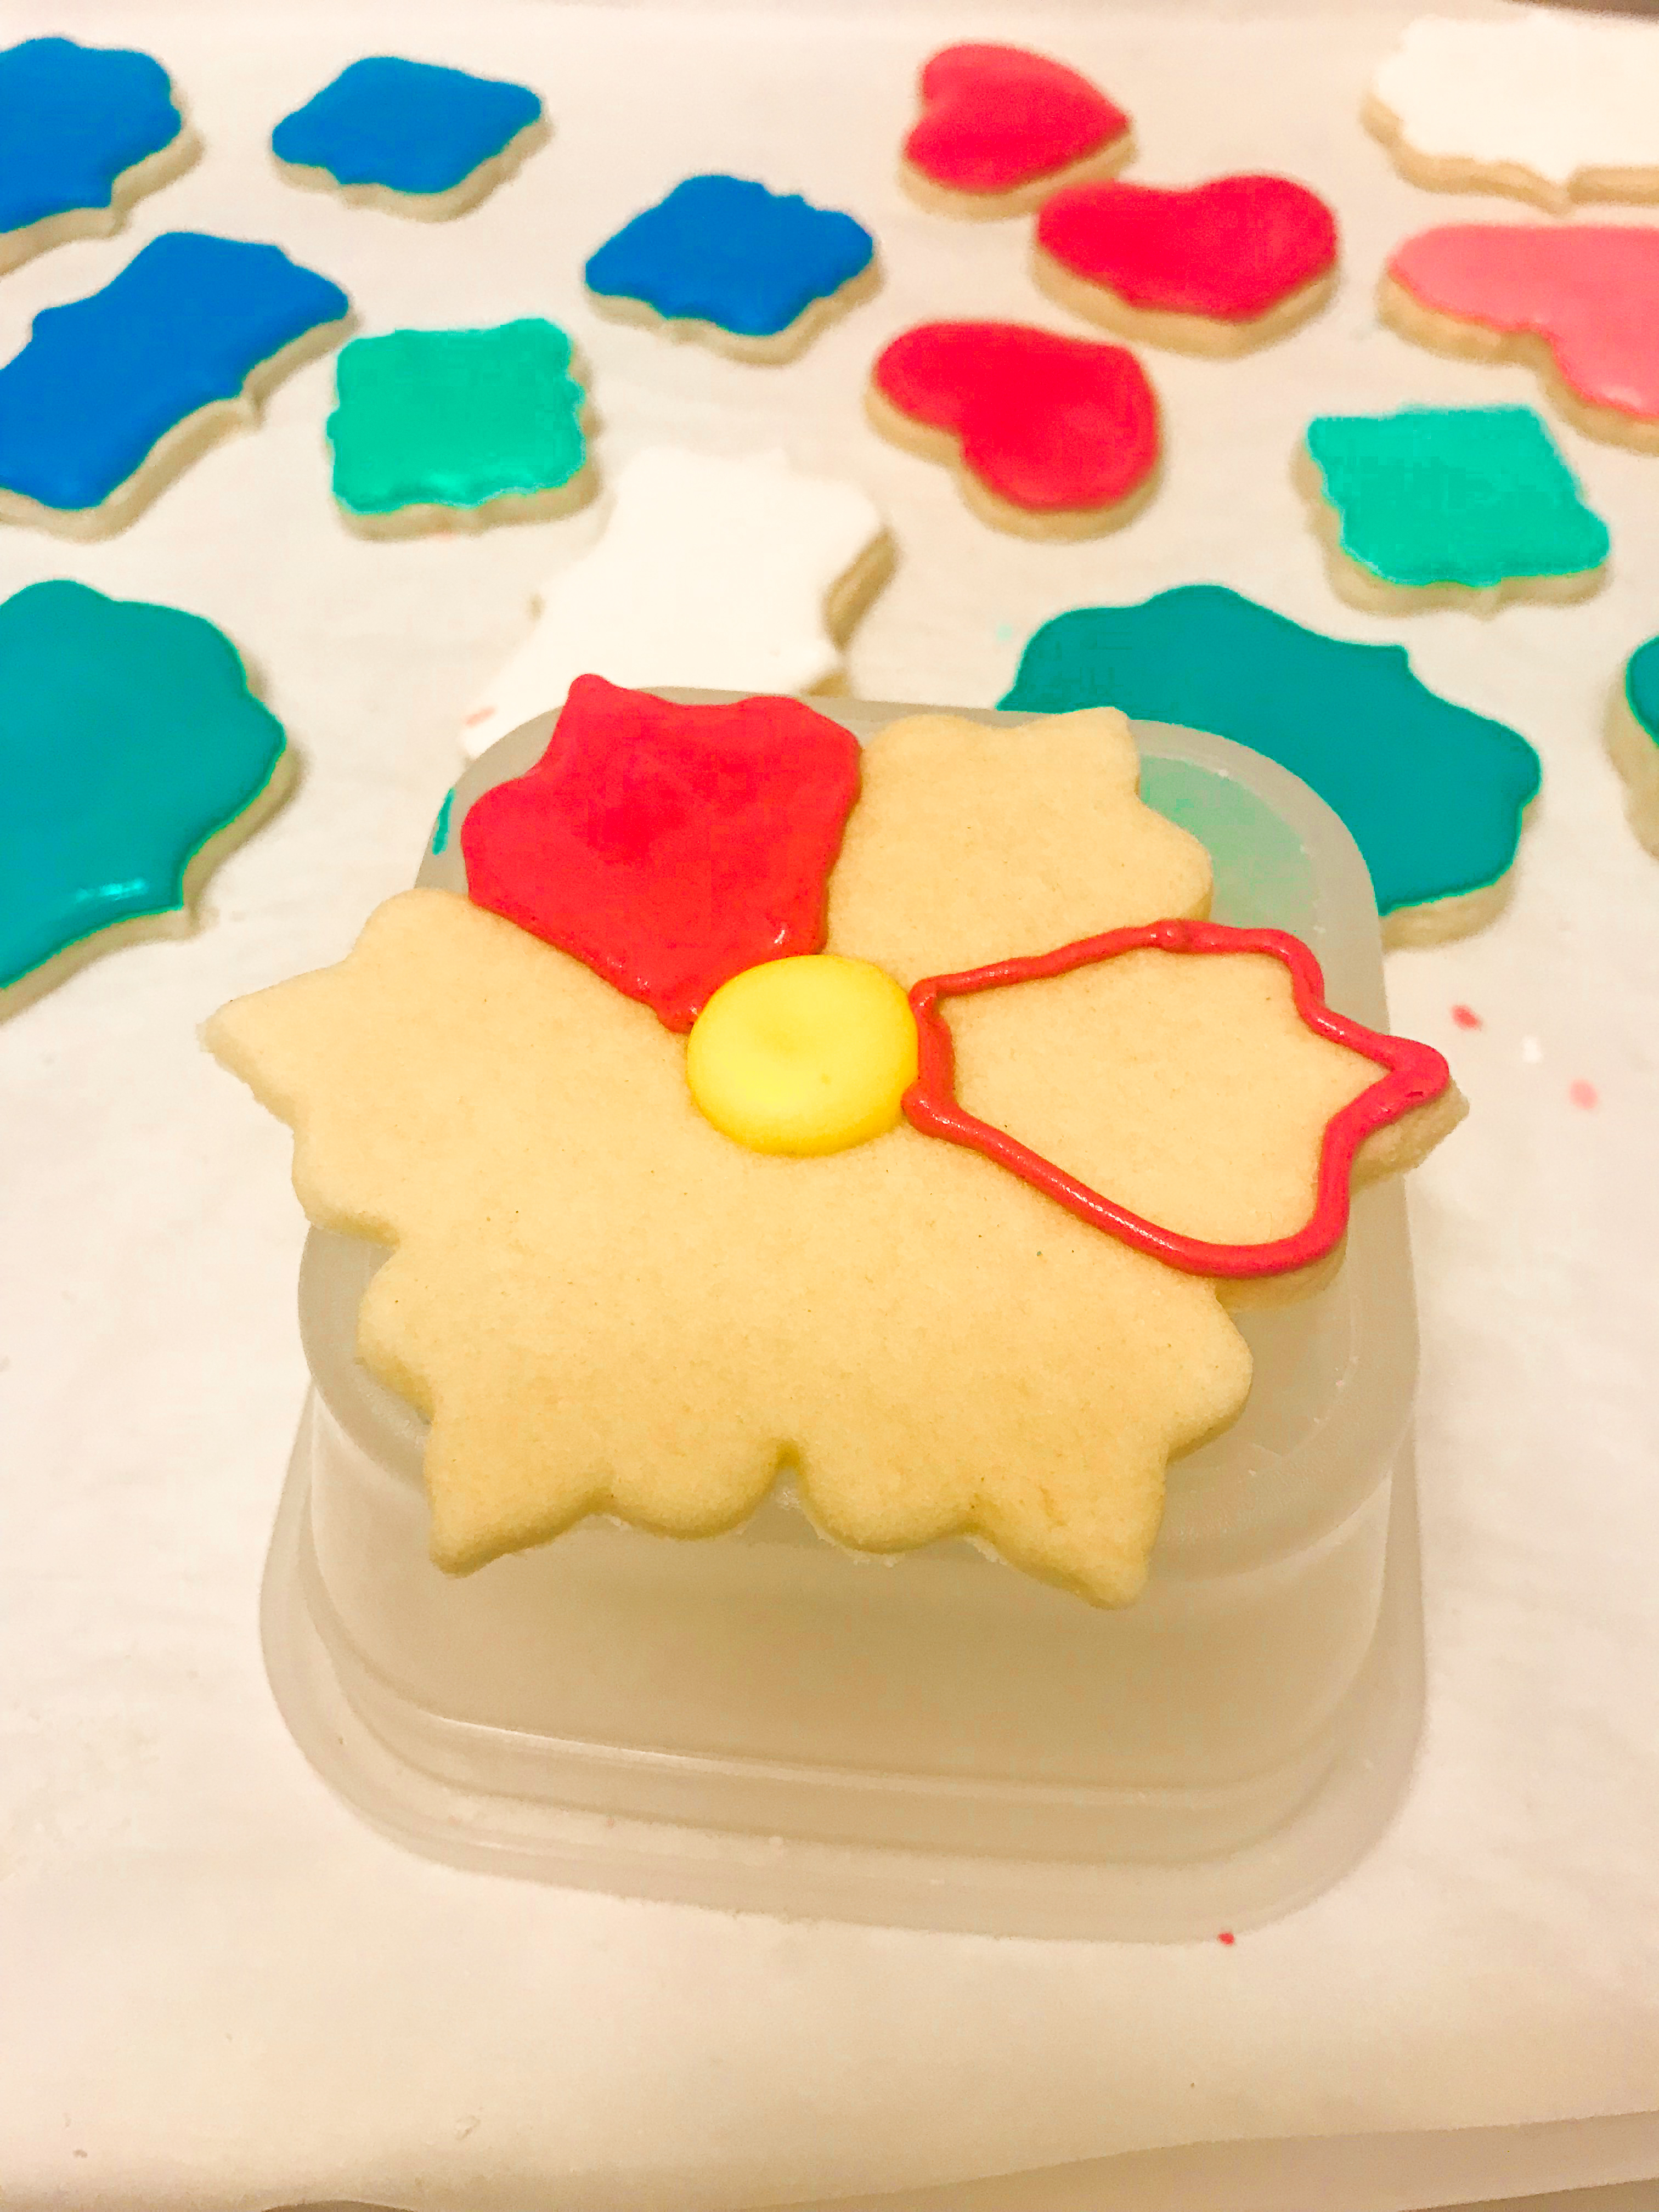
Once you have finished every other petal on all the cookies, go back to the first cookie and outline and fill the remaining petals.
Let harden (preferably overnight) and you are done!
You now have gorgeous flower cookies with identifiable petals that look like they were so much harder to make!
Related Posts